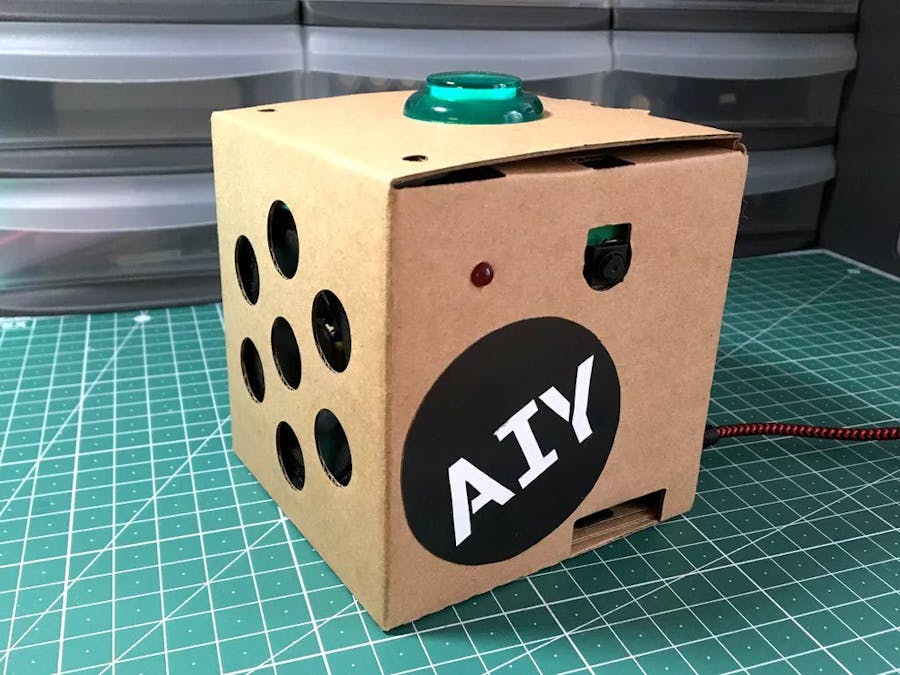
Adding Vision to the AIY Voice Kit (v1.0) by Google, significantly expands the kinds of AI projects you can do, as well as your own skill set. This doorbell prototype is just the beginning. Using many of the Voice Kit APIs (cloudspeech, tts, button, and LED control) plus a Raspberry Pi Camera, and Google Cloud Storage, this is an excellent starting point for a variety of machine learning projects. More specifically, here's what we'll build:
Here's the UX flow we're building:
- Push the button to ring the doorbell
- Take a photo and upload to the cloud
- Unlock the door and greet your visitor
Solder 2 jumper wires to GPIO26 and Ground as shown below.
Thread the Pi Camera ribbon cable through the Voice HAT so that the pins are facing away from the USB ports as shown below. Gently, lift both sides of the ribbon holder, insert the ribbon, and push the black plastic holder back down to hold the cable in place.
To improve the camera UX, we'll add an LED to let users know when the camera has been activated. Later, we'll also add a "click" .WAV file which affords audible feedback confirming that the photo has been taken.
Assembling the Voice Kit is easier if you set the pi atop the cardboard insert with the header pins closest to the speaker. Fold the flap over the USB ports - if it fits easily, the orientation is correct. Set the speaker in its holder.
Connect the longer leg of the LED to the GPIO PIN and the other to Ground. Gently push the connected LED into position as shown below. As you can see, the camera module also fits neatly between the two pieces of cardboard.
Last but not least, download the latest release of the Raspbian Image and copy it to your SD card ( I use Etcher for this task). Put the SD card back in the pi and connect your kit following the AIY Project Site directions.
Speaking of the AIY project site, please make the cloudspeech_demo.py is working before diving into the cloudspeech_doorbell.py script.
Google have excellent instruction on getting started with Google Cloud Services - so there's no need to repeat what they've done here. Assuming your AIY Voice Kit and the cloudspeech_demo.py script are working - we can go ahead and add the camera + LED to allow your kit to SEE as well as speak. Here we go!
Take a picture and review it via the command line
$ raspistill -rot 180 -o /home/pi/Pictures/testimg.jpg -w 640 -h 480
View the picture with the following command.
$ DISPLAY=:0 gpicview /home/Pictures/testimg.jpg
If the resulting image quality is sub-optimal, there are several things you can try. For example, turning off Auto White Balance (AWB), or increasing brightness levels can make a big difference. To learn all about the PiCamera, take a look at this: RaspiCam Reference.
Get the ScriptInside the /home/pi/AIY-projects-python/src/examples/voice/ directory, create a new directory called doorbell. Move to the doorbell directory (cd doorbell) and download the cloudspeech_doorbell.py script using wget like this:
wget https://raw.githubusercontent.com/LizMyers/AIY-projects/production/01_AIY_Smart_Doorbell/cloudspeech_doorbell.py
Login to your firebase console( https://console.firebase.com) and setup a new project called doorbell. Go to the storage tab and upload a photo manually. Once you have an image stored in Firebase, it's available to Google Cloud Services. While we're here, let's gather the keys needed to configure the doorbell script.
apiKey & authDomain
For the authDomain use: <YourProject ID>.firebaseapp.com as shown below.
databaseURL and serviceAccount
storageBucket
Open cloudspeech_doorbell.py with Nano or Mu Editor and edit the configuration settings as shown below (lines 61-65). More specifically, you need to replace the API key, authDomain, etc. with the keys gathered from the previous step.
Install Pyrebase - a great Firebase wrapper for Python
pip3 install pyrebase
./cloudspeech_doorbell.py
Note if you get a "permission denied" error, run the following command, and try again. (To learn more, get MagPi's FREE PDF: Conquer the Command Line.)
chmod +x smart_doorbell.py
Download the Google Cloud Console App (for Android,iOS). Navigate to the Cloud Storage bucket and Voila! - you should see the last image taken.
In this project, we've extended the AIY Voice Kit by adding Vision. We've also setup Firebase and installed the Pyrebase Wrapper for Python. Using Voice UI with Vision and Machine Learning is a very powerful combo. Using the Vision API, you can identify people, objects, landmarks, brands and more. This project marks just the beginning of what you can do with your new AIY super powers. As always, I look forward to seeing what you build!
Ideas for extending the project:
- Add push notifications to alert users that someone rang the bell
- Add face detection to announce visitors by name
- Add an intercom feature to speak with visitors


Comments
Please log in or sign up to comment.