


Hardware components | ||||||
 |
| × | 1 | |||
 |
| × | 1 | |||
| × | 1 | ||||
 |
| × | 1 | |||
| × | 1 | ||||
Software apps and online services | ||||||
 |
| |||||
| ||||||
| ||||||
When wireless is perfectly applied the whole earth will be converted into a huge brain, which in fact it is, all things being particles of a real and rhythmic whole...
-author Nicola Tesla 1926.
Internet-controlled electronic devices like Lamp, Ac, etc. We do simple LED control in this project.
Tap my phone On and just open my lamp controller app then press my Toggle Button to send a message from my device to cloud and back to my IoT connected devices to control it.
First, I highly recommend you to read these Azure IoT Hub Documentation.
1. Create a Azure IoT Hub and Add the DevicePlease refer to the document Get started with Azure IoT Hub for .NET to create an IoT Hub. The process is same. For adding the device, go to your Azure IoT Hub created:
Click on Device Explorer Tab on Left side:
- on Image 01 --> Click Add Device Tab
- on Image 02 --> Enter your Device Name
- on Image 03 --> Test Message Cloud 2 Device
- on Image 04 --> You can find the connection string in your Azure portal.
The key parameters needed are:
- Hostname,
- SharedAccessKeyName,
- SharedAccessKey
The connection string format is:
HostName=YOUR-HUB.azure-devices.net;SharedAccessKeyName=iothubowner;SharedAccessKey=YOUR-KEY
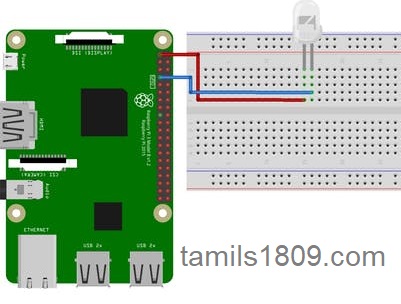
Required Items:
- 1 LED,
- 2 Jump Wires.
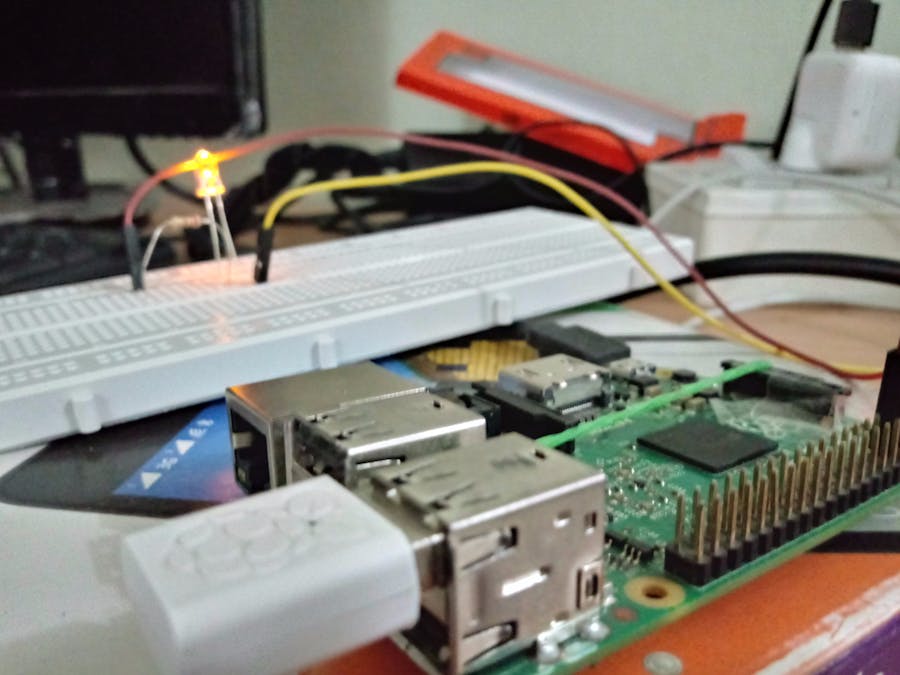
Connect the long leg of LED to DC3.3V, short leg to GPIO 04. Please be careful if your LED is not standard 3.3V, you will need to put a resistor to it.
After the connection:
We need 2 projects. One is for running on the Raspberry Pi, as a message receiver, seeking messages coming from Azure and switch the LED. Another is for running on your Windows 10 devices, as a controller to send message to Azure.
Raspberry Pi Project
If you are a beginner in Raspberry pi IoT developments read the articles from below link:
Build for IoT devices little bit difference:
- Add Iot reference to the project, right click on the project, add reference, universal windows, then click extensions.
- Select the Windows IoT Extensions for UWP, then click OK.
Before deploying to Raspberry Pi change the Build Configuration ARM. Now, run your application again. You should see the result from your Raspberry Pi Screen, or you can use Windows 10 IoT Remote Client App for Remote Monitor IoT devices.
Service Controller ProjectCreate a UWP project, e.g. Controller, it can be UWP, and add NuGet package "Microsoft.Azure.Devices". Add ToggleButton in MainPage for turn on and turn off the LED. You can find the XAML UI code in the attachment.
Logic Code.
MainPage.Xaml.cs Code:
using System.Threading.Tasks;
using Microsoft.Azure.Devices;

namespace BlinkControlUWP
{

   public sealed partial class MainPage : Page
   {

       const string connectionString = "HostName=<YOURHUBNAME.azure-devices.net>;SharedAccessKeyName=iothubowner;SharedAccessKey=<YOUR HUB KEY>";

       public MainPage()
       {
           this.InitializeComponent();
           AddDevices();
       }
       void AddDevices()
       {
           //Type your Devices Name instead
           RegistryManager manager = RegistryManager.CreateFromConnectionString(connectionString);
           manager.AddDeviceAsync(new Device("YOUR DEVICE NAME"));
       }
       private async Task TurnLight(bool isOn)
       {
           await SendCloudToDeviceMessageAsync(isOn);
       }
       private static async Task SendCloudToDeviceMessageAsync(bool isOn)
       {
           var serviceClient = ServiceClient.CreateFromConnectionString(connectionString, TransportType.Amqp);
                      var message = new Message(System.Text.Encoding.ASCII.GetBytes(isOn ? "on" : "off"));
           await serviceClient.SendAsync("YOUR DEVICE NAME", message);
       }
       private async void ToggleLedBtn_Checked(object sender, RoutedEventArgs e)
       {
           await TurnLight(true);
       }
       private async void ToggleLedBtn_Unchecked(object sender, RoutedEventArgs e)
       {
           await TurnLight(false);
       }
   }
}
The message send here is also type of string, consistent with the program on Raspberry Pi. The IoT Hub Connection string used here are exactly the same you used in the main page of Device Explorer.
4. Run The AppRun the both App on Startup. Because we got the controller and the client project, we need to start them together. In Visual Studio, right click on your solution, choose "property" and select multiple start up projects like this:
After starting the project. You will be able to control the light on your PC using the UWP application. And your Raspberry Pi will show the detail operation log on the screen.


_3u05Tpwasz.png?auto=compress%2Cformat&w=40&h=40&fit=fillmax&bg=fff&dpr=2)
Comments
Please log in or sign up to comment.