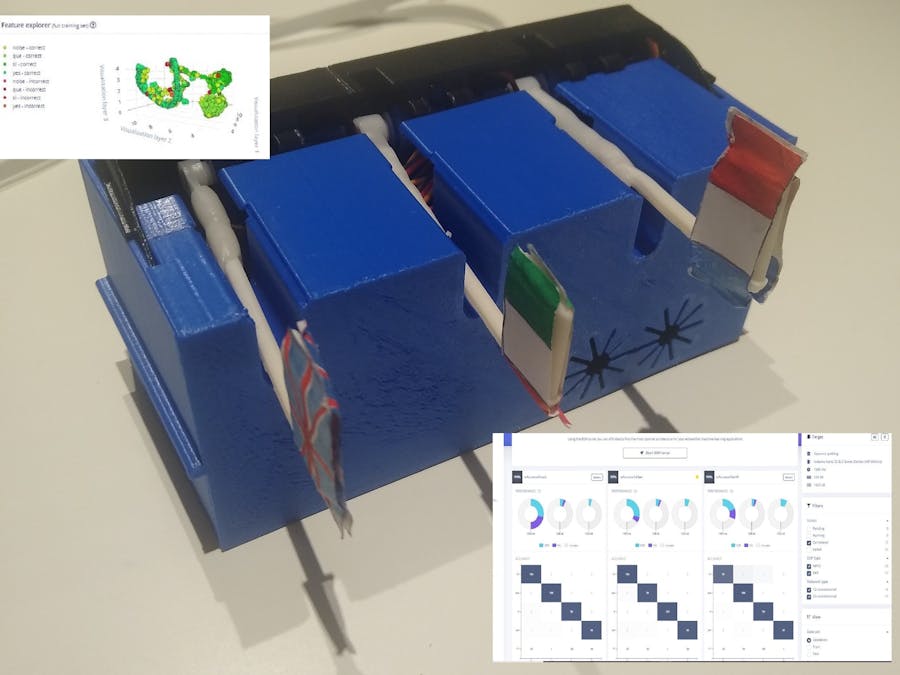
The idea behind this project is to create a language classificatory, using a neural networking/deep learning implemented in a microcontroller. The device will identify one word for the languages Italian, English and France. The words to be recognized are "si" for the Italian, "oui" for the French, and "yes" for the English. The device is listening continuously and once one of the 3 words is recognized it arise the flag of the associated language.
The project is based on the two main components the Arduino Nano 33 BLE Sense microcontroller and the Edge Impulse Studio developing platform.
The project implementation was following these steps:
- Sampling/creating the dataset
- Design the model
- Training the model
- Testing the model
- Customize for the hardware
- Deployment of the model and its customization
- Build the final device (the hardware around the model).
The dataset is composed of the recording of the 3 words (oui, si, yes) globally lasting about 30 minutes (10 minutes for each word).
For each word was created a continuous sound file, where the same word was repeating continuously, then using the Audacity application the file was splitted into multi files each of one of the duration of one second. Each file contain an example of the word.
These files were then uploaded to edge impulse and labelled according to the word.
In addition to these files another set of recording files of the duration of 1 second was uploaded and labelled as background noise.
Globally the Training data was composed of 33 minutes (10 minutes for each word and the 3 minutes for the background noise)
Design the modelThe model was implemented by taking advantage of the the edge impulse platform, where most of the needed algorithms where already defined an dimplemenated.
The first step for creating the model is to transform the sound into a time series. Then the time series is partitioned with a predefined time window size.
(This first transformation is shown on the red side of the picture below).
The second step is using signal processing technique, in this case the MFCC (Mel Frequency Cepstral Coefficients), to extract the features from the time series that best characterises each of the 4 classes (3 words + the background).
Below an example of the MFCC transformation and its coefficients.
The convolution of the time series and the coefficients is used to feed a neural networks. Finally, the output of the neural networks provide a probability of belonging for each class.
Below an overview of the neural network implementation and its classification performances.
For the training and for the final model customization, a new option is available on the Edge Impulse Studio called "EON Tuner". It allows to choose the optimal architecture for an embedded machine-learning application.
It runs many instances of possible models in parallel, each instance with different configuration (different signal digital technique and different neural networks architectures).
This option require just a couple of information to run:
- The "Target" which represents the model type (in this case "Keyword Spotting")
- The hardware where the application runs (in this case "Arduino Nano 33 BLE Sense (Cortex-M4F 64MHz)".
For each instance it gives the few classification performances metrics, the time it takes for the computation, the amount of ram, and file system space used on the microcontroller file system.
For this project we selected the 5 best instances for the classification accuracy and from them it was choose the fastest one.
TestingThe testing was performed by collecting a new set of recorder files and check the quality of the classification.
Once it was verify that the classification was accurate. We moved to the next step of the implementation, the final deployment.
DeploymentThe deployment thanks to the edge-impulse studio was quite straightforward.
It was selected the Arduino library option from the deploy options. That gives a standard arduino C file of the model, that can be customized for our needs.
Once the building is concluded by the edge-impulse, a zip file is created and downloaded on the local machine, and it just needs to be imported in the Arduino Ide for the final customization.
CodeThe code is available at the link. The code is based on the code downloaded from the edge-impulse with few customizations, listed below.
1. It was add the library Adafruit_PWMServoDriver.h for driving the servos attached to the flags.
2. It was defined the function servos_selector to coordinate the servos according to the classification results.
void servos_selector(int iter){
time_now = millis();
delta=time_now - time_was;
if (delta > 2000){
time_was=time_now;
switch (iter) {
case 0:
pwm.setPWM(0, 0, 350);
delay(500);
pwm.setPWM(0, 0, 200);
pwm.setPWM(1, 0, 200);
pwm.setPWM(2, 0, 200);
break;
case 1:
pwm.setPWM(1, 0, 350);
Serial.println("2222");
delay(500);
pwm.setPWM(0, 0, 200);
pwm.setPWM(1, 0, 200);
pwm.setPWM(2, 0, 200);
break;
case 2:
pwm.setPWM(2, 0, 350);
Serial.println("333");
delay(500);
pwm.setPWM(0, 0, 200);
pwm.setPWM(1, 0, 200);
pwm.setPWM(2, 0, 200);
break;
}
}
}
3. Finally, it was added an IF condition that invocate the servos_select function based on the "result.classification" object.
for (size_t ix = 0; ix < EI_CLASSIFIER_LABEL_COUNT; ix++) {
ei_printf("    %s: %.5f\n", result.classification[ix].label,
result.classification[ix].value);
}

#if EI_CLASSIFIER_HAS_ANOMALY == 1
ei_printf("    anomaly score: %.3f\n", result.anomaly);
#endif
print_results = 0;
}
if (result.classification[1].value > 0.80){
servos_selector(0);
}
else if (result.classification[2].value > 0.80){
servos_selector(1);
}
else if (result.classification[3].value > 0.80){
servos_selector(2);
}
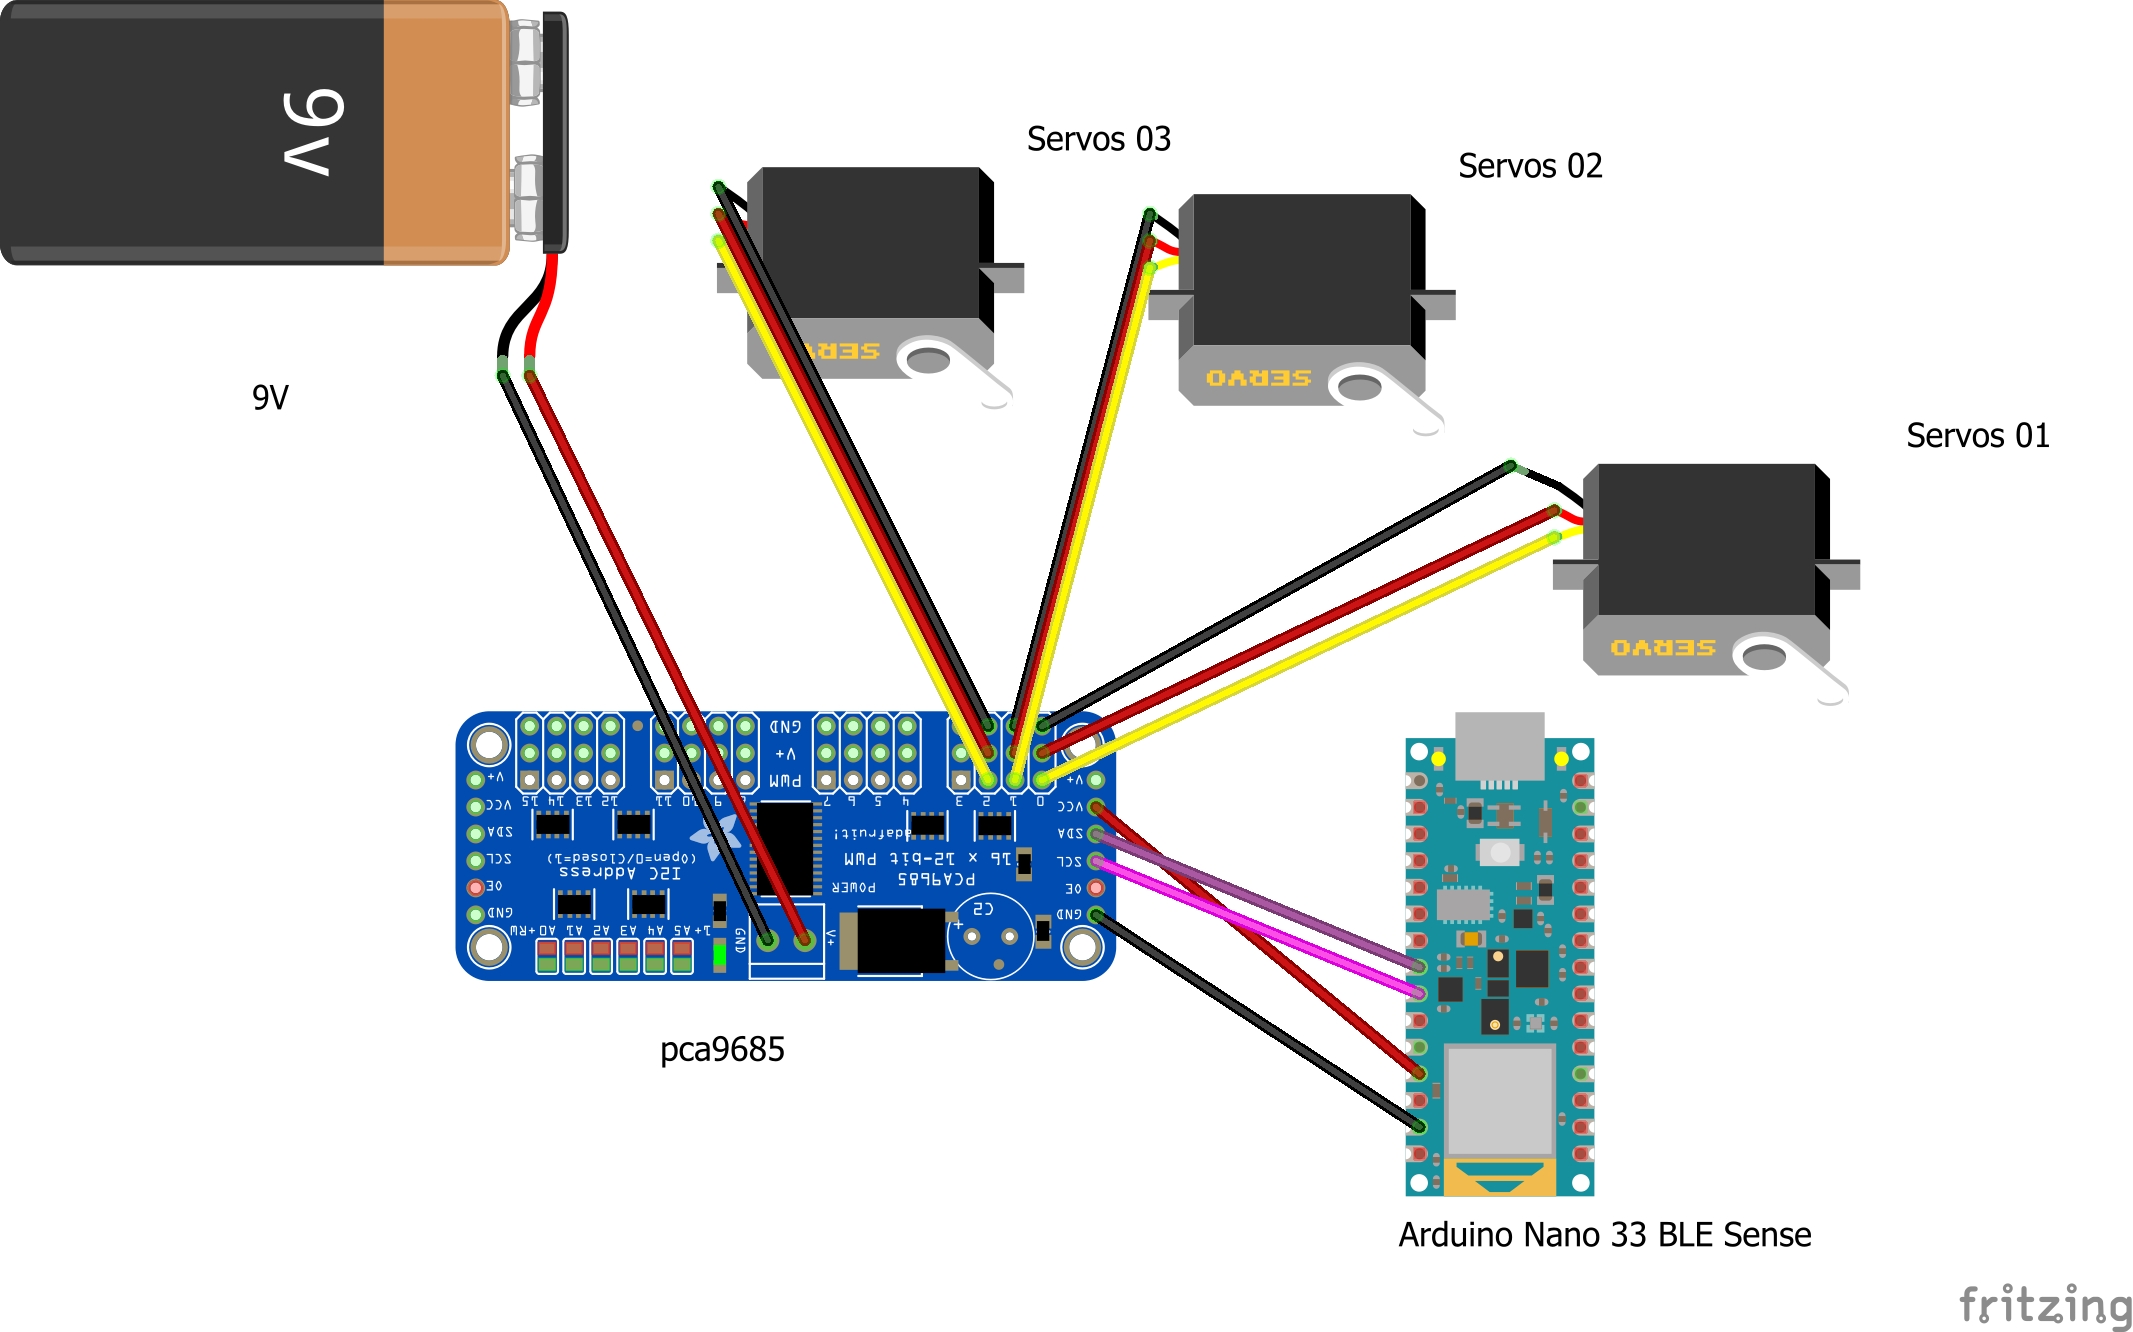
}The electric circuit is based on the microcontroller Arduino Nano 33 BLE Sense microcontroller and its using a PCA9685 to drivers the 3 servos.
The PCA9685 workload is supported by an external battery of 9v.
That is all.


Comments