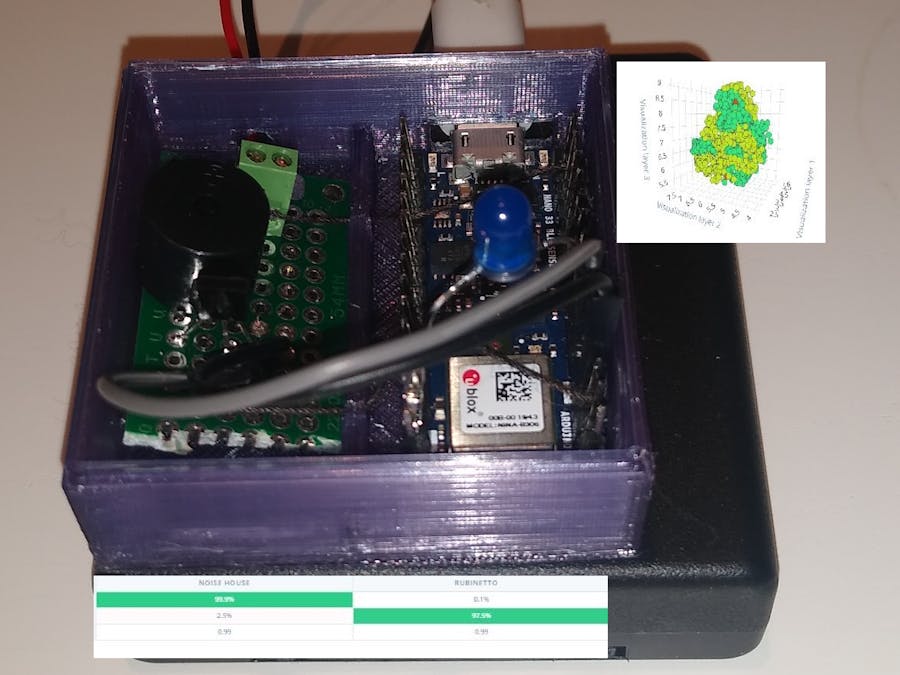
The idea behind this project is to create a sound classificator, based on neural networking/deep learning, and since my son keeps on forgetting to wash his hand for 20 seconds, I thought to associate the classificatory with a 20 seconds timer with sound.
The device is listening continuously for any sound, and once a running tape is identified a timer is triggered to produce 20 seconds buzzing sound and a flashing LED.
The project is based on the two components an Arduino Nano 33 BLE Sense and the Edge Impulse Studio as developing platform.
The project implementation has the following steps:
- Sampling
- Design the model
- Training the model
- Testing the model
- Deployment of the model and its customization
- Build the final device (the hardware around the model).
In case you need further details or clone and extend, I made the project public
https://studio.edgeimpulse.com/public/5682/latest
Sampling
The sampling has been performed with a mobile phone connected to the studio edge-impulse studio.
For the sampling two types of sounds has been collected:
1. The tap running water (the trigged sound)
2. Generic sound of the house (as generic noise)
Once the sampling was completed we had little more of 20 minutes of sampling data.
Once the sampling was concluded, the focus switches to the model design.
Design the modelA neural network cannot process the sounds directly. The raw sound needs to be processed.
The Edge Impulse studio, at this stage was very handy, in fact, it allows to implement directly the pipeline for the sound processing.
The pipeline model consists of four steps:
1. The sound is saved as a time series and sliced it up in smaller temporal windows; (Time series data)
During the test, it was identified that the minimum length for having a reliable classificator was 1000ms, reducing the time windows dropped dramatically the accuracy.
2. Extract thefeatures from the time series, with Signal Processing Techniques. In this project the MFCC (Mel Frequency Cepstral Coefficients) was used.
3. The features are used as input for the neural network. I tried different network architectures but I end up using the one below.
4. The output of the neural network defines the classification and a rating of confidence.
If the rating of confidence is equal or more than the predefined level (in the current project was set 0.60).
TrainingThe next steps was the training of the model using the samples collected earlier. For the training have been performed for 100 cycles. The result were extremely good they have a precision of 99%.
The model needed to be tested, I decided to test with new live data, from different water sound source and different back ground sounds.
For the testing, new samples were taken using different scenarios, and the result was quite good, and the model was therefore considered valid and ready to be implemented.
The deployment using edg-eimpulse studio is quite straightforward.
I selected the Arduino library option. Since It was needed to customize the code to launch the trigger when the water sound was identified.
Once the building is concluded by the edge-impulse, a zip file is created and downloaded, and it needs to be imported in the Arduino ide to be customized.
CodeThe code is available at this link. The code is based on the code downloaded from the edge-impulse. The main customization was to add to after the result where shown an "if" statement that in case of a positive result of the classification trigged the timer.
Below, the section that show to customization, where the "result.classification" object is printed on the serial port and its values are used to for the if statement.
ei_printf("Predictions ");
ei_printf("(DSP: %d ms., Classification: %d ms., Anomaly: %d ms.)",
result.timing.dsp, result.timing.classification, result.timing.anomaly);
ei_printf(": \n");
for (size_t ix = 0; ix < EI_CLASSIFIER_LABEL_COUNT; ix++) {
Enzo_Str = ix;
Enzo_val = result.classification[ix].value;
ei_printf("    %s: %.5f\n", result.classification[ix].label , Enzo_val);
Serial.println("----------------");
Serial.println(Enzo_Str);
Serial.println(Enzo_val);
if((Enzo_Str==1) && (Enzo_val > level)) {
digitalWrite(LED_BUILTIN, HIGH);   // turn the internal LED on (HIGH is the voltage level)
digitalWrite(led, HIGH);   // turn the LED on external LED (HIGH is the voltage level)
routine_sound();
}
else {
digitalWrite(LED_BUILTIN, LOW);
digitalWrite(led, LOW);
}
Serial.println("----------------");
}
A couple of functions were implemented to be launched when the model was able to identify the water sound. And they are available from the previous link.
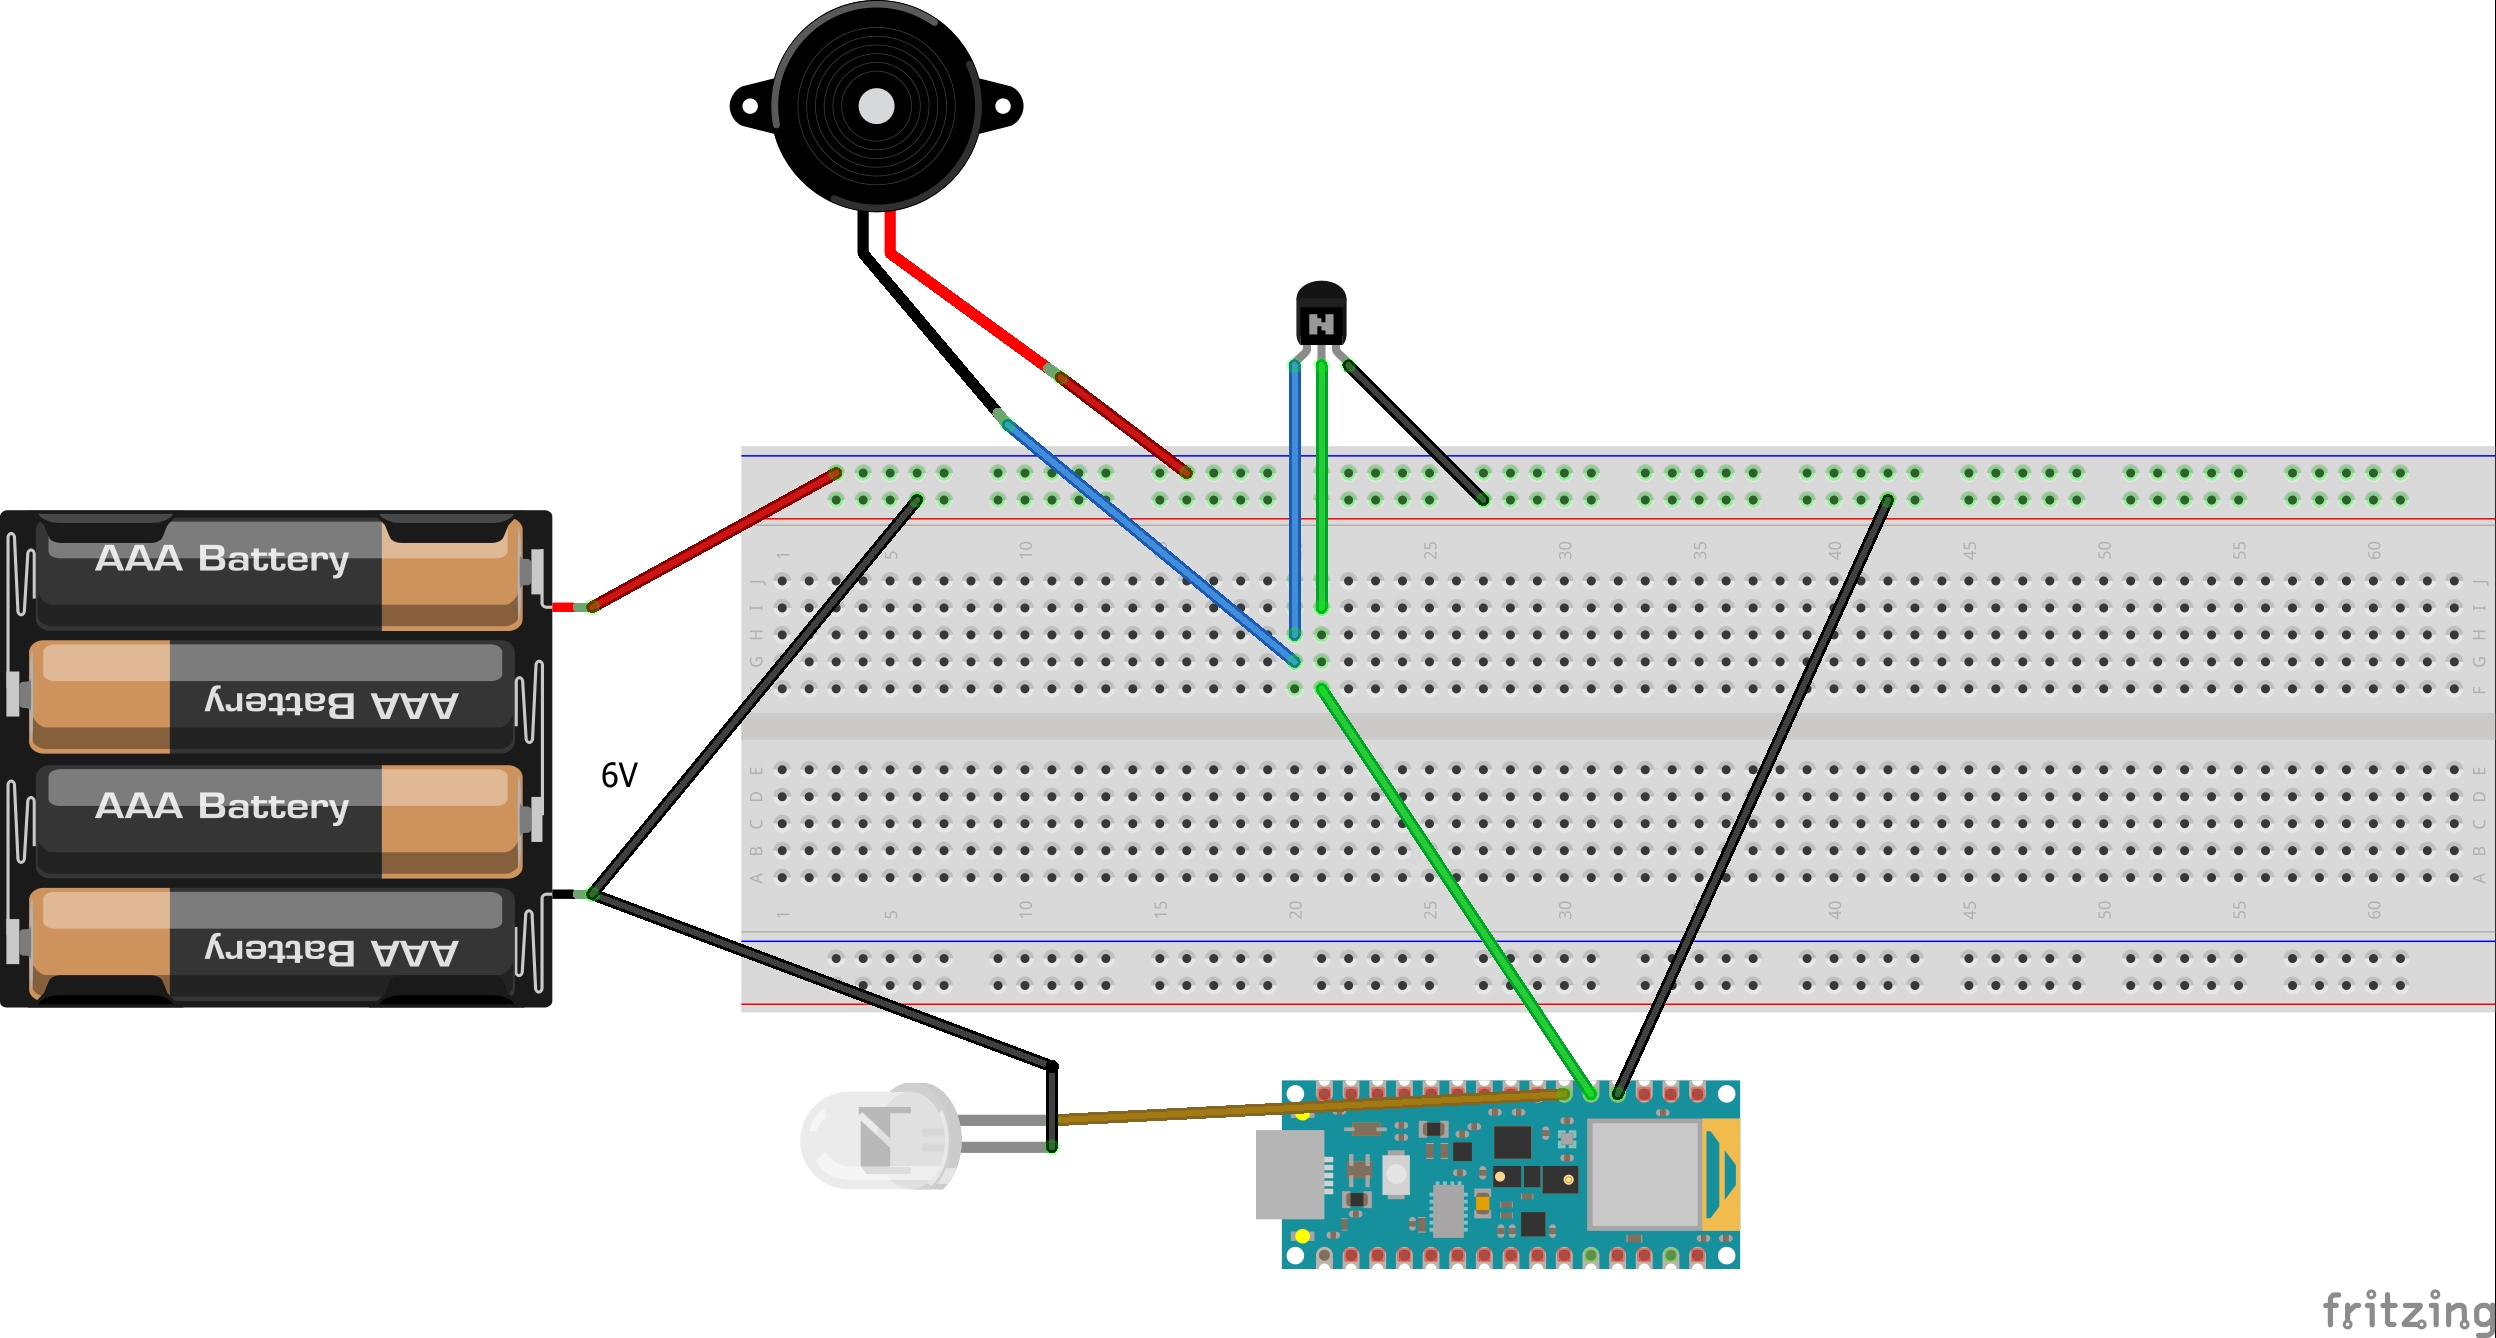
Electric CircuitsThe circuit used was quite straightforward, it is using a buzzer (and a transistor used for the signal amplification) and an LED to allow to see in addition to hear when the the timer is activate.
To provide some protection to the microcontroller and its components an enclosure was designed and 3D printed.
For it to be more compact, the battery holder was glued to the enclosure...
e finally the LED was added to make it visible in the dark.


_t9PF3orMPd.png?auto=compress%2Cformat&w=40&h=40&fit=fillmax&bg=fff&dpr=2)

Comments
Please log in or sign up to comment.