People with hearing problems always have to struggle with a world that does not adapt to their necessities. Audition problems can be very incapacitating for people who enjoy living alone, as households nowadays do not provide with the necessary instruments to give them complete autonomy in their lives.
In order to allow them to feel safer, we have developed a machine learning device capable of detecting different housing sounds and informing the user.
Main GoalThe primary goal of this team was to create an IoT product that would simplify a daily problem. To achieve it, we had to make use of machine learning. Therefore, we needed to face three main tasks:
- Creating a Machine Learning Model using Edge Impulse.
- Creating a mobile phone app using MIT App Inventor.
- Implementing Arduino's bluetooth connection to connect both.
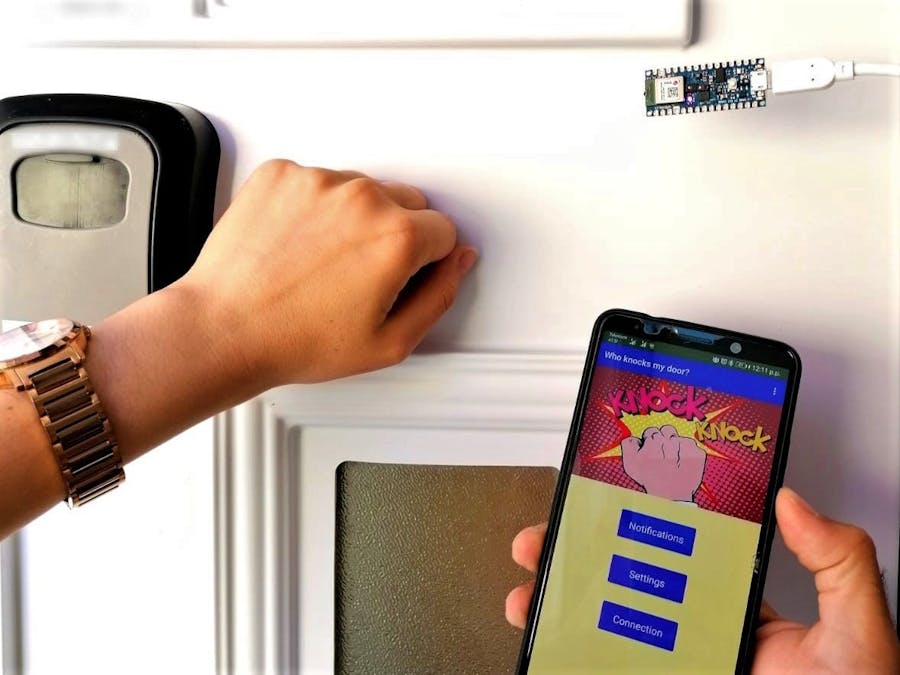
This project uses an Arduirno BLE paired with an Android device, that allows the detection of different sounds so it can differentiate between knocking sounds or doorbells, and other noises. When somebody knocks the door, a mobile app will inform the user so that they are aware of the situation and can respond accordingly.
The functioning of this mechanism is quite simple. First, the machine learning model, inside an Arduino Nano 33 BLE Sense, grants the recognition of different sounds. Then, it feeds the data to a user terminal via Bluetooth. This is connected to an Android application so that received information can be accesible.
Machine Learning ModelThe first step of this project was to collect different kind of data using Edge Impulse. This was done by usind the Arduino to gather diferent sounds and background noises. The gathered data could then be fed to a machine learning algorithm.
The idea was to collect audio samples from the knocking door and the doorbell, but it was important to have some additional sounds too. The reason behind this is the need for distinguishing between useful and non useful sounds in the final model. Thus, sounds from conversations, television and some 'house silence' minutes were reccorded and afterwards included to the data from the model.
The next step was to train and test the model. This was quite simple with the help of Edge Impulse. All we had to do was to choose the appropriate processing and, after that, the learning block which would be ideal for our purpose. Then, the results appeared in the screen and the prediction accuracy reached a value of around 90%. Every important detail about the trained model and its testing performance can be seen on the images below.
After building the model, the final step was to download the library, which included the complete and trained model. Then, we had to import it to the Arduino IDE in order to be able to test it using the Arduino Nano 33 BLE Sense. Finally, we had to verify that the model was capable of recording data and giving some feedback.
Arduino FirmwareThe coding part was done in the Arduino IDE, with an imported file directly from Edge Impulse. In order to make the Arduino detect the sounds from its environment, we had to include the necessary library built during the model training, as well as some other important libraries.
After all these being done, the following steps were simpler. Some programming lines were added in specific areas of the given code. This was done to implement BLE connectivity to our device and then send information to the Android application which was later designed.
The code offers two basic functions: the setup() and the loop(). In the first one, we can find the code needed for the connectivity while, in the second one, we mention the things that our device is doing every time it detects an important sound.
You can find some parts of the code below:
In this part of the code, we ask the device to turn on some lights repeatedly, for three times, each time it detects a knocking door or doorbell sound. The light turns blue for the knocking door, and green for the doorbell.
The android application that we designed was meant to include some specific characteristics. It was designed with the purpose of being accesible and useful for everyone. Therefore, we only used three buttons on the homepage that illustrate simple and basic tasks. The first one, 'Connection', is for pairing the application with the arduino device used for scanning, finding and connecting the phone. The second one, 'Notifications', the most important one, is intended for allowing access to the notifications received during the day. The last one, 'Settings', is just a button which can get you to the app settings, where you can find help in case you need it.
These are the main pages of the adroid app:


Comments
Please log in or sign up to comment.