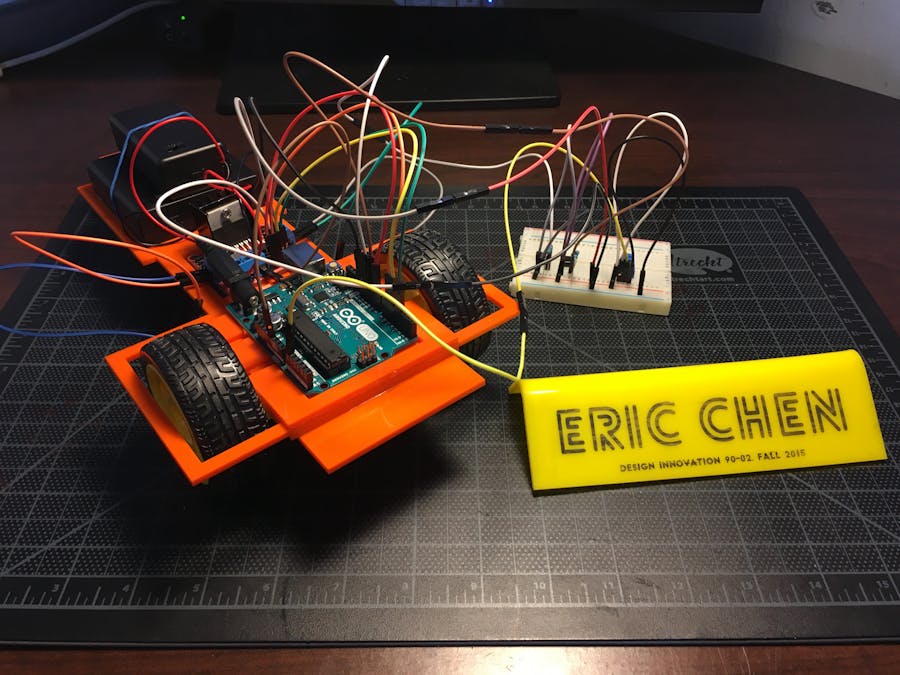
A finished rolling chassis, working steering, working motors. Treat this as a final design, but without the polish of final presentation.
This homework was to continue on with our prototype chassis from the last assignment and make a working version, with full steering and motion.
Process
Out of the models from last week, I choose Model #1, since I felt it the most fleshed out of the three models I had. Once that was decided, I went forward with planning out the finer details of the project.
The parts I had to work out were the caster wheel, the body, and the controller.
The caster wheel would have to be at most as tall as the height of the wheels I've chosen to drive the vehicle, such that either the body of the vehicle was even or at a downward tilt. This would prevent the car from tipping over (though in hindsight, the idea that my vehicle would tip over from a loss of balance would be laughable, given what I ended up stacking on the tail). I took the design of the driving wheel I had for Model #3 in the last assignment for the caster wheel, and it worked well. I also had the idea of using cable ties to perhaps give the wheel more traction, but in practice it was hard to get the cable ties flat. I also didn't consider where the clip part would go, so in the end, the idea didn't work. Unfortunately, the epoxy I used to keep the caster wheel on the chassis may have made the caster wheel less "swingable" as I would like it to have been, such that without manual manipulation, in practice the caster wheel will remain stationary in direction.
The body was perhaps the most problematic part of this entire assignment. I wanted to use cable ties to keep the motors on the body, and after I had made the first prototype of the body, I realized that the cable ties I wanted to use were too short to close. Thus I had to make another one, only to find that the cable ties were too strong, ripping and cracking apart the body near the holes I made for the cable ties. I tried rubber bands, but they wouldn't keep the motors in place. In the end, I decided I was spending too much time trying to figure out how to attach these motors, so I just used epoxy to glue the motors on.
Another part of the body I hadn't fleshed out as much was how the rest of the components, the shield and the battery pack, would be placed. I had a defined placed for the Arduino, such that the design was built around the Arduino, but things like how the wiring would obstruct motion, the weight of the battery pack, or the length of the male connector for the battery pack to the Arduino weren't factored in. To address the weight, I used a spare body cutout to help strengthen it. I guess I was lucky everything else more or less fit as I hoped they would.
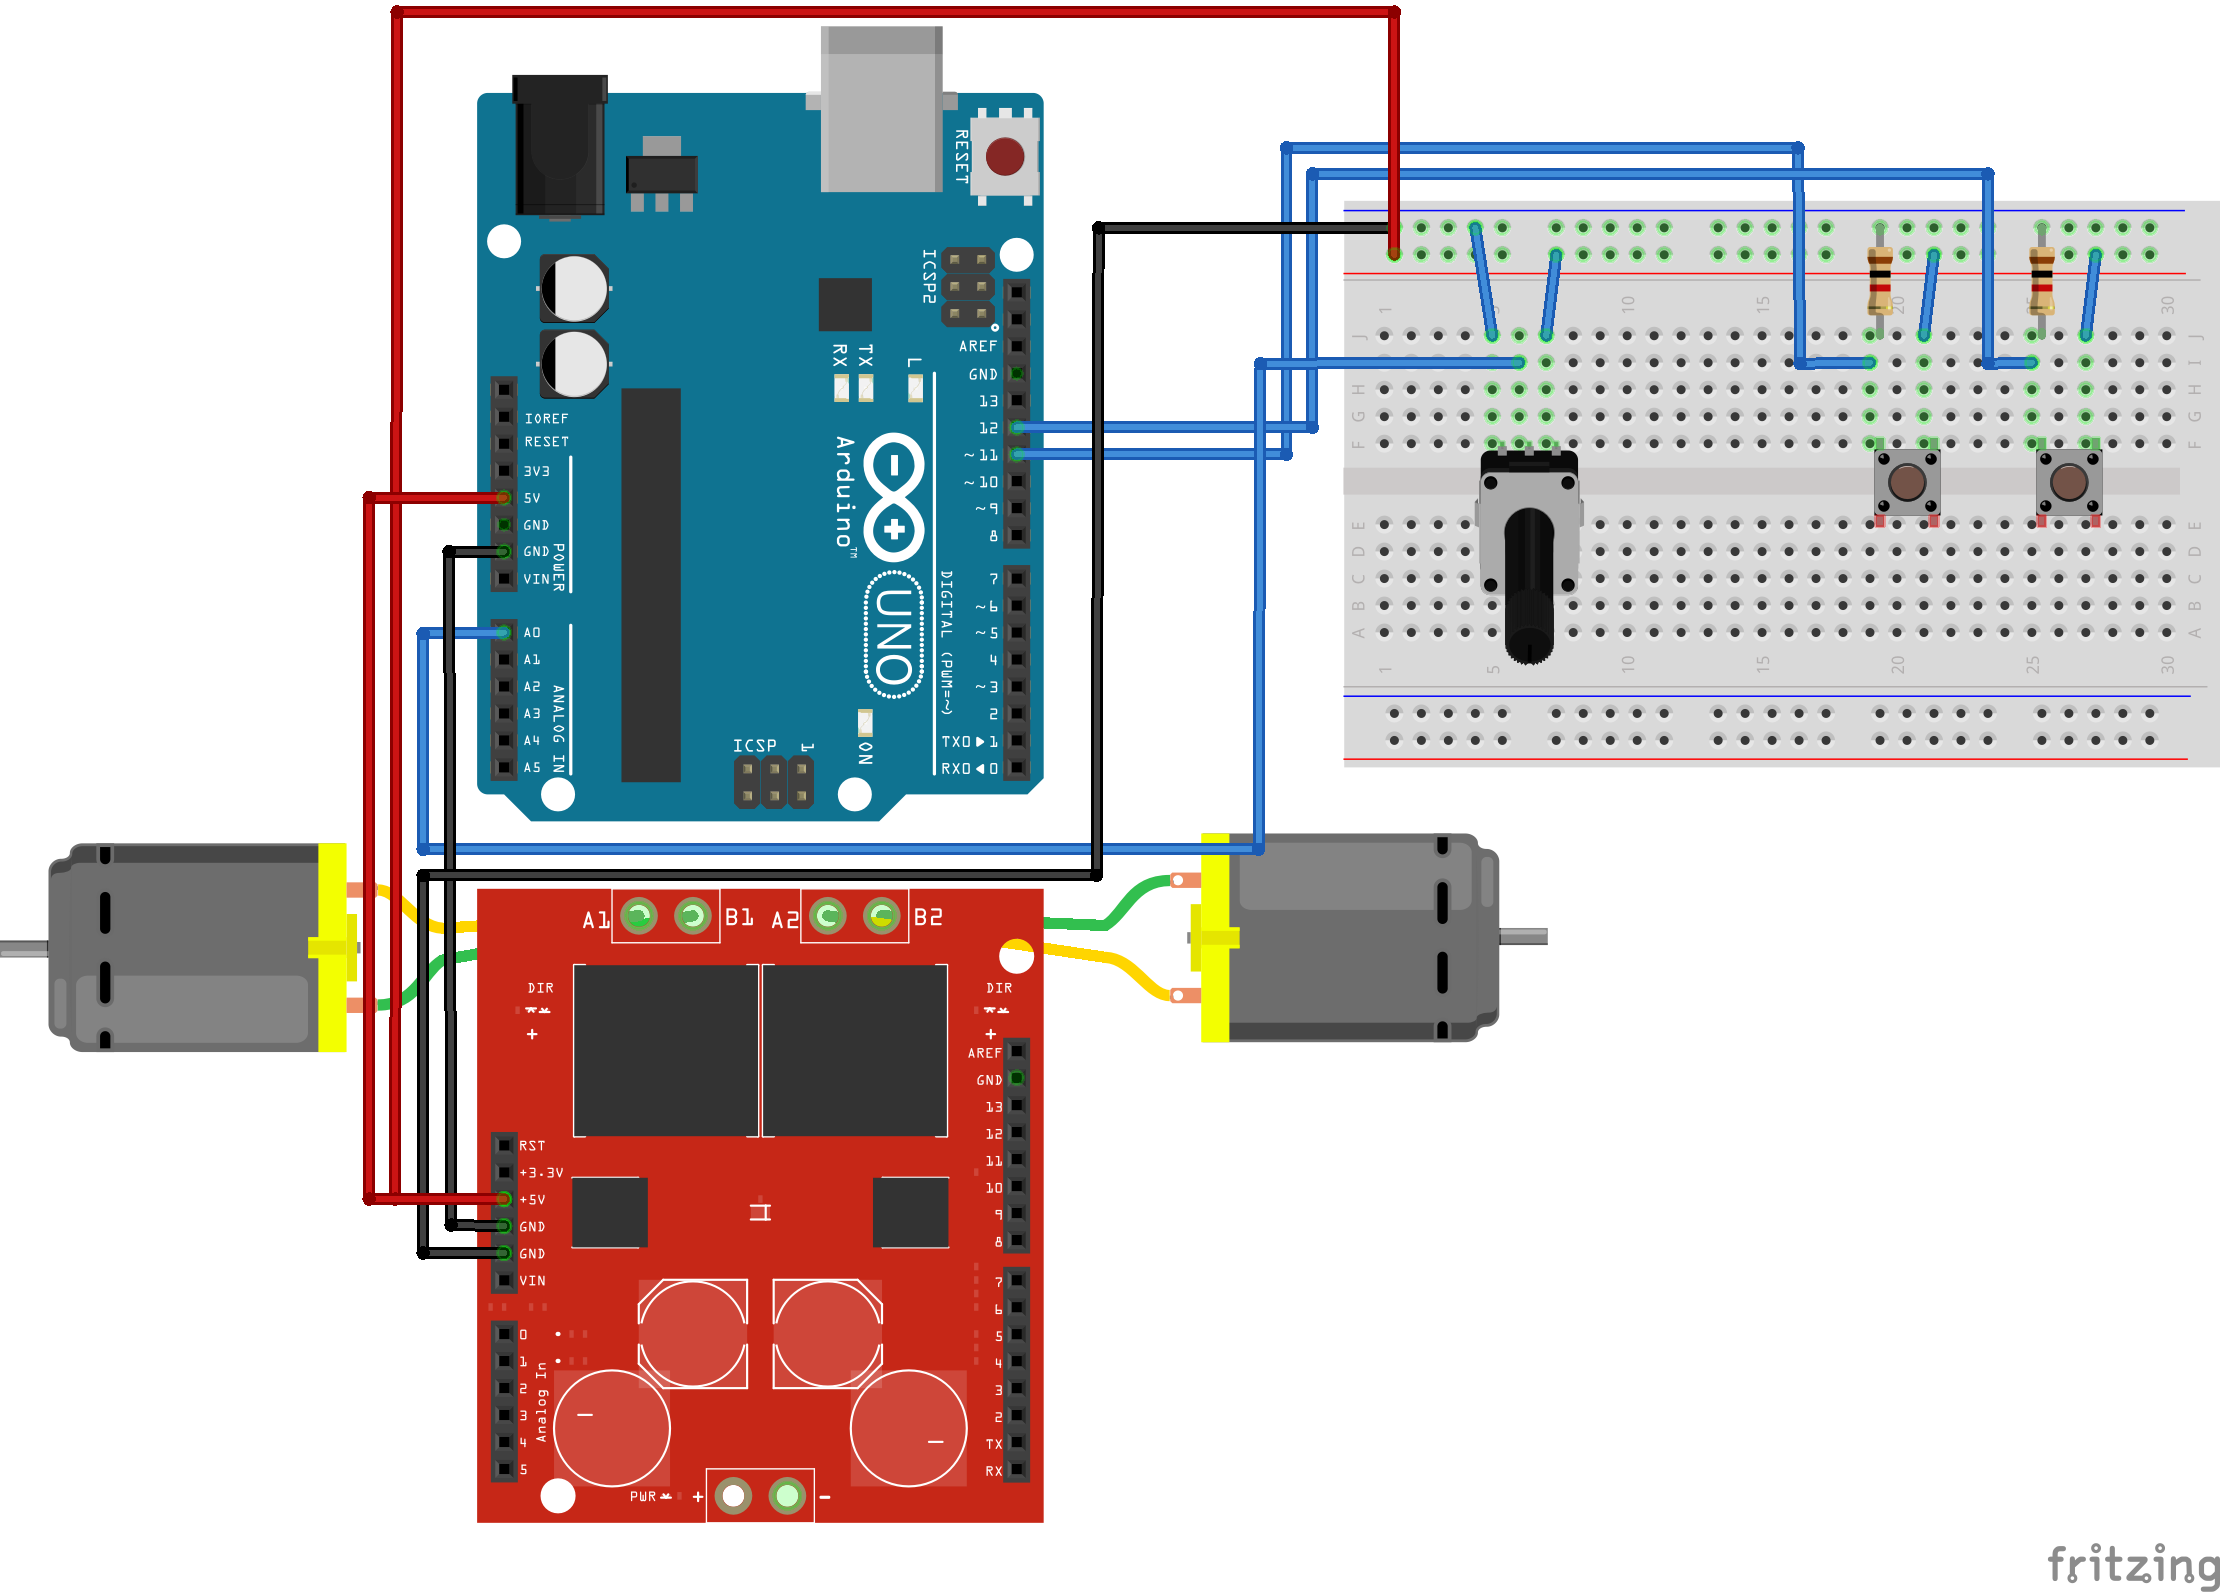
I wanted to mimic a game console controller, so I went with a "joystick" on the left and two buttons on the right. The joystick would controller what direction the vehicle would move in, while the two buttons would be the forward and backwards motion. Of the components that came in our kit, I figured the potentiometer would be the best fit to play the role, and for the buttons, two simple button switches. Following our previous assignments, making the circuitry for the controller was pretty simple.
Results
After all the close calls, it worked! Like I mentioned before, the caster wheel doesn't really work, and for some reason, the wheels seem to only have two speeds, full or stationary, despite deliberately coding in analog to get different speeds. Thus steering is a little tricky, but by doing it in segments (holding A only in short bursts on the controller :P), I can get the car to go where I want it to.
And now to see it in motion:
Conclusion
For the final model, I should probably consider 3D-printing the front of the body so I can have a more modular motor attachment method. Hopefully we could do a wireless controller, but otherwise I need longer wires. Soldering things together should clean up the model a lot. Maybe I can also fine tune the code so the steering is smoother. Better craftsmanship on the caster wheel could help too. But this is a good step forward!


_ztBMuBhMHo.jpg?auto=compress%2Cformat&w=48&h=48&fit=fill&bg=ffffff)


Comments
Please log in or sign up to comment.