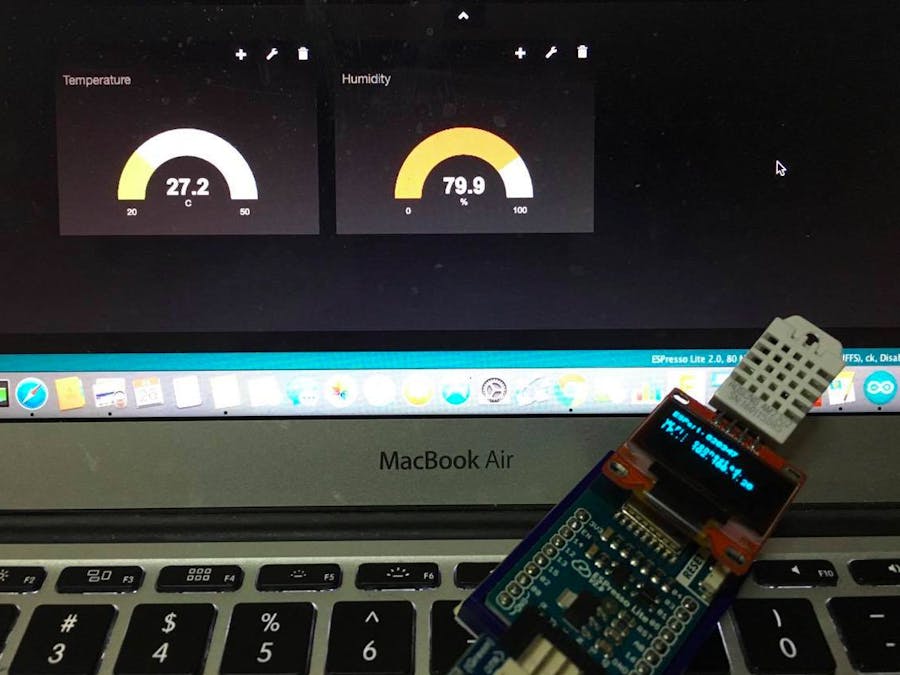
One of the core feature of the ESPresso Lite V2 Wi-Fi microcontroller is that it is meant to help novice learners to build their first Internet of Things (IoT) project quickly and easily. A simple project that all novice learners can start with is to build a simply temperature/humidity sensor and get it visualized using Freeboard.
1. HardwareFor this project, the key component is the DHT22 digital humidity & temperature sensor. We add an OLED display simply because it will help a lot in determining the status of the board since it can display messages directly (instead of having to read via the Serial monitor).
Putting it together is much simpler than what is being shown in the Fritzing diagram below.
The ESPresso Lite V2 have in-built pads that allow external devices such as the DHT22 & the OLED display to be connected directly via the two rows of headers right on top of the ESPresso board. This reduces the need for complicating jumper wires.
2. Booting it upWhen connected to a power source(either the laptop/PC or simply a powerbank), it will boot up and display the unique id for each board.
There is no need to flash the board (or upload any sketch from the Arduino IDE) when using it straight out of the box for the first time. The in-built firmware would have been already flashed at the factory. But just in case there's a need to update it, it can be done using the Arduino IDE using the example code below:
// #include <Arduino.h>
#include <ESPert.h>
ESPert espert;
const char* mqtt_server = "mqtt.espert.io";
unsigned long loopTime = 0;
int currentSwitch = true;
String outTopic = "ESPert/" + String(espert.info.getChipId()) + "/Status";
String inTopic = "ESPert/" + String(espert.info.getChipId()) + "/Command";
int currentSwitch2 = true;
ESPert_Button button2;
const char* host = "maker.ifttt.com";
const int httpPort = 80;
String ifttt_key = "";
void callback(char* topic, byte* payload, unsigned int length) {
String strPayload = String((char*)payload).substring(0, length);
espert.println("Receive: " + strPayload);
espert.oled.clear();
espert.oled.println(espert.info.getId());
espert.oled.println();
espert.oled.printf("[%lu]\r\n\r\n", millis());
espert.oled.println("PARSE OK.");
if (espert.json.init(strPayload)) {
 if (espert.json.containsKey("LED")) {
   String value = espert.json.get("LED");
   if (value == "0") {
     espert.led.off();
     espert.println("LED: Off");
   } else if (value == "1") {
     espert.led.on();
     espert.println("LED: On");
   } else if (value == "2") {
     if (espert.led.isOn()) {
       espert.led.off();
       espert.println("LED(Toglle): off");
     } else {
       espert.led.on();
       espert.println("LED(Toglle): On");
     }
   }
   String outString = "{\"LED\":\"" + String(espert.led.isOn() ? 1 : 0) + "\", ";
   outString += "\"name\":\"" + String(espert.info.getId()) + "\"}";
   espert.println("Send...: " + outString);
   espert.mqtt.publish(outTopic, outString);
 }
 if (espert.json.containsKey("Buzzer")) {
   String value = espert.json.get("Buzzer");
   int l = value.toInt();
   for (int i = 0; i < l; i++) {
     delay(200);
     espert.buzzer.beep(60, 200);
   }
 }
 if (espert.json.containsKey("OLED")) {
   String value = espert.json.get("OLED");
   espert.oled.clear();
   espert.oled.println(value);
 }
 if (espert.json.containsKey("IFTTT")) {
   String value = espert.json.get("IFTTT");
   ifttt_key = value;
   espert.eeprom.write(150, ifttt_key);
   String outString = "{\"IFTTT\":\"" + ifttt_key + "\", ";
   outString += "\"name\":\"" + String(espert.info.getId()) + "\"}";
   espert.println("Send...: " + outString);
   espert.mqtt.publish(outTopic, outString);
 }
}
else {
 espert.oled.clear();
 espert.oled.println(espert.info.getId());
 espert.oled.println();
 espert.oled.printf("[%lu]\r\n\r\n", millis());
 espert.oled.println("PARSE FAILED.");
}
}
void setup() {
espert.init();
delay(100);
espert.buzzer.init(15);
espert.dht.init();
espert.mqtt.init(mqtt_server, 1883, callback);
ifttt_key = espert.eeprom.read(150, 80);
button2.init(0);
espert.oled.init();
delay(2000);
espert.println("Press USER button to switch Mode");
espert.oled.clear();
espert.oled.println(espert.info.getId());
espert.oled.println();
int mode = espert.wifi.init();
if (mode == ESPERT_WIFI_MODE_CONNECT) {
 espert.println(">>> WiFi mode: connected.");
 espert.oled.println("WiFi: connected.");
 espert.oled.print("IP..: ");
 espert.oled.println(espert.wifi.getLocalIP());
} else if (mode == ESPERT_WIFI_MODE_DISCONNECT) {
 espert.println(">>> WiFi mode: disconnected.");
 espert.oled.println("WiFi: not connected.");
}
loopTime = millis();
}
void loop() {
espert.loop();
if (espert.mqtt.connect()) {
 espert.println("MQTT: Connected");
 espert.println("MQTT: Out Topic " + outTopic);
 espert.mqtt.subscribe(inTopic);
 Serial.println("MQTT: Subscribed " + inTopic);
}
bool buttonPressed = espert.button.isOn();
if (buttonPressed != currentSwitch) {
 String outString = "{\"button\":\"" + String(buttonPressed ? 1 : 0) + "\", ";
 outString += "\"name\":\"" + String(espert.info.getId()) + "\"}";
 espert.println("Send...: " + outString);
 espert.mqtt.publish(outTopic, outString);
 currentSwitch = buttonPressed;
}
buttonPressed = button2.isOn();
if (buttonPressed != currentSwitch2) {
 espert.println("SW");
 if (buttonPressed) {
   String path = "/trigger/button/with/key/" + ifttt_key;
   espert.println(">>" + espert.wifi.postHTTP(host, path.c_str()) + "<<");
 }
 currentSwitch2 = buttonPressed;
}
if (millis() - loopTime >= 5000) {
 loopTime = millis();
 float t = espert.dht.getTemperature();
 float h = espert.dht.getHumidity();
 if (!isnan(t) && !isnan(h)) {
   String outString = "{\"temperature\":\"" + String(t) + "\", ";
   outString += "\"humidity\":\"" + String(h) + "\", ";
   outString += "\"name\":\"" + String(espert.info.getId()) + "\"}";
   espert.println(outString);
   espert.mqtt.publish(outTopic, outString);
   // espert.oled.clear();
   // espert.oled.println(String("....") + millis());
 }
}
delay(100);
}
As shown on the screen above, the board is currently being configured as a 'wireless access point' or WAP mode. Using your web, scan and connect to the corresponding WAP and key in 192.168.4.1 in your web browser.
Choose from a list of SSID and enter the correct password of the local Wi-Fi router. If the connection is successful, the ESPresso Lite V2 will reboots and show successful connection.
4. Check whether the DHT22 sensor is transmitting data to the cloudOpen another tab in your web browser and enter http://www.espert.io/mqtt
Click Connect > Add New Topic Subscription and enter the Topic according to the format: ESPert / <board id> / #
Once it is set up properly, you will be receiving messages (in JSON format) containing the temperature and humidity values.
With this you can now proceed to http://www.espert.io/freeboard to add this data source to the Freeboard:
Click Add Datasource and then enter the necessary information (mostly from the MQTT Websocket Panel).
For the Topic, make sure the format is: ESPert / <board id> / Status
To start creating your own dashboard widget, for instance, the Temperature gauge, select Add Pane > Type > Gauge.
For Value, click on Datasource > [name of datasource] > [msg] > [temperature]
After that you may continue creating another gauge to show the Humidity level.
And there you have it. You have successfully created a temperature and humidity dashboard that will change in real-time.


Comments
Please log in or sign up to comment.