


Hardware components | ||||||
 |
| × | 1 | |||
| × | 1 | ||||
| × | 1 | ||||
| × | 1 | ||||
Is your home heating system driving you crazy? Mine certainly was. I was stuck with an old setup that blasted heat indiscriminately, turning small, insulated rooms into saunas while larger spaces remained iceboxes. The thermostat? Useless—it only monitored the living room, oblivious to the rest of the house. And with a furnace that burns gas and pushes air through simple floor vents, I had no way to control which rooms got heat.
Sure, I could manually open and close the floor registers, but who wants to do that every morning and night? So, I decided to build my own solution: a smart floor vent system.
Here is the whole story in a video:
This project would use a Raspberry Pi Pico, a temperature sensor, and a stepper motor to monitor room temperatures and automatically adjust the registers. With the help of a 3D printer and some inexpensive components, I planned to spend just $30 to revolutionize my heating system—and save money on energy bills in the long run.
I started by designing the floor register in Fusion 360. Because the part was larger than my 3D printer’s capacity, I split it into two pieces.
But my first attempt was a disaster—warping issues ruined the print, and worse, the pieces didn’t fit together!
After redesigning and tweaking settings, I printed a sturdier version with 50% density. Another mistake. It was unnecessarily heavy and over-engineered. Finally, I settled on a standard 15% density. After three attempts, I had all the parts ready for assembly.
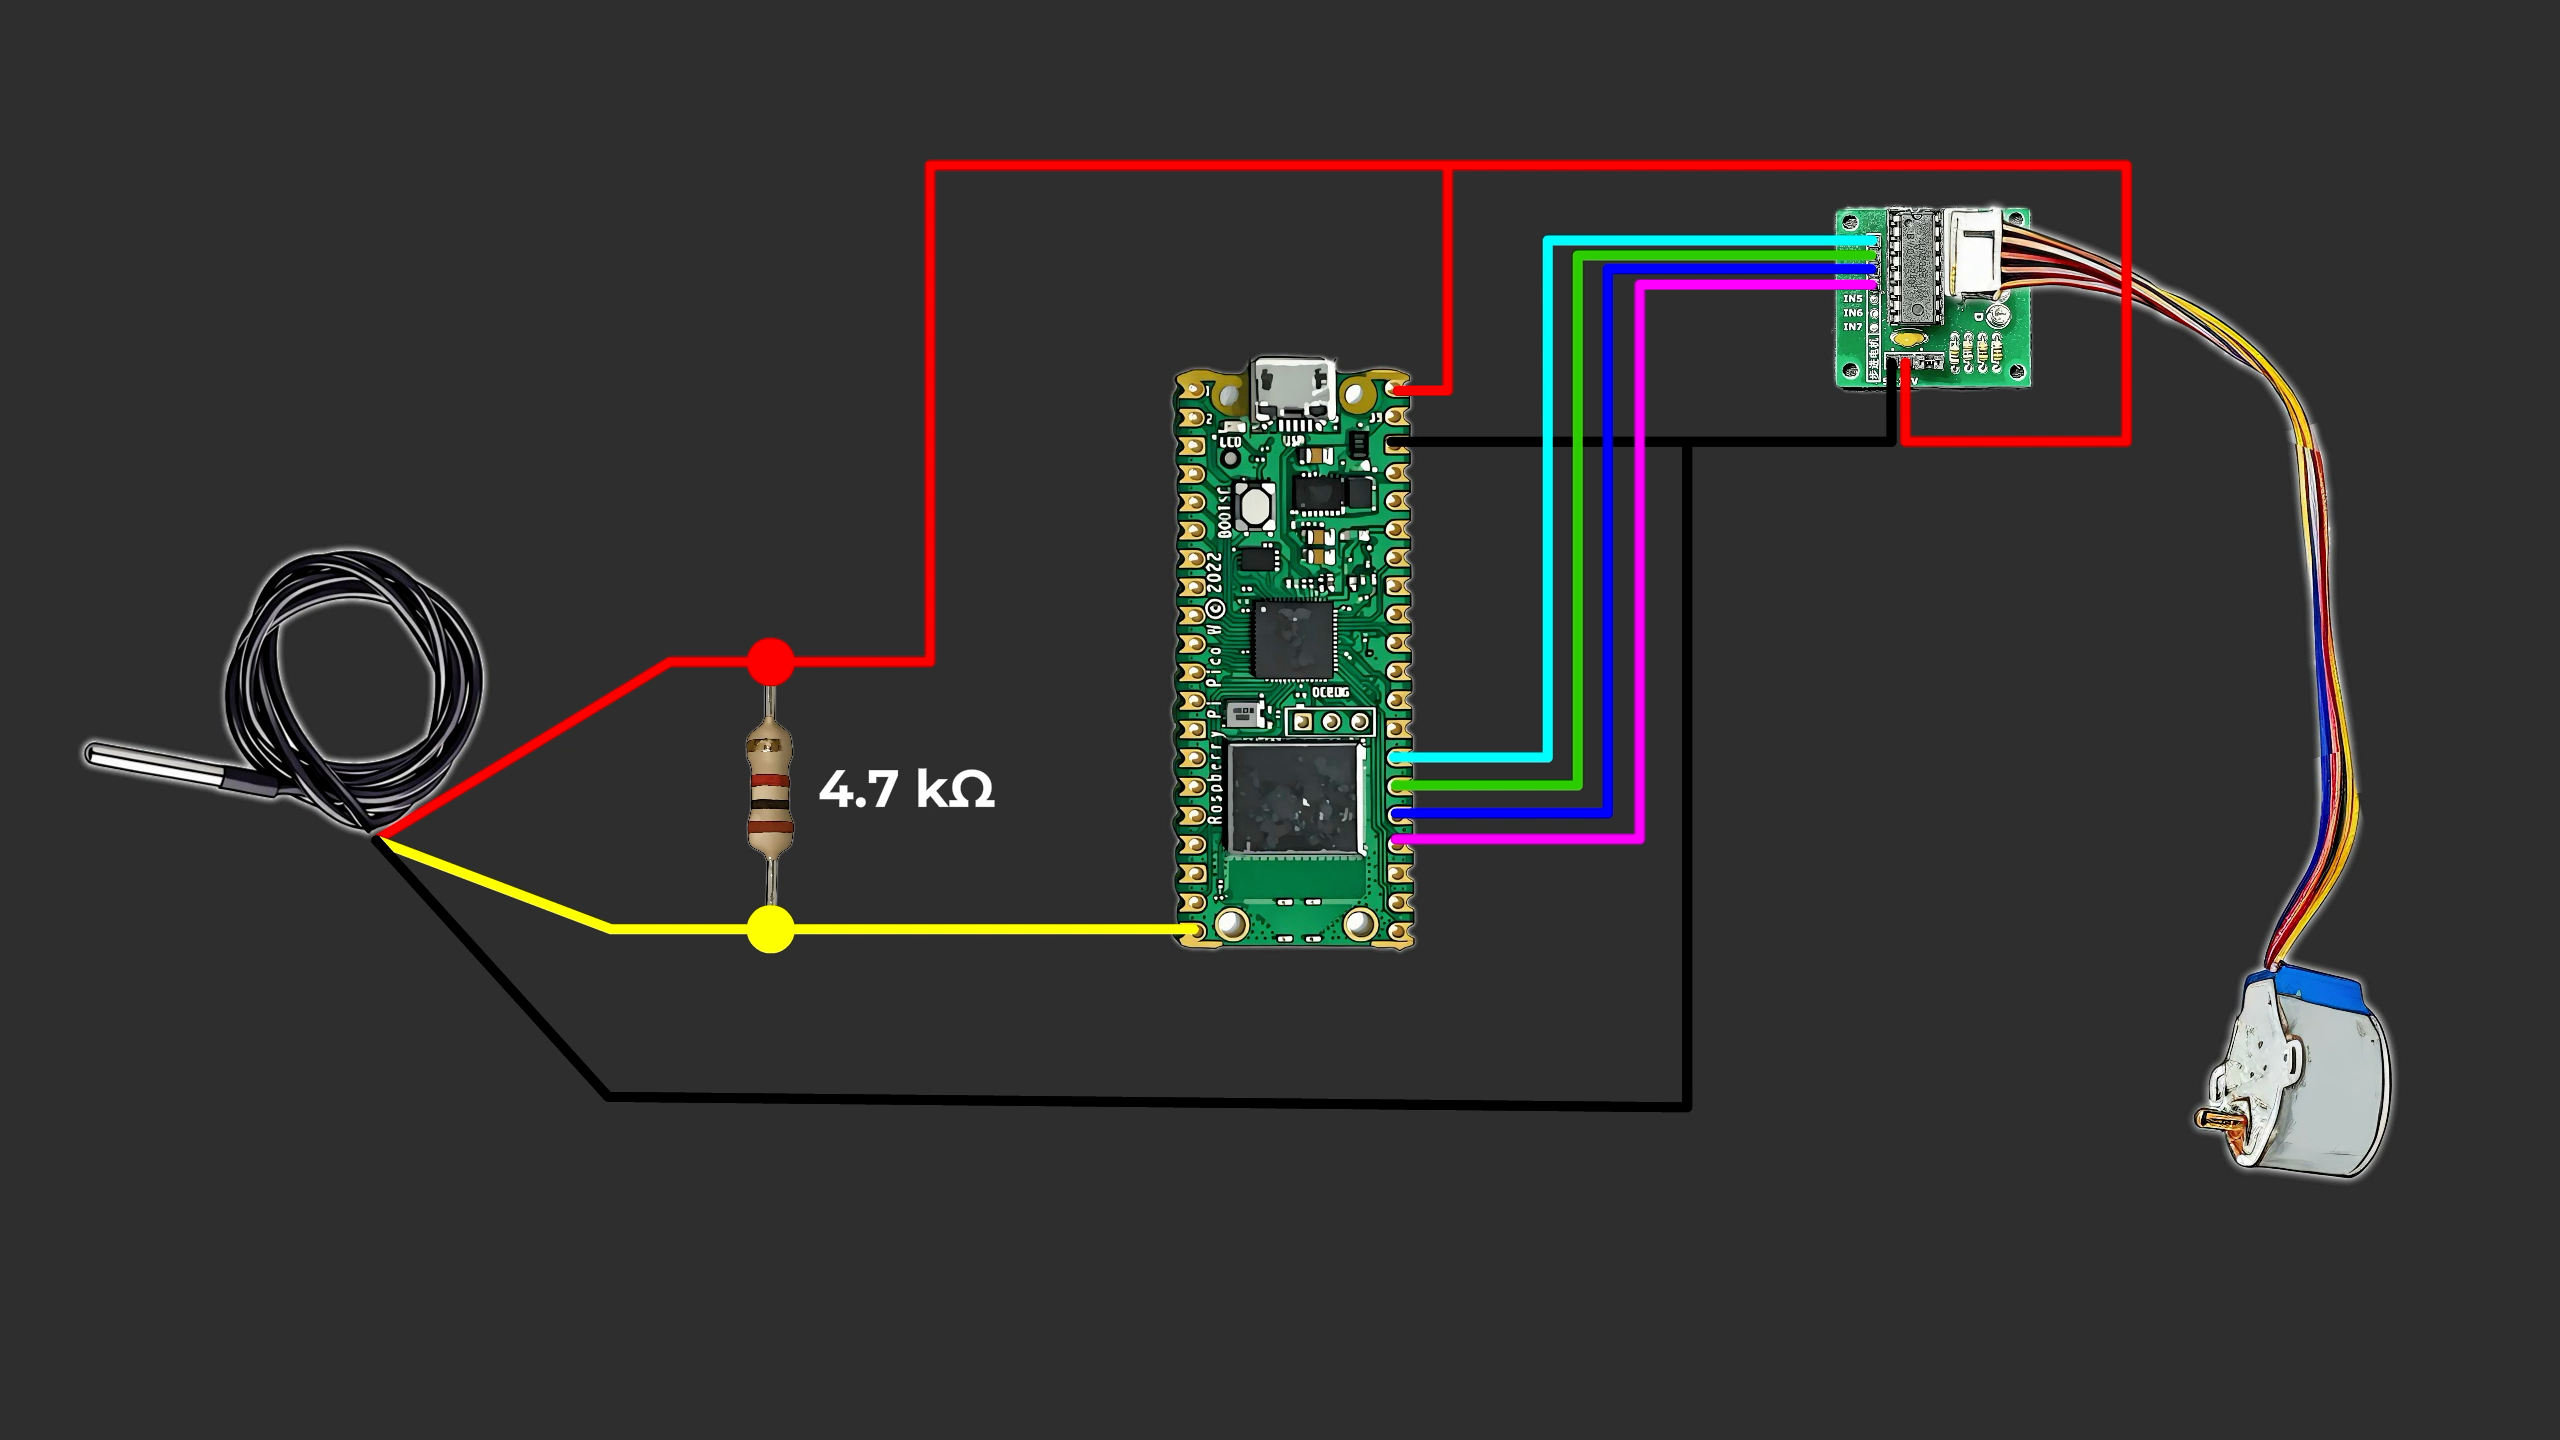
The setup was simple but effective:
- Raspberry Pi Pico: The brains of the operation.
- DS18B20 Temperature Sensor: To monitor room temperatures.
- Stepper Motor with Controller Board: To open and close the register.
- A Resistor: To complete the circuit.
Using MicroPython, I programmed the Pico to connect to my home network. I wrote a schedule to keep the damper closed during the day (7 AM to 8 PM) and open at night.
The code is here:
https://github.com/Nerdy-Things/raspberry-pi-pico-floor-register-cross-platform
git clone https://github.com/Nerdy-Things/raspberry-pi-pico-floor-register-cross-platform.git
git submodule init
git submodule update
The main lines are in main.py:
......
wifi.connect("WI-Fi-SSID", "WI-FI-PASSWORD") # ENTER YOUR WI-FI CREDENTIALS
......
    hour = date_time.current_hour()
    if hour == None:
        pass
    # Close registry during a day
    elif hour >= 7 and hour < 20 and is_opened:
        Logger.print("Closing during a day")
        motor.rotate(direction=-1)
        is_opened = False
        send_status()
    # Open registry at night
    elif hour < 7 and not is_opened or  hour > 20 and not is_opened:
        Logger.print("Opening at night")
        is_opened = True
        motor.rotate(direction=1)
        send_status()
After uploading the code via Visual Studio Code, the first console messages confirmed success: the sensor was detected, and the Pico was connected to Wi-Fi.
Every smart device needs an app! I built one using Kotlin Multiplatform, ensuring it worked on both iPhones and Android devices.
For Android, it was straightforward—just a matter of syncing with Android Studio.
For iOS, the process required Xcode, but it wasn’t too difficult. Now, I could control the register directly from my phone.
The Final TestFinally, I tidied up the wires with custom 3D-printed cable holders and attached them neatly to the wall skirting. Now, my smart floor register was fully operational. I could control the heating through my phone, on a schedule, or based on room temperature. No more manual switching. No more overheated spaces.


Comments