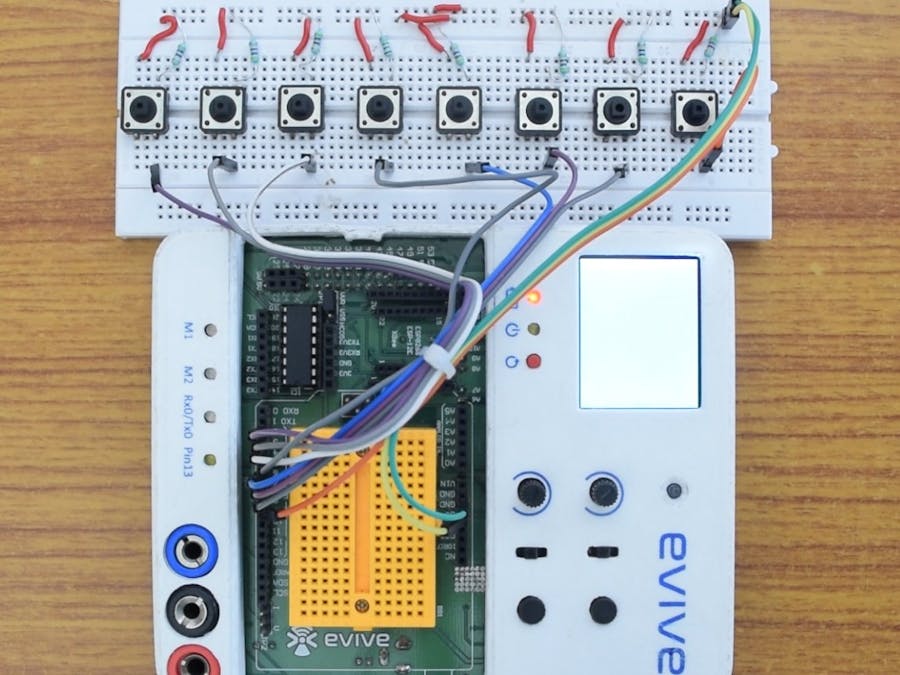
We have built an simple 8 key piano for kids. This is programmed in Evive using mblock software which is derived from scratch as a programmer. Just go through the next steps and build this good looking simple piano.
First of all you need to install the mblock software on your PC. You can download it from its official site: http://www.mblock.cc/download
You will get the zip file which you can extract using winrar extractor which you can get from here. Just extract this files to your workspace, and run the so extracted setup and for further detail watch the video.
Step 2: Components usedComponents used in this project are:
- push buttons
- resistors
- breadboard
- breadboard wires
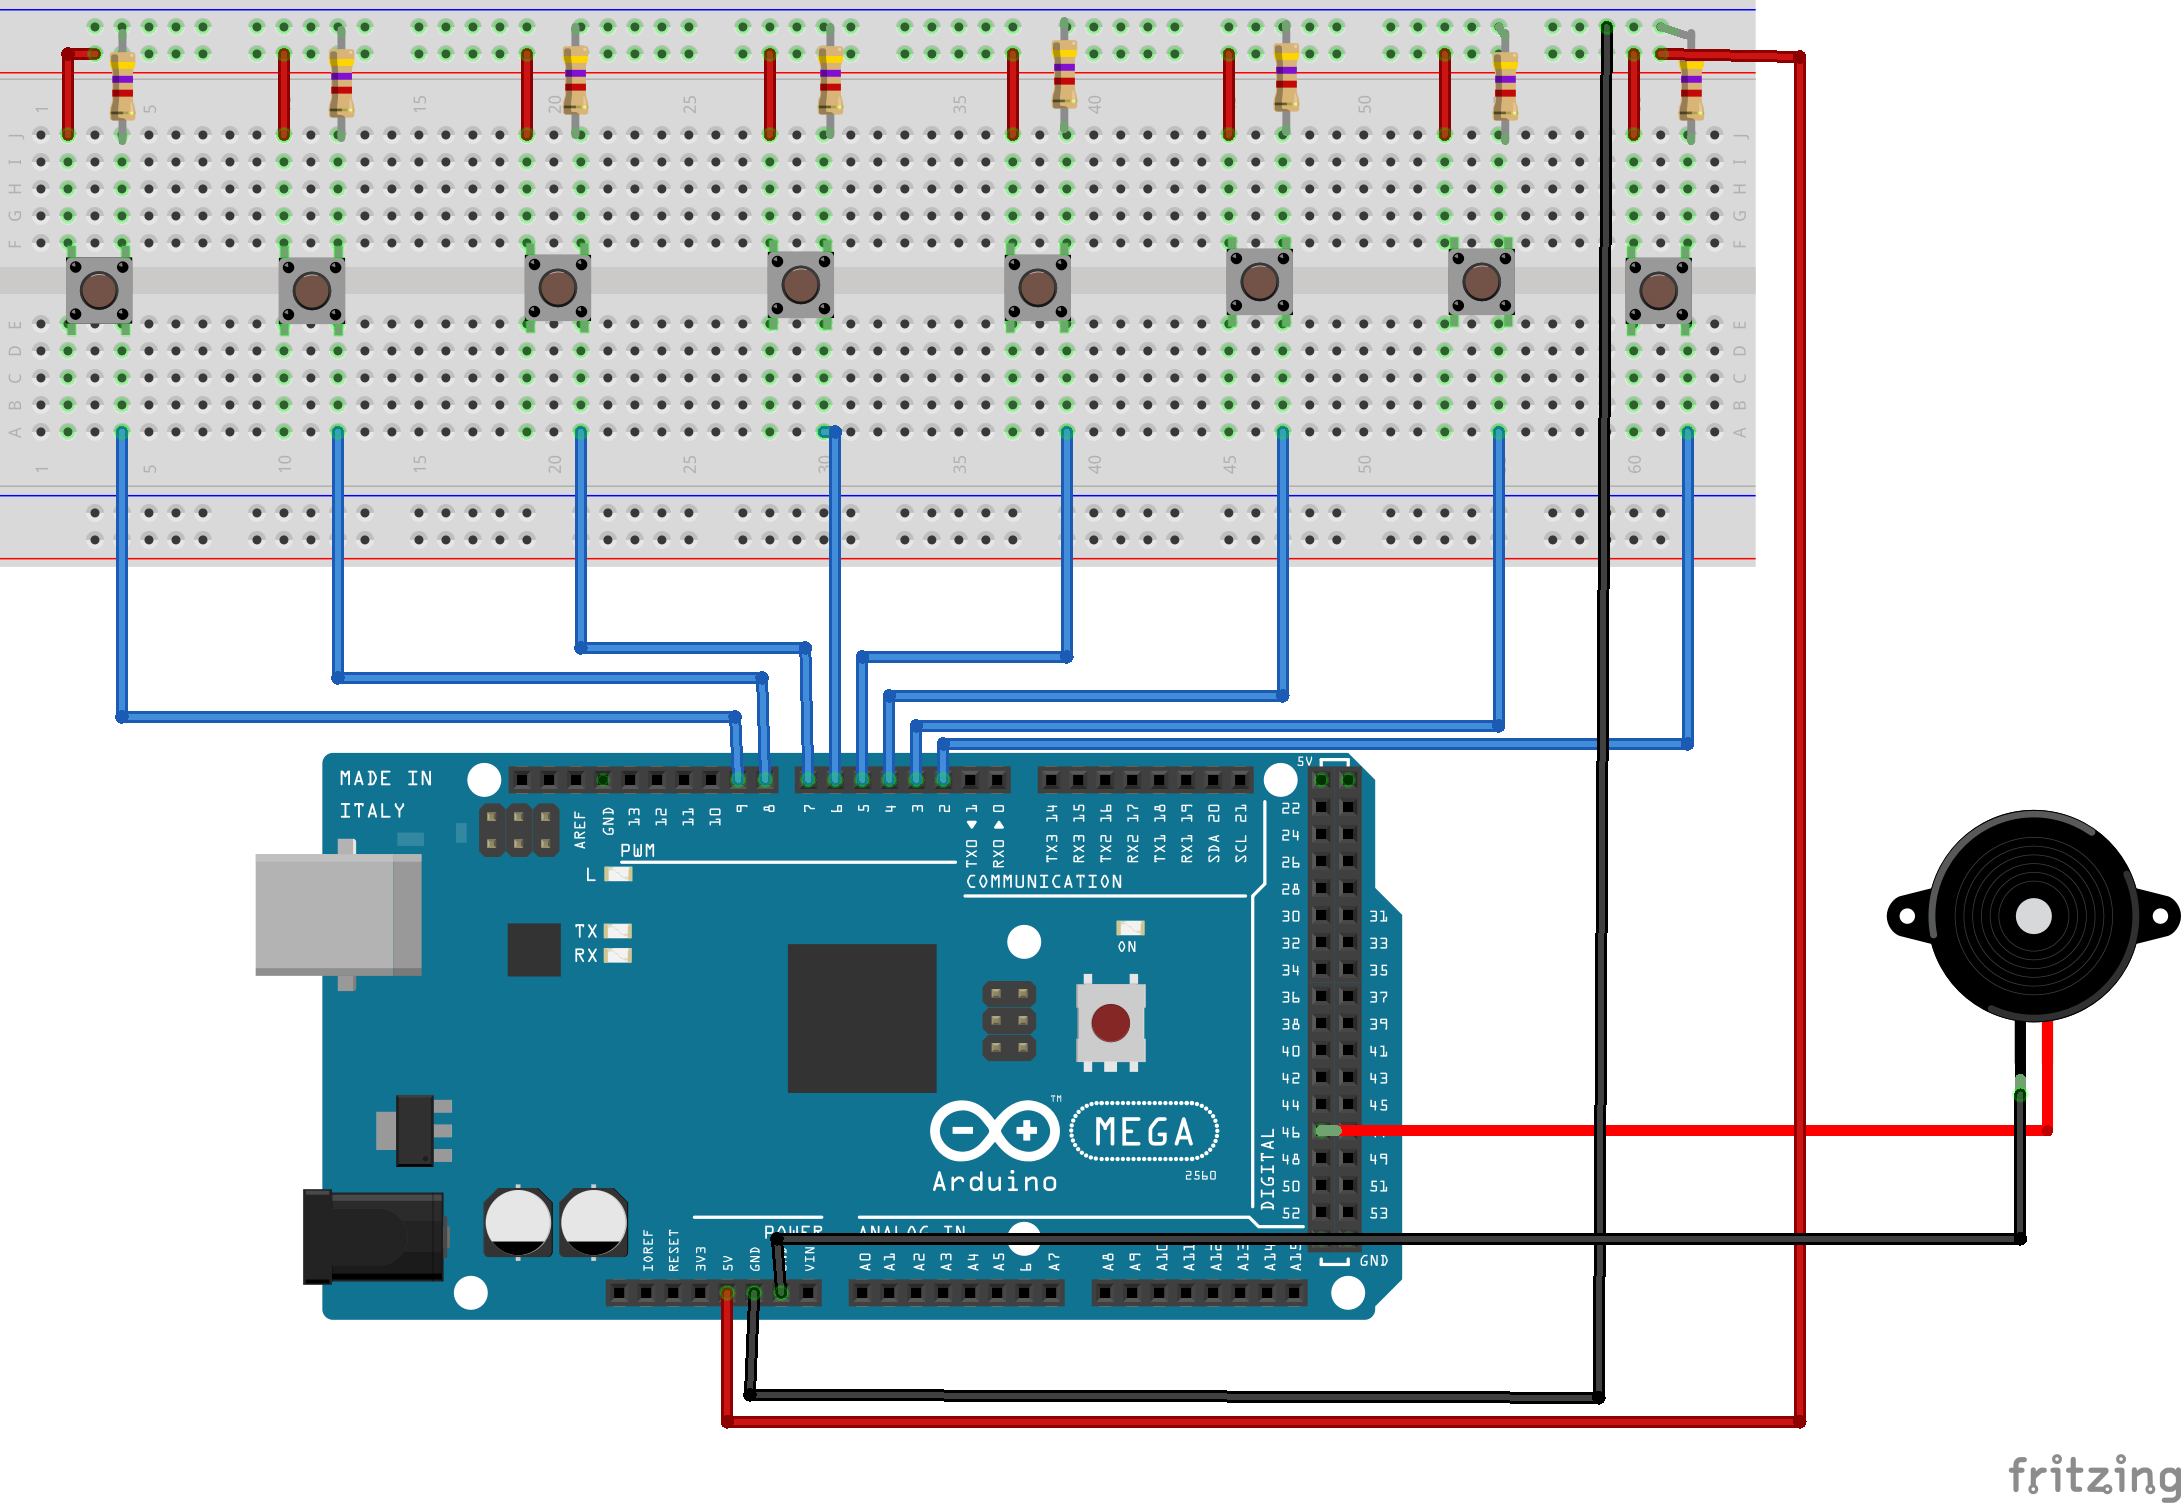
Your piano should be good looking enough. We will make it now. First of all you should know some things about the breadboard. As you can see in the given photo of breadboard the middle holes are shortened in vertical pattern (relative to diagram) and the side ones are shortened horizontally except at middle you have to join the two externally using breadboard wire as shown in figure.
- Take the bread board
- Place the push buttons in between the two sets of breadboard as shown in photo
- There are two side of button left and right. Power the left side with 5 volt, you can do so by making the side line of bread board of 5 volt.
- Make the right side to be ground using a high value resistor.
- Now, you have to take input from the button which you can do by joining the right side of switch to Evive digital pins.
- Repeat these steps to set up 8 switch.
- Connect these switches to Evive digital pin 2-9.
You should know some basics about the piano. We have 8 basic tones that are: sa, re, ga, ma, pa, dha, ni, san in hindi. We have used these sounds in our piano. Actually all possible notes are derived by these 8 notes. You can read more about this from here. Here we are writing the 'sargam', corresponding piano keyword and the frequency, which is given by Arduino to the buzzer.
Step 5: Building the project in mblockNow, our circuit is ready and we just have to start our project on mblock. On opening the scratch you will see a default scratch interface, now follow these simple steps:
- Go to edit and select 'Arduino mode'
- Go to board and select 'Arduino mega 2560' (heart of evive)
- Now, we have to start the project, select the 'robot' script.
- Choose the 'Arduino program' tag and release it in middle.
- All our main work is in the loop so go to '
control' script and select 'forever' and attach it to 'Arduino program' tag.
- Now you have to select 8 '
if then' tags and place it inside the 'forever'.
- The condition which you are going to check is whether the digital pins (2, 3, 4, 5, 6, 7, 8, 9) are high, if they are then you have to play corresponding tone for 1/4th of the second.
For this go to 'Robot' script again and select 'digital read pin' and place it in the 'if then' condition part.
- Then pick the '
play tone' tag and place it in 'then' part of 'if then'.
- Repeat these steps for all the switches.
- For more clarification see the video.
Once you have made the project fully you have to upload your project on the Evive.
Connect the Evive using USB cable. Then in mblock go to connect and then Serial port you will see the COM# which is the port on which your Evive is connected. After connecting to your Evive, upload the project to it after saving the project by clicking on the button 'upload to arduino' on the right side.
Evive is an open-source embedded platform for all age groups to help them learn, build, debug their robotics, embedded and other projects. With an Arduino Mega at it's heart, Evive offers a unique menu-based visual interface which removes the need to re-program the Arduino repeatedly. Evive offers the world of IoT power supplies, sensory and actuator support in one small portable unit.
To explore more click here.


_wzec989qrF.jpg?auto=compress%2Cformat&w=48&h=48&fit=fill&bg=ffffff)


_3u05Tpwasz.png?auto=compress%2Cformat&w=40&h=40&fit=fillmax&bg=fff&dpr=2)

Comments
Please log in or sign up to comment.