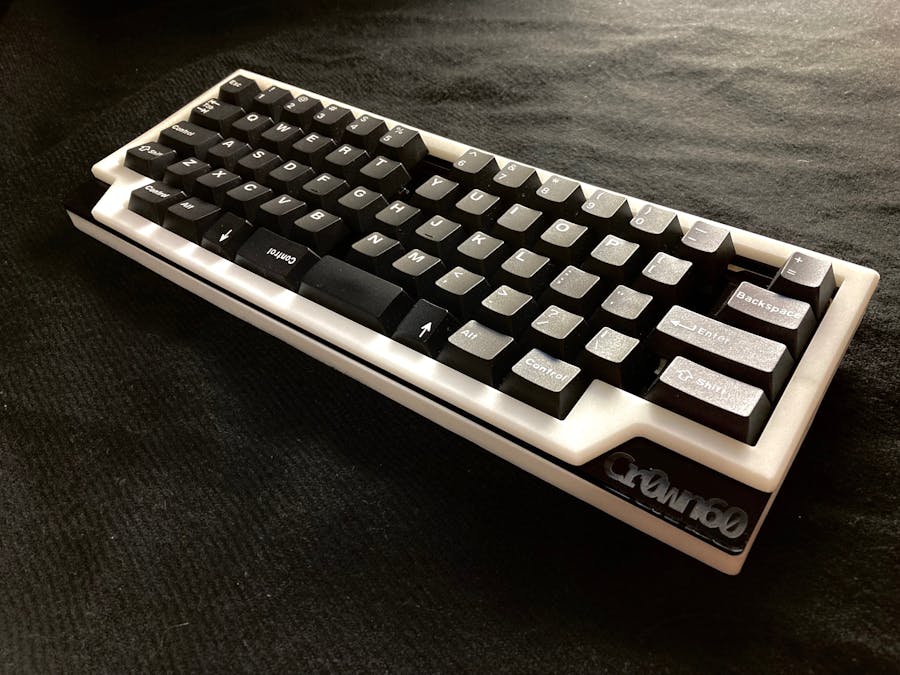
Since the Cr0wn65 keyboard I had previously made was more difficult to use than I had expected, I decided to keep the case and layout concept, but make it a little more compact and use a proven key layout.
The first thing I considered was the key layout, and I quickly decided to use the TreadStone 60 as a base. To take advantage of the case design that shows off the different materials in the corners, the allocation of the keys in the bottom row was changed drastically. (As I would later find out, I made the arrangement assuming keycaps that did not exist in this world.)
I then modeled the case in FreeCAD and repeated the rendering process to refine the structure. In particular, I sought opinions from the community on how to handle the area around the USB port, and finally settled on the current form.
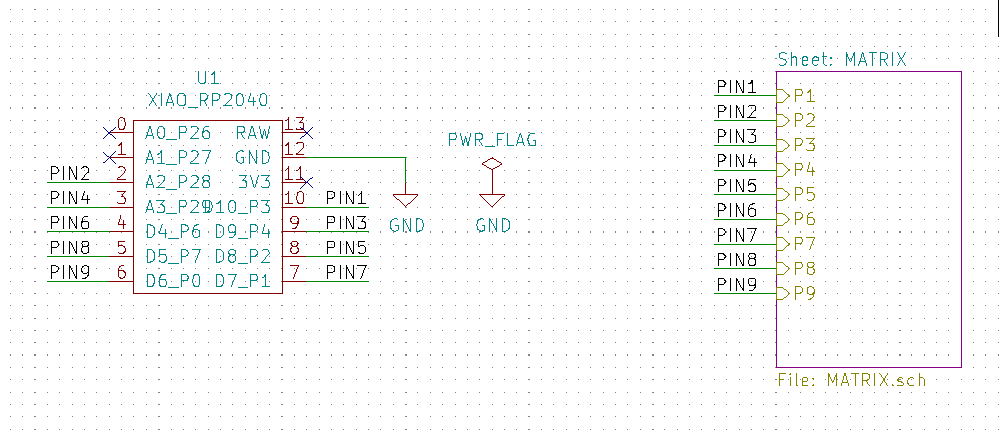
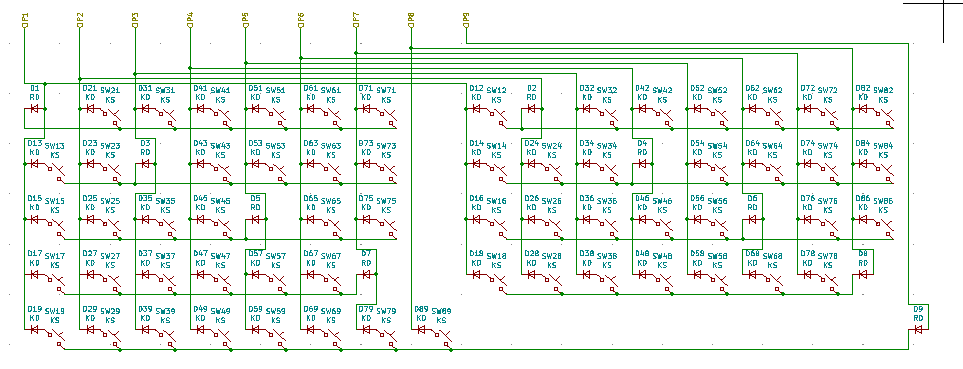
For the circuit design, I used Square Matrix (by IKeJI), which uses the fewest number of GPIOs known, in order to achieve a 60% keyboard with the XIAO RP2040, which has fewer pins. More details can be found at KBD.news.
It was around this time that I learned about the Seeed XIAO DIY keyboard contest and decided to change my XIAO installation method to surface mount in order to qualify for the coupon. Fortunately, I was able to handle this by simply replacing the holes that point to pin headers with pads, thanks to the fact that the XIAO series features Castellated Holes.
The board was delivered in about two weeks and was of good quality, with no design errors, so it could be used as is. It took about 3 hours to solder the switches and the board was ready to use as a keyboard.
For the firmware, I used PRK Firmware, which is currently under development and powered by Ruby. It has all the functions you would want to use on a normal keyboard, and also supports keycode rewriting from a browser using Remap. With the code in attachments, I was able to implement Square Matrix, Remap, three layers, and keys with different functions for tap and hold.
CaseWhat remains is the case. First, I ordered the top and bottom of the case via online 3D printing order, and ordered the switch plate and the plate to be inserted into the case from a domestic acrylic shop. However, the data used for the 3D printing and the data used for the acrylic seemed to be different versions, and I ended up with a complete piece of garbage that could not be fitted together...
I then recovered the correct data and placed a new order, but I found that some stabilizer claws interfere with the 2mm switch plate and cannot be used, and that the plate structure needs to be modified to use the screw-in stabilizer in the case of O-ring mounts. In the case of O-ring mounts, the plate structure needed to be modified to take advantage of the screw-in stabilizer. Sandpaper solves all of these problems. Another weakness of 3D printing was the severe distortion of the shaped object due to its shape, which greatly affected its appearance.
In the future, I plan to redo the O-ring selection, adjust the height of the top case, add underglow, and other modifications, and then rebuild the case using machined aluminum.
Translated with www.DeepL.com/Translator (free version)


_4YUDWziWQ8.png?auto=compress%2Cformat&w=48&h=48&fit=fill&bg=ffffff)


_Ujn5WoVOOu.png?auto=compress%2Cformat&w=40&h=40&fit=fillmax&bg=fff&dpr=2)

Comments
Please log in or sign up to comment.