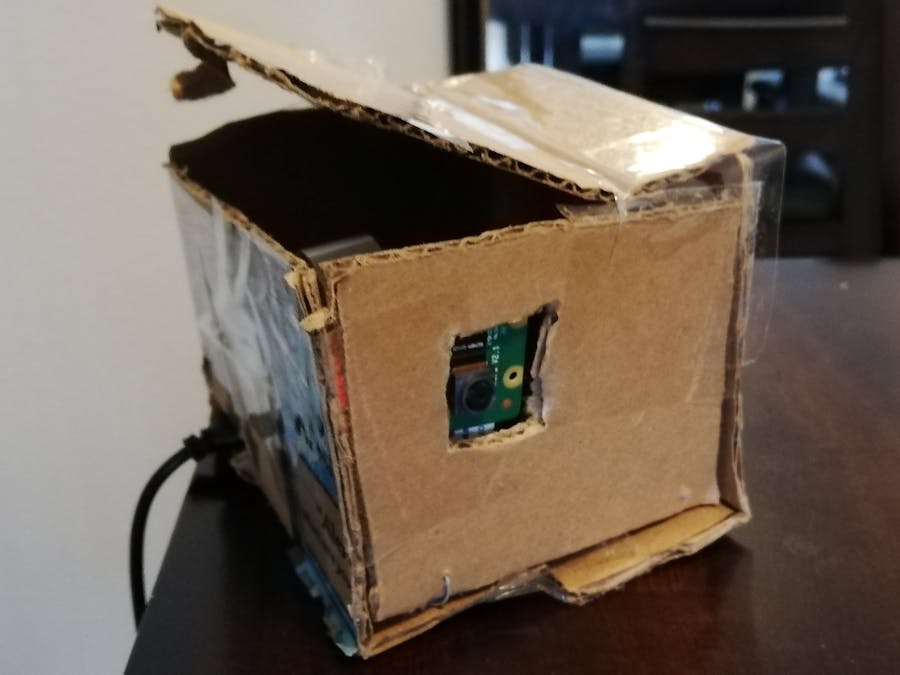
Building an IP cam with a Raspberry Pi is easy. The link below is providing some few steps to easily do just that.
https://randomnerdtutorials.com/video-streaming-with-raspberry-pi-camera/
Unfortunately, remotely viewing the live feed outside the home network is not that simple.
Most often, port forwarding, or other maneuver will be needed every time the network environment is changed. The usage of the IP cam is therefore a little bit more complicate for non-tech folks.
New cameras on the market only require customers to provide their Wi-Fi name and password. Their customers can then have access to their live feed and video history anywhere in world as long as they have access to an internet connection.
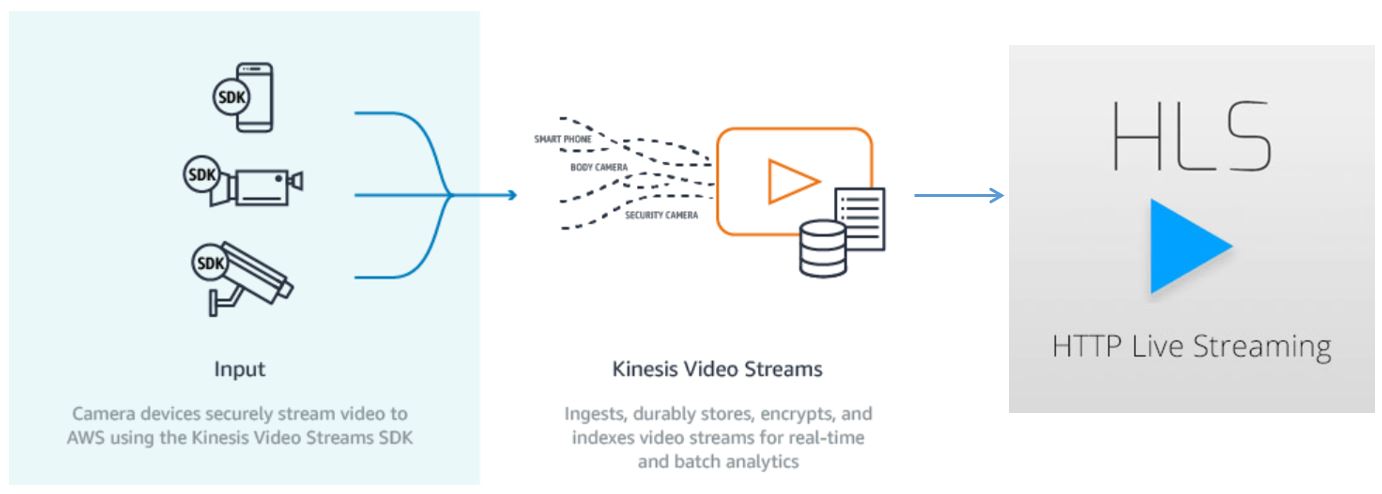
The steps below will provide guidance to reach the same result with a Raspberry Pi … Thanks to AWS.
Before Starting:
Make sure to go on raspberry.org to download and install Raspbian on the SD card. Follow the steps in the link below if you need assistance.
https://www.raspberrypi.org/documentation/installation/noobs.md
For this project, I am using Noobs version 2.9.0 released the 10/11/2018.
Follow the steps in the link below to create your first stream in Kinesis Video Streams:
https://docs.aws.amazon.com/kinesisvideostreams/latest/dg/gs-createstream.html
Most of the steps described are in the link below. Of course, I modified by adding some criticaluseful missing steps so any beginner can do it.
https://aws.amazon.com/kinesis/video-streams/raspberry-pi-tutorial/
AWS Account Setup1. Create an AWS account (You will enter a payment method, but you won’t get charged)
2. Sign in to the AWS Management Console and open the IAM console at https://console.aws.amazon.com/iam/.
3. In the navigation menu on the left, choose Users.
4. To create a new user, choose Add user.
5. Provide a descriptive User name for the user, such as kinesis-video-raspberry-pi-producer.
6. Under Access type, choose Programmaticaccess.
7. Choose Next: Permissions.
8. Under Set permissions forkinesis-video-raspberry-pi-producer, choose Attach existingpolicies directly.
9. Choose Create policy. The Createpolicy page opens in a new web browser tab.
10. Choose the JSON tab.
11. Copy the JSON policy below and paste it into the text area. This policy gives your user permission to create and write data to Kinesis video streams.
12. Choose Review policy.
13. Provide a Name for your policy, such as kinesis-video-stream-write-policy.
14. Choose Create policy.
15. Return to the Add user tab in your browser, and choose Refresh.
16. In the search box, type the name of the policy you created.
17. Select the check box next to your new policy in the list.
18. In the search box again type “kinesis”
19. Select the check box next to “AmazonKinesisFullAccess”
20. Choose Next: Review.
21. Choose Create user.
22. The console displays the Access key ID for your new user. Choose Show to display the Secret access key.Record these values; they are required when you configure the application.
Connect Remotely to Your Raspberry PiYou can connect remotely to your Raspberry Pi in headless mode. If you are using your Raspberry Pi with a connected monitor and keyboard, proceed to Configure the Raspberry Pi Camera.
- Follow the instruction on the link below to enable SSH on your Pi. https://www.raspberrypi.org/documentation/remote-access/ssh/
- Before connecting to your Raspberry Pi device remotely, do one of the following to determine its IP address:
- If you have access to your network's Wi-Fi router, look at the connected Wi-Fi devices. Find the device named
Raspberry Pito find your device's IP address. - If you don't have access to your network's Wi-Fi router, you can use other software to find devices on your network. Fing is a popular application that is available for both Android and iOS devices. You can use the free version of this application to find the IP addresses of devices on your network.
- When you know the IP address of the Raspberry Pi device, you can use any terminal application to connect.
- On macOS or Linux, On Windows, use PuTTY, a free SSH client for Windows. The article below describe how to SSH using windows. https://www.raspberrypi.org/documentation/remote-access/ssh/windows.md
Follow these steps to configure the Raspberry Pi camera to send video from the device to a Kinesis video stream.
- Open an editor to update the modules file with the following command:
$ sudo nano /etc/modules
- Add the following line to the end of the file, if it's not already there:
bcm2835-v4l2
- Save the file and exit the editor (Ctrl-X, Enter, Enter).
- Reboot the Raspberry Pi:
$ sudo reboot now
- When the device reboots, connect to it again through your terminal application and Open raspi-config:
$ sudo raspi-config
- Choose Interfacing Options, Camera. Enable the camera if it's not already enabled, and reboot if prompted.
- Verify that the camera is working by typing the following command:
$ raspistill -v -o test.jpg
The display shows a five-second preview from the camera, takes a picture (saved to test.jpg), and displays informational messages.
The C++ Producer SDK requires that you install the following software prerequisites on Raspberry Pi.
- Install Git:
$  sudo apt-get update
$  sudo apt-get upgrade
$  sudo apt-get install git
- Install Yacc, Lex, and OpenJDK (Open Java Development Kit):
$  sudo apt-get install byacc flex
$  sudo apt-get install openjdk-8-jdk
- Set the JAVA_HOME environment variable (Don't reboot the device after this step until you complete the SDK installation):
$ export JAVA_HOME=/usr/lib/jvm/java-1.8.0-openjdk-armhf/
- CMake is used to build the SDK. Install CMake with the following command:
$ sudo apt-get install cmake
- Create a certificate named cert.pem :
$  cd /etc/ssl
$  sudo nano cert.pem
- Copy everything from the link below and paste it in cert.pem
https://www.amazontrust.com/repository/SFSRootCAG2.pem
- Save the file and exit the editor (Ctrl-X, Enter, Enter).
- Install the C++ Producer SDK:
$  cd  /home/pi/Downloads
$  git clone https://github.com/awslabs/amazon-kinesis-video-streams-producer-sdk-cpp
- Change your current working directory to the install directory:
$ cd amazon-kinesis-video-stream-producer-sdk-cpp/kinesis-video-native-build
- Make the install script executable:
$ chmod +x install-script
- Run the install script. The script downloads the source and builds several open-source projects.
$ ./install-script
- Type
Yto verify. Then the build script runs. - Now go to sleep and wake up the next day : )
- To run the sample application, you need the following information:- The name of the stream you created in the Prerequisites section. - The account credentials (Access Key ID and secret access key) that you created in Create an IAM User with Permission to Write to Kinesis Video Streams.
- Run the sample application using the following command:
$ export LD_LIBRARY_PATH=/home/pi/Downloads/amazon-kinesis-video-streams-producer-sdk-cpp/kinesis-video-native-build/downloads/local/lib:$LD_LIBRARY_PATH
$ export AWS_ACCESS_KEY_ID=<Access Key ID>
$ export AWS_SECRET_ACCESS_KEY=<Secret Access Key>
$ ./kinesis_video_gstreamer_sample_app Stream Name
At this point you should be able to stream your Raspberry Pi IP Cam on AWS Kinesis video stream
- Open the Kinesis Video Streams console at https://console.aws.amazon.com/kinesisvideo/.
- Choose the Stream name of the stream you created.
Now let's try to stream on a browser using HLS.
HLS (also known as HTTP Live Streaming) is just an HTTP-based media streaming communications protocol implemented by Apple Inc.
- Open the following repository on GitHub:
https://github.com/aws-samples/amazon-kinesis-video-streams-hls-viewer
- Read the instruction and click on Kinesis Video Streams HLS Viewer.
- Fill-out all the missing value and click on "Start Playback"
Please comment for assistance.


Comments
Please log in or sign up to comment.