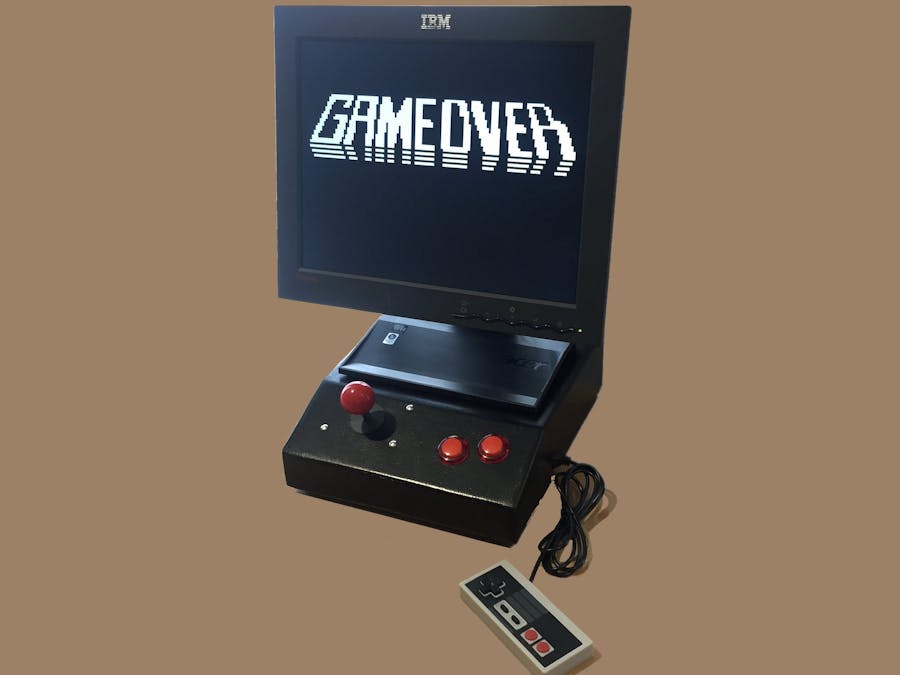
One of the things I love about the Arduboy is its diminutive size. Its small enough to slip into a pocket or even a wallet alongside your credit cards!
But this small size comes at a cost for those, like me, with poor eyesight. I wanted a bigger Arduboy for game play at home and the idea of a console was born. I have previously made a table-top arcade console so the though of making a small desktop version did not phase me. But how to take the small Arduboy and make it big?
This is not a step by step tutorial on how to make this unit, sorry.
This project would not have been possible without the brilliant work of uXe. He had developed a solution that used an FPGA (Field Programmable Gate Array) module to emulate an SSD1306 LCD screen – the one that is being used in the official Arduboy – but render the results to a VGA screen. As his project progressed, I noticed that he was testing using a version of 1943 that I had been developing and had rotated it to its rightful orientation – exactly what I wanted to be able to do. I offered to test one of his prototype boards which he had already commissioned.
uXe and I tested the board with a number of games, including my port of Lode Runner, and made some minor changes to the scaling and positioning so the image was optimally rendered in the centre of the screen – albeit with letterboxing due to the 2:1 ratio of the original Arduboy’s screen.
Information about uXe’s FPGA development can be found here https://community.arduboy.com/t/vga1306-vga-out-for-diy-arduboys-implemented-on-an-fpga/4851
The controls went through a number of iterations.
Initially, I bought a cheap NES controller of eBay and gutted the electronics and hard wired the buttons directly to the Leonardo itself as shown below. Although this worked really well, the overall effect was.. well ugly. In the photo below, you can see that the device is a simple Leonardo board on the left wired to uXe’s FPGA board on the right. I am using some old-school coloured ribbon cable to the NES controller itself.
Some further digging on the internet revealed some code that would allow me to use an unmodified NES controller. By default, the key presses on a NES controller are serialised before being sent to the main unit. The code I found would allow me to use a ProMicro to decode the key presses and control the input lines of the Leonardo to emulate the analogue pressing of buttons. The code I used can be found here https://github.com/MrBlinky/Arduboy/blob/master/SNES-controller/SNES-controller.ino
Now, I could use a standard NES controller and went about trying to find a standard socket to incorporate into my case. Another tip from uXe lead me to a supplier and I ordered one.. my console was coming together! Turns out that supplier has since stopped stocking these so I have no idea where you would get one now.
To top it off, I had a spare arcade joystick and some buttons left over from my arcade build that I could also use. These joystick units have four simple micro-switches that make it a snap to wire up using the original Arduboy wiring. With my build, I simply wired the unit up alongside my NES controller so players can use either input or both together!
For this part of the recipe, take one sheet of MDF and make a simple box. I tapered the front panel of the lid on a 30 degree angle to present the joystick and buttons at a more ergonomic angle for the player.
The final piece of puzzle arrived in the mail as a gift from uXe – an old IBM monitor fitted to an Acer stand that allowed it to rotate. Perfect for that 1943 game!
The almost complete unit showing screen rotation.


Comments
Please log in or sign up to comment.