This was such an amazing opportunity, getting involved in designing some automation for a Coffee Roaster!
The nature of the project included some proprietary information but I decided to publish a core piece of equipment that was at the very centre of this system. Power by Particle Xenon and Argon devices, this system consisted of several nodes, all working in conjunction to ensure freshly roasted coffee beans was stored and dispensed as needed as per their secret recipes.
It was my very first project that we started a while back, but I decided to share some of it anyway.
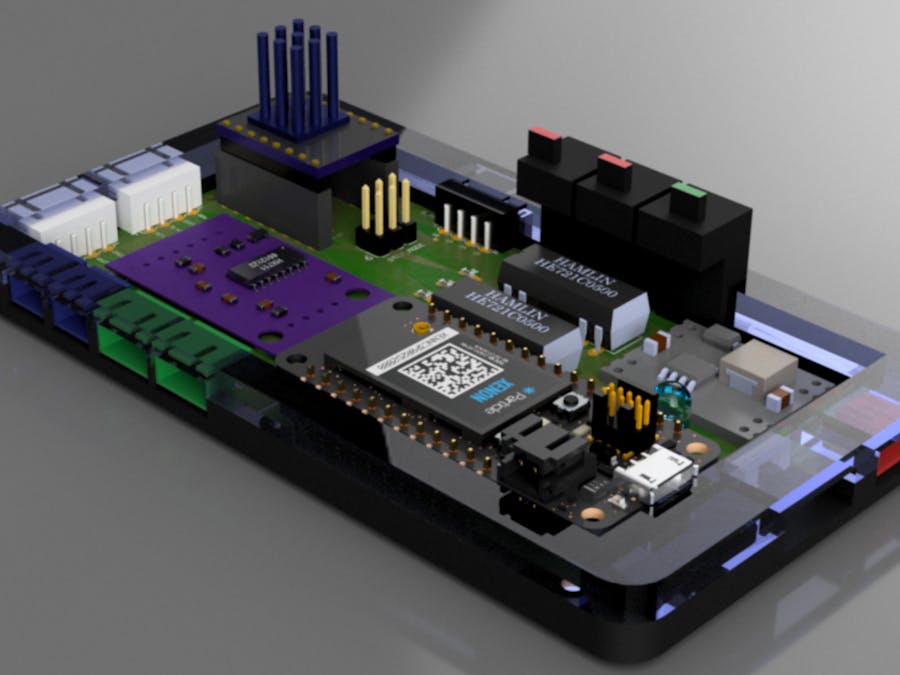
The system comprised of 8 control boxes which is the unit I will be sharing here. Each unit has the capability to control:
- 2 x 24V Solenoid Valves
- 2 x Load cells
- Nema 23 Stepper motor
- 2 x Analogue sensor inputs
These units were set up as a Mesh Network with a Argon acting as the Gateway. The idea was to have the roasted coffee beans stores in six solo's with controlled atmospheres in order to prevent roasted coffee from going stale. Further to this, the six recipes were mix automatically by dispensing the appropriate amount of each component needed into a small trolley that traveled on a rail track to the mixer.
Below is a short clip of the trolley in the initial stages travelling and taking turns (and getting stuck - lol)
I tried embedding the video but no luck... just click here :)
Back to what I am sharing in this post:
First thingsAs the code for the project is proprietary information, I put together a simple control and monitoring sketches to showcase functionality. The sketches will show you have to send and receive data between BLYNK and both Gateway as well as End Point devices (nodes).
Disclaimer:Idid not have a load cell at the time of putting this together, so the load cell code is untested.
The enclosure designTo match the look and feel of the Roastery, I wanted some sort of a retro meet tech design, hence the old school radio look on the top cover. Due to numerous manufacturing restrictions, the only option was to go with several layers of Plexiglass making up a single unit.
The PCBNOTE: #define dirPin D8 and NOT A0 as in code attached.
As this was my very first PCB design and was still finding my way around Eagle, it comprised mostly of modules placed on a PCB as apposed to a "component level design". We all have to start somewhere right :)
I tried to keep the design as compact as possible, more or less the size of a smartphone with a slightly higher profile due to some key components placed on headers.
To accommodate the two solenoids valves and the TMC Stepper driver (and to keep cables to a minimum), we had to supply each module with 24V. The Buck converter steps the voltage down to 5V for the rest of the components whilst the Reed relays sends 24V to the solenoid valves when triggered. The Stepper driver also receives 24V to power the Nema23 Stepper Motor as can be seen on the Schematic.
Several JST connectors are put n place in order to connect external devices and sensors. A master on/off switch lets you disable all power to the unit.
I have included a 5mm RGB LED that is used to to indicate system status. Three SMD LED's are used to indicate whether:
- Device is connected to the Network
- Stepper Motor is running
- Solenoid Valve is in operation
The Stepper Motor driver, Xenon and relays are installed on headers for easy replacement.
Unfortunately this part is all proprietary information as it also includes their super secret recipes.
I have however put together a brief sketch that should give you basic functionality of all of the components as well as Monitoring and Controlling via Blynk.
To say there were several would probably be an understatement. I think one of the biggest challenges was to the BLYNK working in both direction with all Mesh devices, Argons and Xenons. Thanks to a great post by Jared Wolff I was able to het it working!
The bottom line, BLYNK does not work directly with Xenon's and the work-around would be to publish the information first, have the gateway device subscribe to that channel and then send the data to BLYNK. Once working, it runs smoothly without any problems.
ConclusionA lot can be done in with a small footprint if some careful consideration is put into the design. Below is an image of the POC units these replace in the final product. A huge improvement!
And here is the final version of the DMASS Control unit, you be the judge :)
All and all it was a great project to be part of. I hope you can find this unit (or some part thereof) useful or inspirational in some way.
Thank you for reading and ALWAYS Keep innovating!!


_t9PF3orMPd.png?auto=compress%2Cformat&w=40&h=40&fit=fillmax&bg=fff&dpr=2)


_3u05Tpwasz.png?auto=compress%2Cformat&w=40&h=40&fit=fillmax&bg=fff&dpr=2)
Comments
Please log in or sign up to comment.