Looking for a new project to build around the Raspberry Pi Zero, I came across the pHAT DAC from Pimoroni. This little add-on board adds audio playback capabilities to the Pi Zero. Because the pHAT uses the GPIO pins, the USB OTG port remains available for a wifi dongle. Perfect for a small wireless speaker project!
Hardware
The project is fairly simple and requires following components:
- Raspberry Pi Zero
- pHAT DAC
- Mono 2.5W Class D Amplifier
- WiPi wifi dongle
- Two 100 ohms resistors
- Speaker (4-8 ohms)
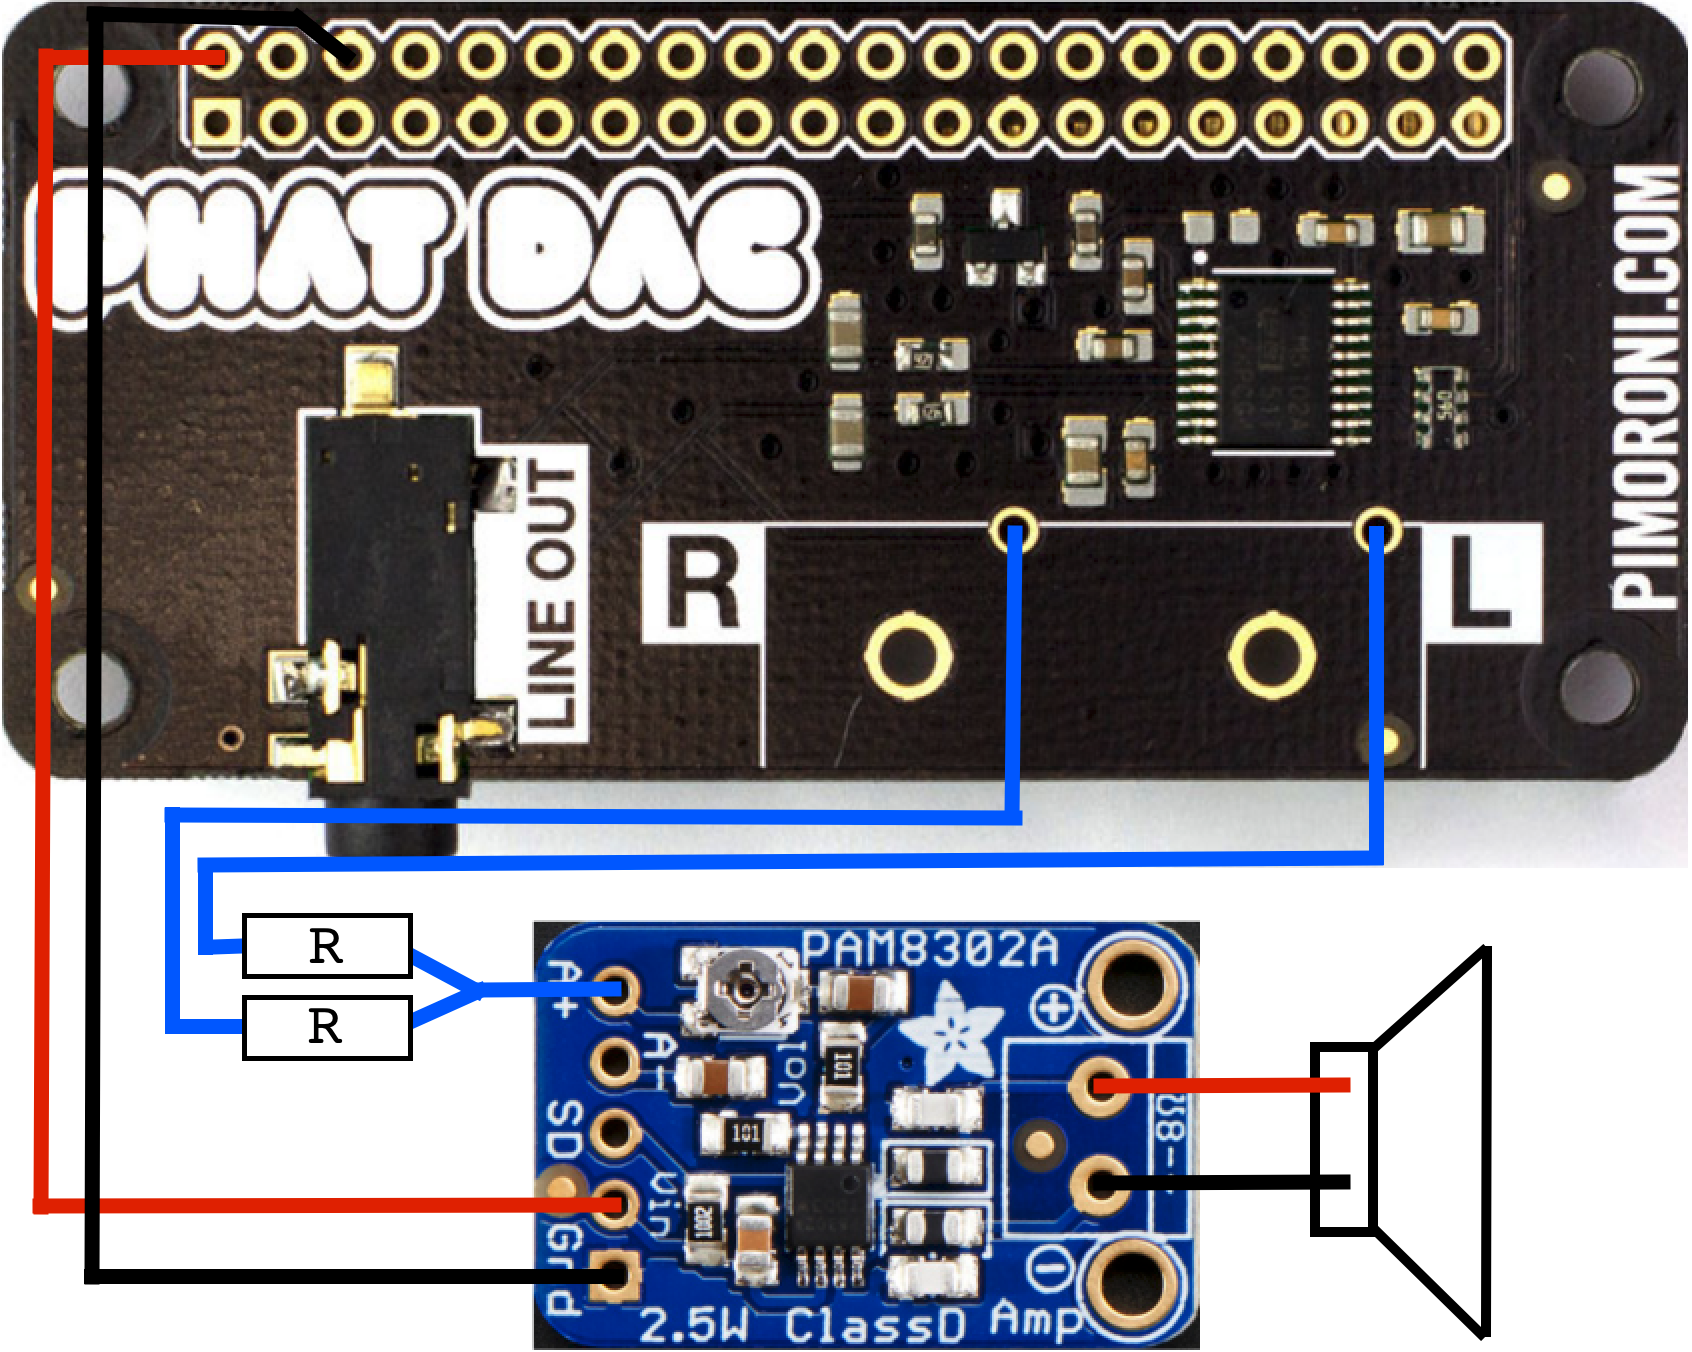
The Raspberry Pi Zero is obviously the brains of the project and will run the Shairport software to wirelessly stream music to. The pHAT DAC is a neat little add-on board adding audio to the Raspberry Pi. It has a jack output, and the possibility to add RCA connectors to it. The fact that the RCA connectors are not presoldered is a bonus, as it exposes the audio lines and keeps a low profile. A small mono amplifier from Adafruit then takes the audio from the pHAT and amplifies it (what else?), playing audio from the speaker. A wifi dongle connected via the USB OTG port provides wireless network connectivity for streaming.
I decided to make a mono speaker to keep things smaller. Making this project with stereo support would imply having a second speaker and replace the mono amplifier by a stereo one.
I know this isn’t the nicest way to convert stereo to mono (at all?), but it works. I tried to tackle the problem from a software point of view by downmixing the stereo to mono, but with no success. If I do manage to find a proper solution, ideally in software, I’ll be sure to update this post. If anyone has tips on how to achieve this in a simple way, feel free to leave it in the comments!
Software
On the software side, nothing too difficult either.
I started off from the latest Raspbian Jessie image which can be downloaded from the official Raspberry Pi website.
Using “dd”, I put the downloaded image on a 8Gb microSD card and then used it to boot the Pi Zero from.
sudo diskutil list
sudo diskutil unmountDisk /dev/disk3
sudo dd if=Downloads/2015-11-21-raspbian-jessie.img of=/dev/disk3 bs=1m
sudo diskutil unmountDisk /dev/disk3
Once booted, I set up the wifi in the graphical desktop environment by selecting the correct SSID and entering the wifi password. With the Pi Zero connected to the network, I could update the software.
sudo apt-get update
sudo apt-get upgrade
Then came the time to install the project specific software: support for the pHAT DAC and the AirPlay software.
pHAT DACA tutorial on how to install and use the pHAT DAC is available on the Pimoroni website. I did things slightly differently though, as I didn’t disable the default sound driver.
Device-tree overlay is used to describe hardware. As the pHAT DAC uses the same hardware as the HiFi Berry, the same overlay can be used by appending the following lines to the config file:
pi@raspberrypi:~ $ sudo nano /boot/config.txt

# pHAT DAC
dtoverlay=hifiberry-dac
After rebooting, I listed the audio devices using the “aplay” application, and there it was: card 1 – HiFi Berry.
pi@raspberrypi:~ $ aplay -l

**** List of PLAYBACK Hardware Devices ****
card 0: ALSA [bcm2835 ALSA], device 0: bcm2835 ALSA [bcm2835 ALSA]
Subdevices: 8/8
Subdevice #0: subdevice #0
Subdevice #1: subdevice #1
Subdevice #2: subdevice #2
Subdevice #3: subdevice #3
Subdevice #4: subdevice #4
Subdevice #5: subdevice #5
Subdevice #6: subdevice #6
Subdevice #7: subdevice #7
card 0: ALSA [bcm2835 ALSA], device 1: bcm2835 ALSA [bcm2835 IEC958/HDMI]
Subdevices: 1/1
Subdevice #0: subdevice #0
card 1: sndrpihifiberry [snd_rpi_hifiberry_dac], device 0: HifiBerry DAC HiFi pcm5102a-hifi-0 []
Subdevices: 1/1
Subdevice #0: subdevice #0
To make it the default for audio playout, I updated the asound.conf file and replaced every reference to “card 0” by “card 1”.
pi@raspberrypi:~ $ sudo nano /etc/asound.conf

pcm.!default {
  type hw
  card 1
}

ctl.!default {
  type hw
  card 1
}
A final reboot ensured everything was applied.
ShairPortShairport is an Airtunes emulator, allowing compatible iOS devices or iTunes to stream audio to the device running it.
A few dependencies need to be met before Shairport can be installed and run.
pi@raspberrypi:~ $ sudo apt-get install git libao-dev libssl-dev libcrypt-openssl-rsa-perl libio-socket-inet6-perl libwww-perl avahi-utils libmodule-build-perl
pi@raspberrypi:~ $ git clone https://github.com/njh/perl-net-sdp.git perl-net-sdp
pi@raspberrypi:~ $ cd perl-net-sdp/
pi@raspberrypi:~/perl-net-sdp $ perl Build.PL
pi@raspberrypi:~/perl-net-sdp $ sudo ./Build
pi@raspberrypi:~/perl-net-sdp $ sudo ./Build test
pi@raspberrypi:~/perl-net-sdp $ sudo ./Build install
With the dependencies taken care of, the actual Shairport software can be installed.
pi@raspberrypi:~ $ git clone https://github.com/hendrikw82/shairport.git
pi@raspberrypi:~ $ cd shairport/
pi@raspberrypi:~/shairport $ make
At this stage, it’s possible to test if everything was installed properly by manually running the shairport.pl script.
pi@raspberrypi:~/shairport $ ./shairport.pl -a AirPi
Afetr confirming everything works as expected, the shairport application can be daemonized in order to have it automatically start at boot.
pi@raspberrypi:~/shairport $ sudo make install
pi@raspberrypi:~/shairport $ sudo cp shairport.init.sample /etc/init.d/shairport
pi@raspberrypi:~/shairport $ sudo chmod +x /etc/init.d/shairport
pi@raspberrypi:~/shairport $ sudo update-rc.d shairport defaults
Finally, the shairport file needs to be modified in order to specify the name of the AirPlay device. This could be anything you want. In my case, I picked something generic, such as “AirPi”.
pi@raspberrypi:~/shairport $ sudo nano /etc/init.d/shairport

#DAEMON_ARGS="-w $PIDFILE"
DAEMON_ARGS="-w $PIDFILE -a AirPi"
Reboot the Pi. Shairport should be running automatically.
Enclosure
Time to package the working AirPlay speaker into something nice, by making a good looking enclosure for it.
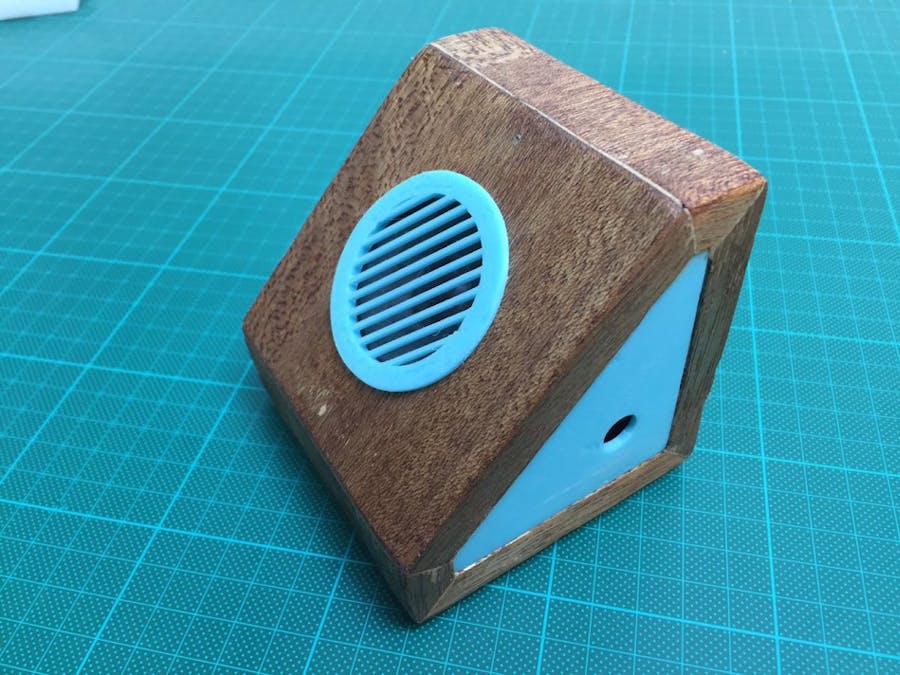
This was actually the hardest part of the project. Mainly because I wanted to make it out of wood and with a slightly tricky shape. It meant doing some maths before cutting pieces at the right length using the miter saw and then ensuring the correct angles were cut as well in order to properly connect the pieces. As I’m not a woodworker, and the tools at my disposal are not the most suited either, the results are not always as accurate as you’d expect. That’s where sanding paper and wood filler come to the rescue …
Some accents were given to the build by adding 3D printed parts: the side panels and the speaker grill. One of the side panels was not glued into place and can be removed if needed, in order to access the electronics. I was hesitating to paint the 3D printed parts in a different color for a chrome or brass look, but ended up leaving the pieces as is. It gives the build a little funky side, no ?
Like the project? What else would you make with a Pi Zero? Let me know in the comments!
Related


Comments
Please log in or sign up to comment.