Because sometimes it is very difficult to get up in the morning, I decided to make an alarm clock, that really gets you out of the bed. The idea is to use a motion sensor so that the alarm clock knows if you went back into your bed after hitting the snooze button. If that is the case the alarm will go off again. Otherwise if you were up long enough (for example 2 minutes) the alarm clock will not go off anymore. During this time you have to be approximately in front of the sensor (within a few meters) where you could already start your morning routine.
AssemblyFor this project we need a clock module, a motion sensor, a buzzer, a small button and an Arduino.
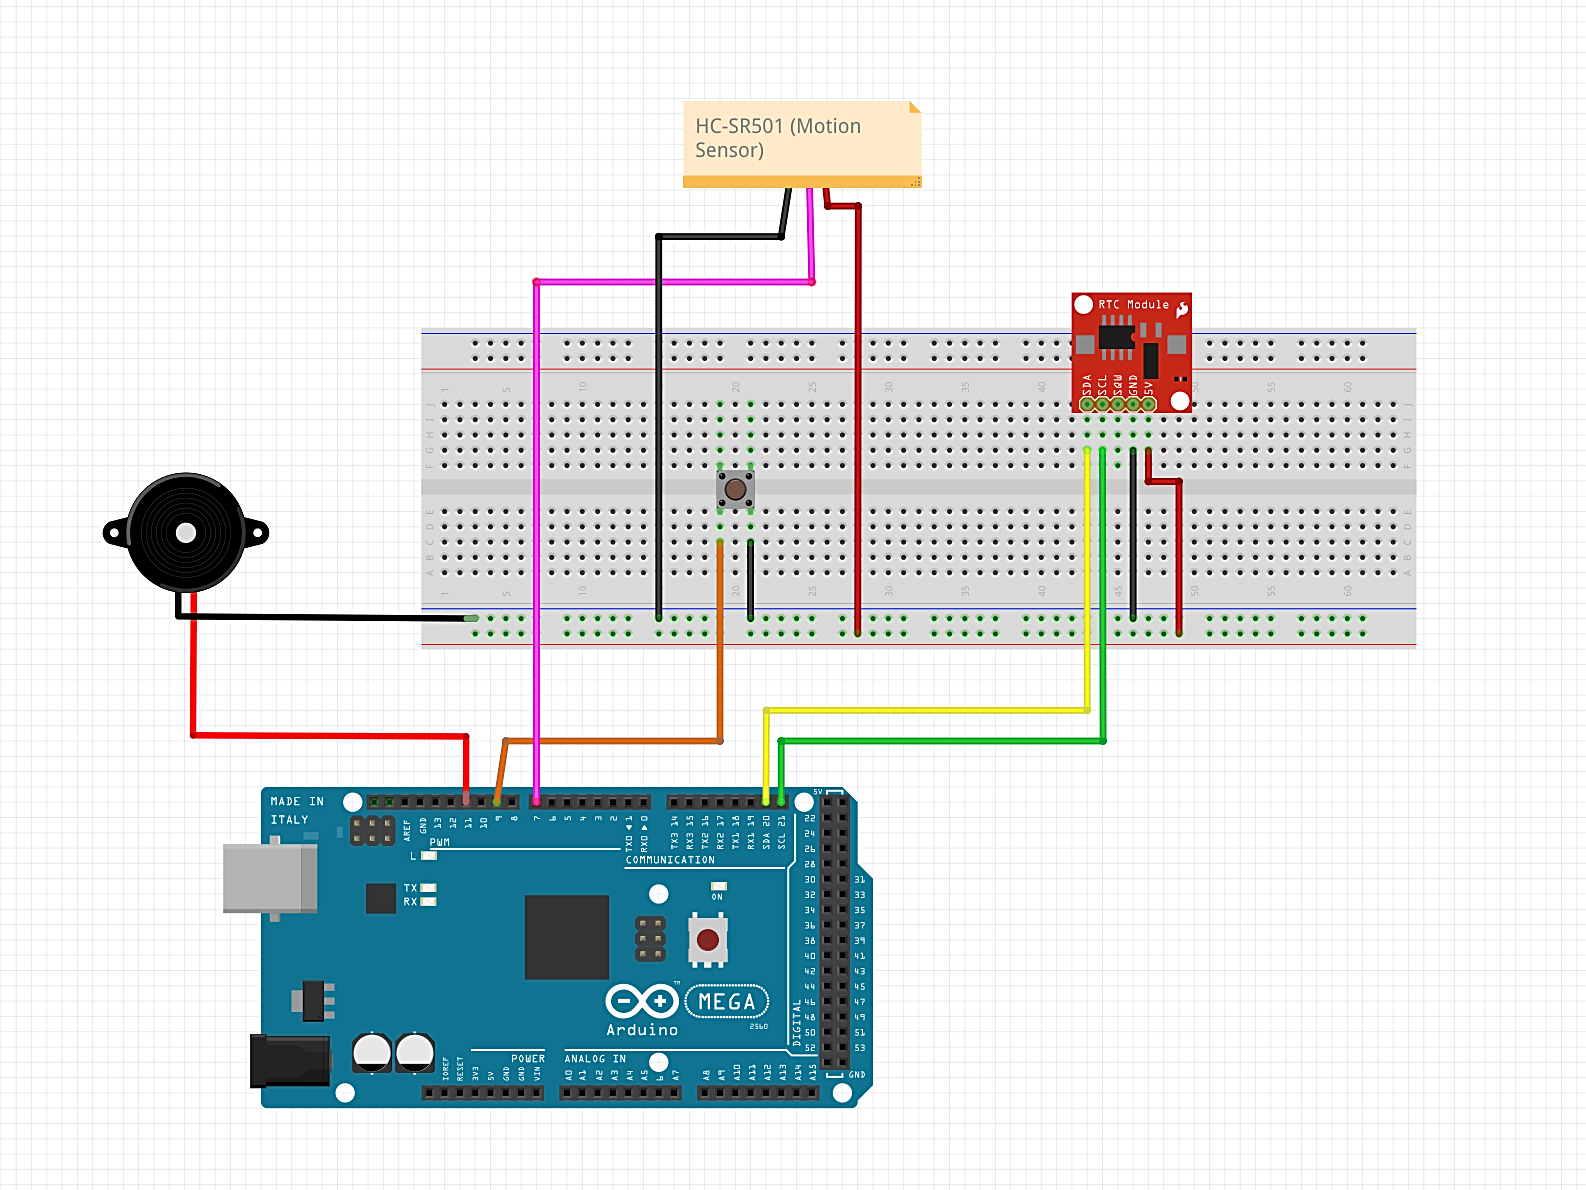
Now everything needs to be wired up:
- the negative pin from the buzzer --> GND
- the positive buzzer pin --> D11
- button pin --> GND
- the other button pin --> D9
- motion sensor VCC --> 5V
- motion sensor output --> D7
- motion sensor GND --> GND
- clock module GND --> GND
- clock module VCC --> 5V
- clock module SDA --> SDA (pin 20 for the Mega2560)
- clock module SCL --> SCL (pin 21 for the Mega2560)
After wiring up as shown in the schematics:
First you need to download the ZIP-file from the code section. This is the library for the clock module. If you have difficulties adding the file to your library, you can follow the instruction which is also in the code section.
Now you can upload the code from the software section. Right after you have uploaded the code, you have to comment out the line:
clock.setDateTime(__DATE__, __TIME__);
This line is in the setup function.
Now you should directly re upload the code.
If you don't comment it out, the time in the clock module will be reset to the last upload time every time you reset the board.
After that you can set the time when the alarm should go off. You can set the hour of the day and the minute:
//--------------------------------------
int set_hour = 6;
int set_minute = 55;
//--------------------------------------
Now the alarm will ring everyday at this time. It would also be possible to edit the code, so that you can have a different time for the weekend or some other days.
Now if you power the alarm clock, it will wait until the set time. Then the alarm() function will be executed. At first it will start to beep until you press the snooze button. After that the motion sensor looks if there is a person in front of it. You have to be in front of the sensor for a given period of time and you also have to move a bit, so that the motion sensor gets triggered. If you keep within the vision of the motion sensor for long enough there will be a short beeping signal to tell you that the alarm is now disabled for the day and it will wait until the next morning.
However if you go back to bed during the time after you pressed the button, the alarm will go off and the whole procedure will start over again. So this alarm clock makes sure you don't just turn of the alarm and go back to bed. Hopefully after the time you stood in front of the sensor you are awake enough to not go to bed again.
In this line you can adjust the time (in minutes) during which you have to be in front of the sensor:
if(abs(dt.minute - minute) >= 1){ //set the time period where you must //be in
The motion sensor will need some adjustment in order to work properly for this alarm clock. First we have to place the trigger selection jumper into the right place. It needs to be in repeatable trigger mode!
Now you also have to adjust the time delay and the sensitivity. For me it worked best when I set the sensitivity to the maximum and the time delay a bit over the minimum. The time delay determines how long after the last detection of a person the output is high. If the delay is too short then it is very difficult to keep the alarm from going off again because the sensor will not always detect you. On the other hand if the delay is too long then the alarm will not notice if you go back to bed again.
After some testing we are ready to make the alarm clock more compact. For that I use an Arduino Nano Every but you can also use pretty much any other Arduino board for that.
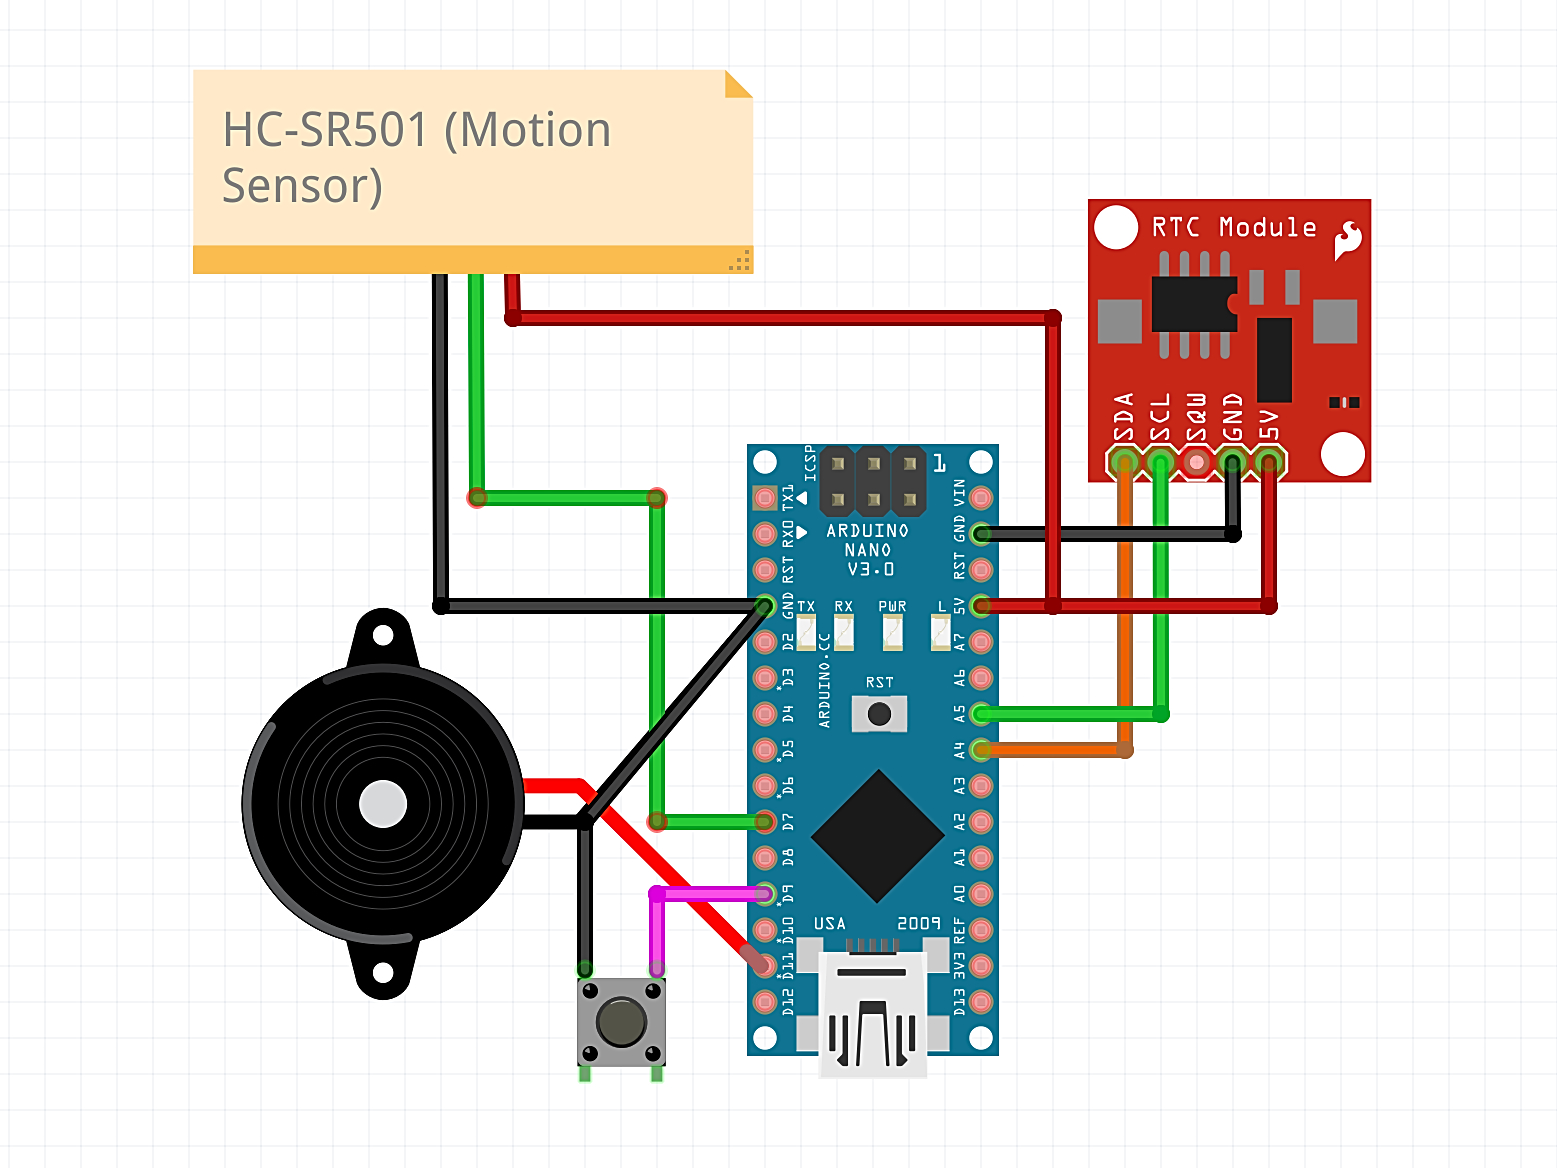
We begin with soldering everything together according to the second schematics (it is basically the same as before only without the breadboard).
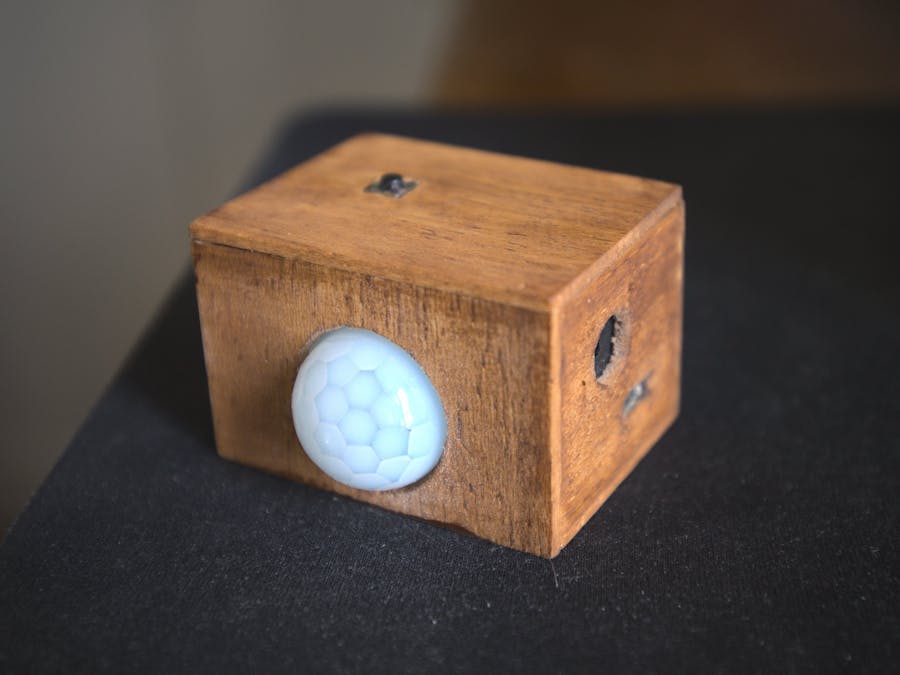
After testing if everything is still working we can build a case for the alarm clock. I decided to make the case out of 3mm balsa wood because it is very easy to work with. Here are a few pictures of the process of building the case. The dimensions of my case are 55mm x 35mm x 40mm.
I made a big hole for the motion sensor and also a slot for the micro USB cable and an opening for the speaker.
The finished alarm clock:


Comments
Please log in or sign up to comment.