gaonthegrace
Published © GPL3+

Piano Tiles automatic Robot

Kid and his father make Piano Tiles automatic Robot.

BeginnerWork in progress3,585
Piano Tiles automatic Robot

Things used in this project

Hardware components

Arduino UNO Wifi Rev.2
×1
SG90 Micro-servo motor
×1
Photo resistor
Photo resistor
×1

Software apps and online services
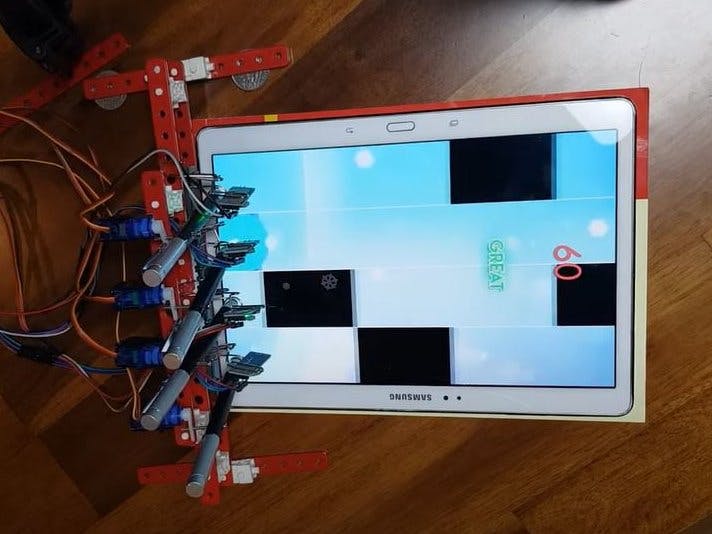
Arduino IDE
Arduino IDE

Story

Read more

Schematics

schmetics_arduino_pianotiles_200414

Code

Piano tiles code

Arduino
#include <Servo.h>
Servo myservo_0;
Servo myservo_1;
Servo myservo_2;
Servo myservo_3;

void setup() {

myservo_0.attach (11);  
myservo_1.attach (10);  
myservo_2.attach (9);  
myservo_3.attach (3);  

pinMode(A0, INPUT);
pinMode(A1, INPUT);
pinMode(A2, INPUT);
pinMode(A3, INPUT);
Serial.begin(9600);
}

void loop() {

int light_0 = analogRead(A0);
Serial.println(light_0);  
int light_1 = analogRead(A1);
Serial.println(light_1);
int light_2 = analogRead(A2);
Serial.println(light_2);
int light_3 = analogRead(A3);
Serial.println(light_3);        


if(light_0 > 400)
 {
      
for (int angle_0=0; angle_0<180; angle_0+=3)  
     {
      myservo_0.write(angle_0);  
      delay(5); 
     }
  }
else  
{
  int angle_0=0;
  myservo_0.write(angle_0);  
  delay(5);  
 }


if(light_1 > 400) 
 {
      
for (int angle_1=0; angle_1<180; angle_1+=3) 
     {
      myservo_1.write(angle_1); 
      delay(5);  
     }
  }
else  
{
  int angle_1=0;
  myservo_1.write(angle_1); 
  delay(5); 
 }


if(light_2 > 400)
 {
      
for (int angle_2=0; angle_2<180; angle_2+=4)
     {
      myservo_2.write(angle_2);
      delay(5); 
     }
  }
else 
{
  int angle_2=0;
  myservo_2.write(angle_2);  
  delay(5);  
 }


 if(light_3 > 400)
 {
      
for (int angle_3=0; angle_3<180; angle_3+=3) 
     {
      myservo_3.write(angle_3);
      delay(5); 
     }
  }
else 
{
  int angle_3=0;
  myservo_3.write(angle_3);  
  delay(1); 
 }  

}

Credits

gaonthegrace
1 project • 1 follower
Contact

Comments

Please log in or sign up to comment.