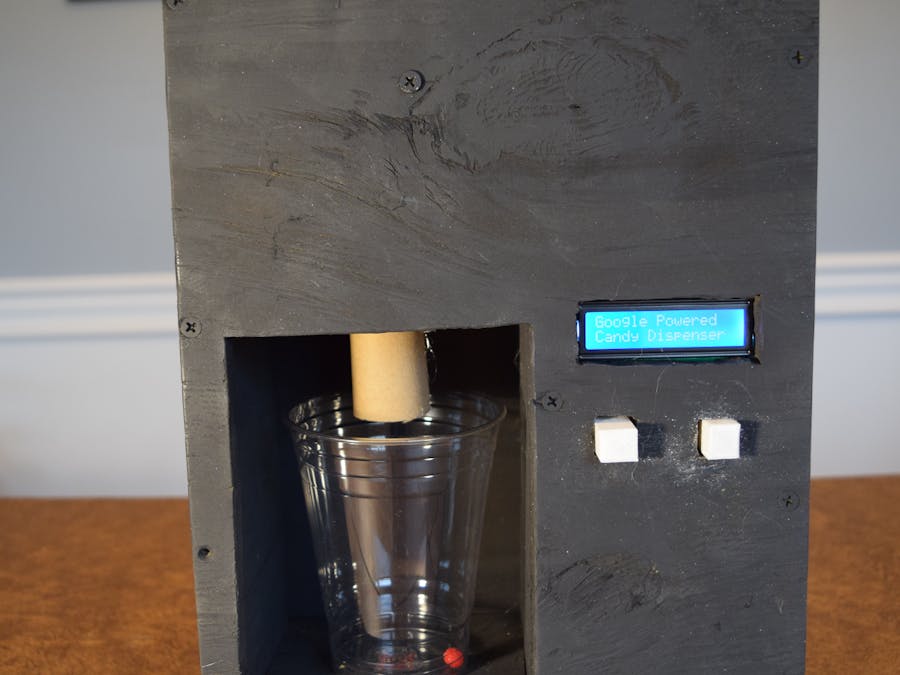
This is a comprehensive guide for building and using my Google Assistant Powered Candy Machine. It can be split up into these parts:
- Making and Using the Raspberry Pi with Google Assistant
- Coding and Setting up the Particle Photon
- Making an IFTTT Applet
- Creating the Wooden Box and the Mechanical Parts
- Coding the Arduino Mega 2560
- Installing the Electronics
- Testing and Usage
Here is a short demonstration video:
Making and Using the Raspberry Pi with Google AssistantFirst, I had to set up my Google Assistant. I don't have a fancy new Android phone that comes with it, nor do I want to go online to query the API. Thankfully, the wonderful people at Google have engineered a solution. They created an SDK in Python that can run as a service on the Raspberry Pi. Bundled with the Voice HAT and a mic array, along with a speaker and button, it is now possible to either clap or push the button to speak to the Google Assistant. I have been beta testing this device for about 2 months now, and it works very well. All you need to do is plug in the microphone sensor and button, as shown here:
After that, load the python files and run the service after adding your API credentials and the API to a new project in the Google Developers Cloud. Now, whenever you push the button or clap (with the right setup) you should be able to say "hello" and it will respond.
Coding and Setting Up the Particle PhotonThe first step to making your Particle Photon talk is creating a new project in the Particle build IDE. After it is created, copy and paste the provided code into the IDE. Save it and then flash it to your Photon. Now in the Particle Console you should be able to call the function and make the light blink. If that works, you are ready to create the IFTTT applet.
Making an IFTTT AppletThe first step is to head on over to ifttt.com and sign in.
Then, click on "My Applets" and make a new applet. Go ahead and select the "this" part.
Now, select the Google Assistant service and choose "Say a simple phrase". Put whatever you want in the fields. I chose "Give me some candy", "I want some candy", and "Can I have some candy?" for my queries. For the response I set it to say "Follow the on screen instructions to receive your treat."
Now for the "that" portion of your applet. Choose the Particle service and make it call a function. Choose the "give_candy" function on your device and set 200 for the input.
That should be it for the applet. To test it, say your phrase into Google Assistant and see if the light blinks on your Photon. If it does, well done!
Creating the Box and Mechanical PartsThis is the longest part of the project. It took me about 2 days to create, but it should be shorter for you because everything has been figured out by myself already.
First, 3D print all of the parts. You will need 1 auger (the 2 halves glued together), and then 2 of each- the button holder, the button, and the switch holder. After printing, assemble the buttons with the tact switches and make sure they work. Solder on wires with 10k pulldown resistors to complete the button assembly.
Lay Out ComponentsI laid out my components and the cardboard prototype for reference.
Now for the difficult part- creating the actual dispenser. I used about one piece of 2'x2'x.5" plywood for the structure. Here are some of the parts drawn out:
I then cut the wooden pieces out and screwed them together to form a basic box. The front wall had an LCD cutout and two places for the buttons.
I attached the auger to the servo, slipped the 1.5" PVC pipe T joint on it, and then screwed the servo onto the wall. I also attached a hinge and a door to the side so that everything in the back can be easily accessed.
I took a protein shake mixing bottle and cut a 1.25" hole into the bottom so it would line up with the top of the PVC pipe. It is also removable.
I then spray painted the dispenser black.
To keep it from scratching tables I added four rubber feet on the bottom of it.
That is the actual box finished.
Coding the Arduino Mega 2560You can just copy and paste the provided code into the Arduino IDE and upload it to the board.
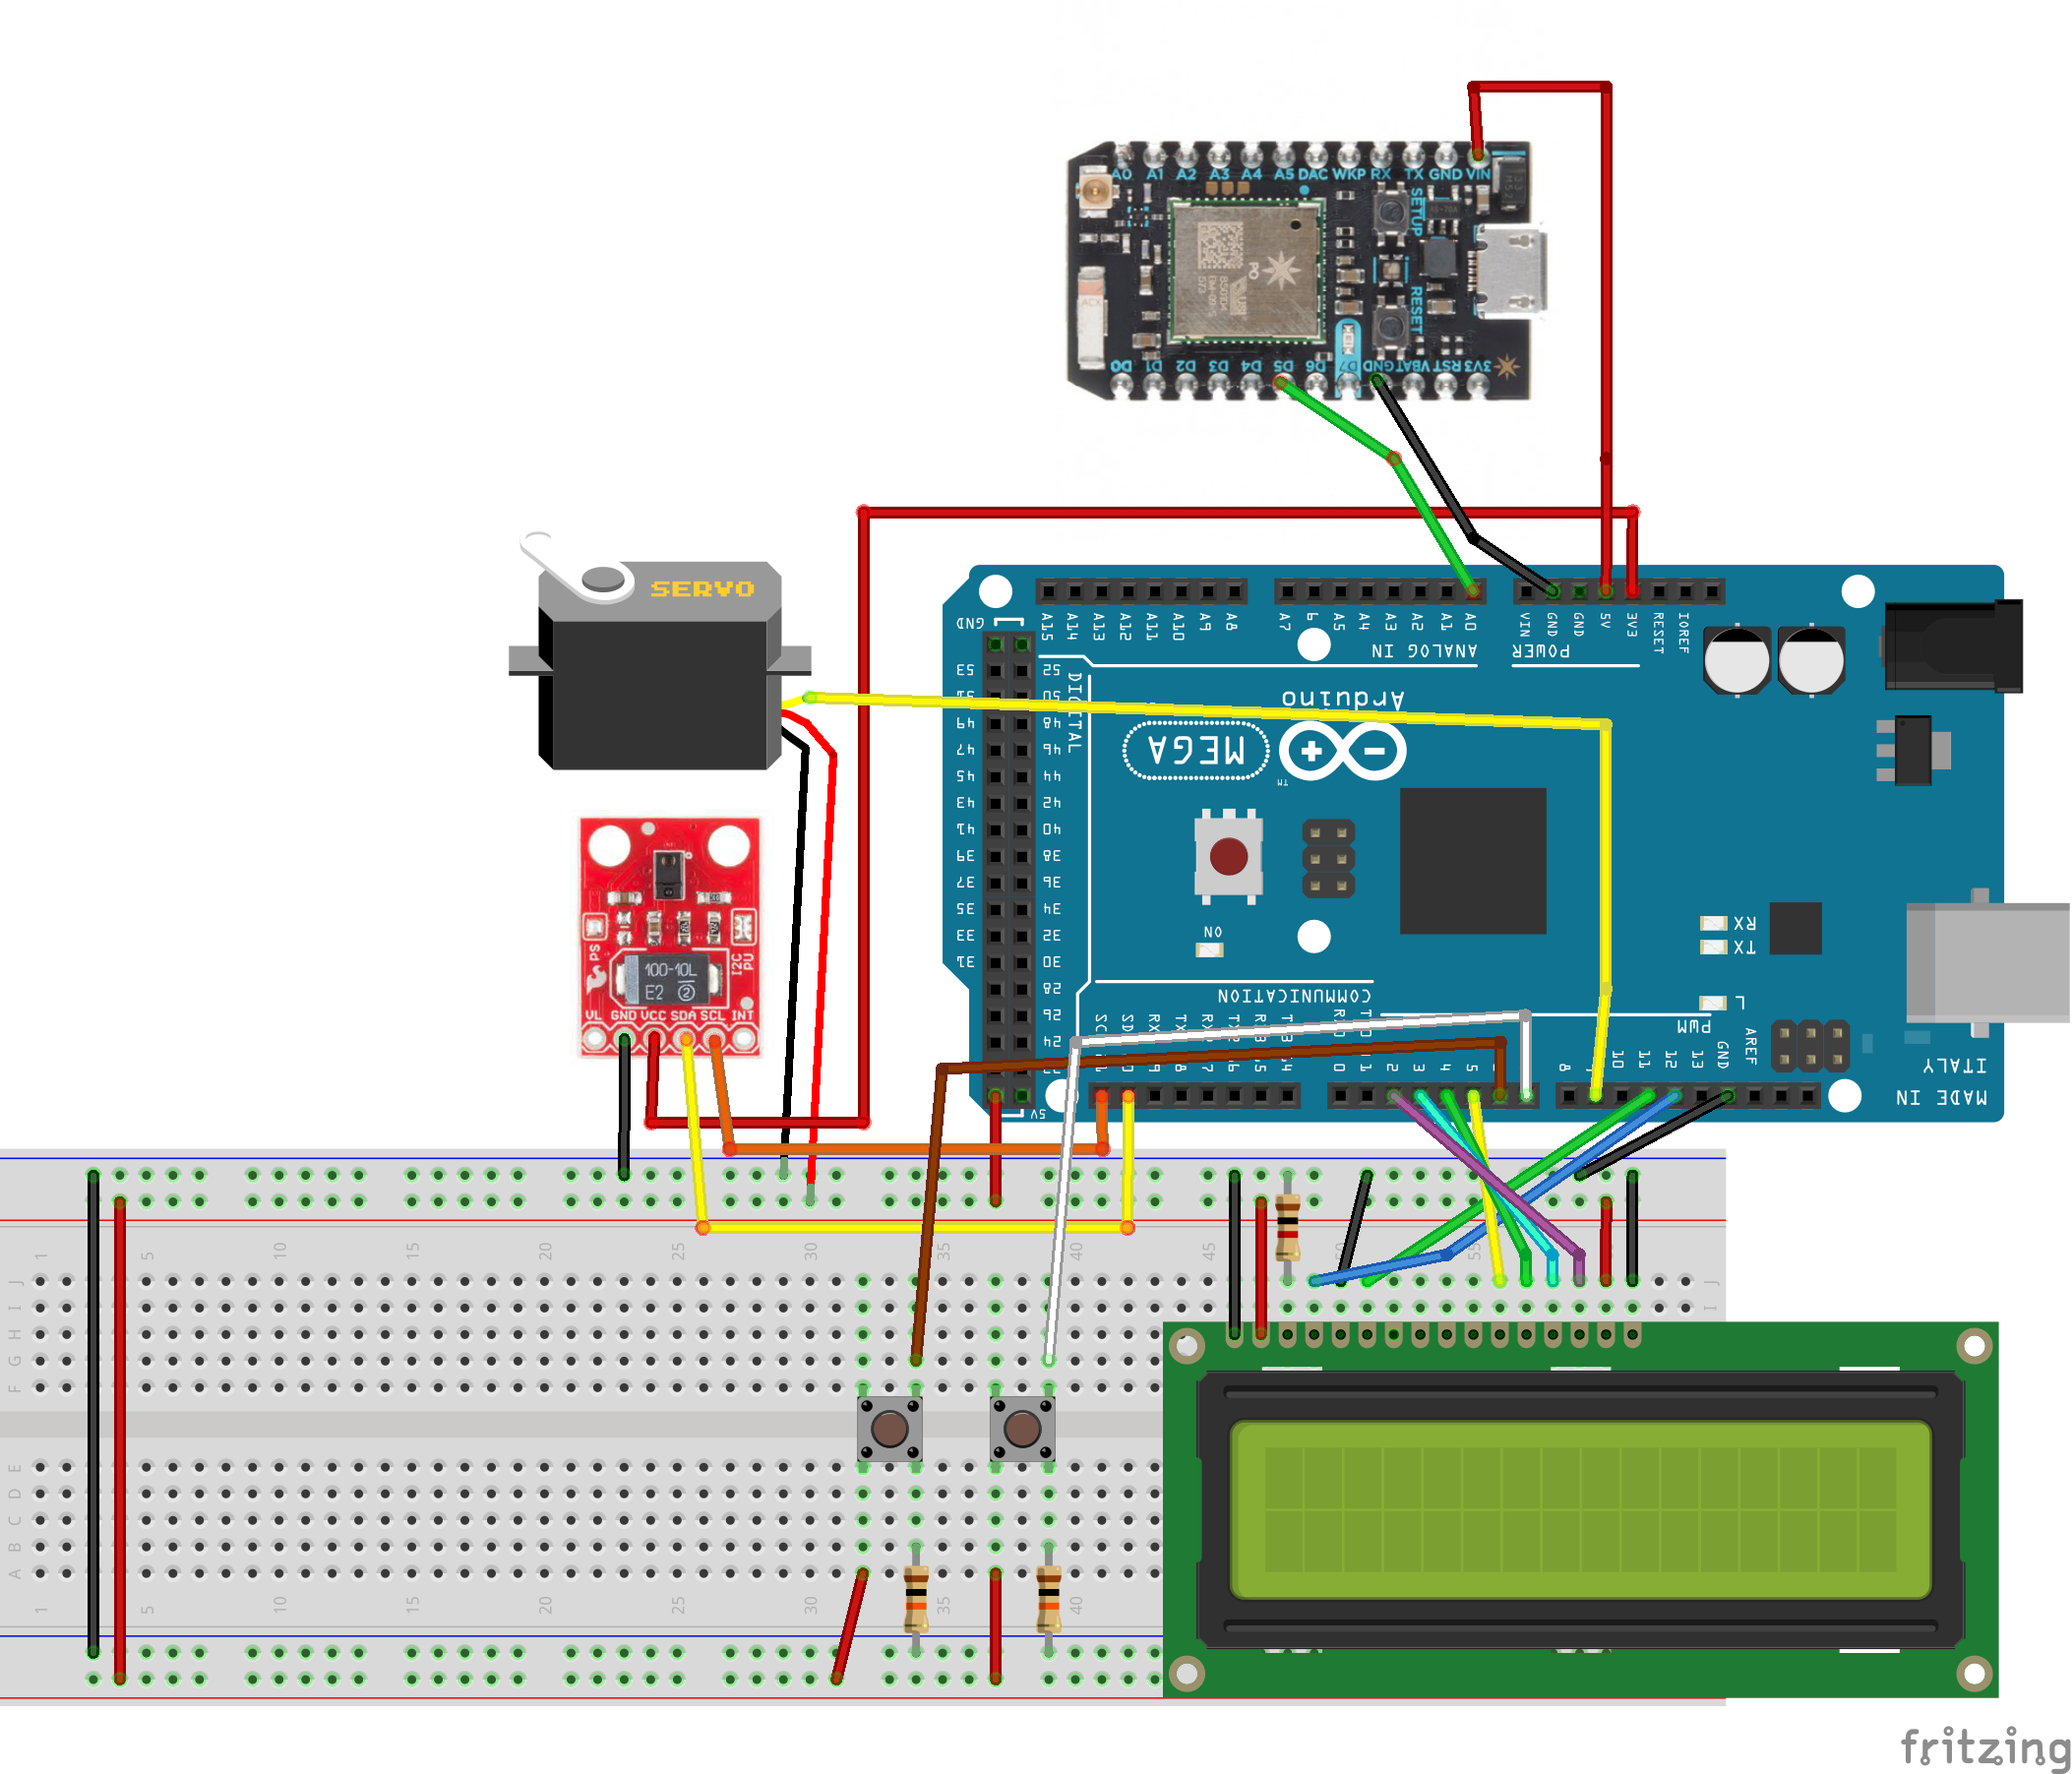
Installing the ElectronicsInstallation is fairly easy. I just hot glued the two perf board pieces and each component in place. In my build the electronics look very messy, but it is not a big deal, as the back panel covers it all up. Make sure the Particle Photon isn't blocked by any metal, as the metal can act as an RF shield, blocking the WiFi signal.
Now that the dispenser is completed, the Photon works, and the Google Assistant responds, it's time to test it. Just say your command, select an option from the LCD, and watch the auger turn.
Lastly, here is a quick video that explains each part.


_wzec989qrF.jpg?auto=compress%2Cformat&w=48&h=48&fit=fill&bg=ffffff)


_3u05Tpwasz.png?auto=compress%2Cformat&w=40&h=40&fit=fillmax&bg=fff&dpr=2)
Comments
Please log in or sign up to comment.