


Hardware components | ||||||
 |
| × | 1 | |||
Software apps and online services | ||||||
| ||||||
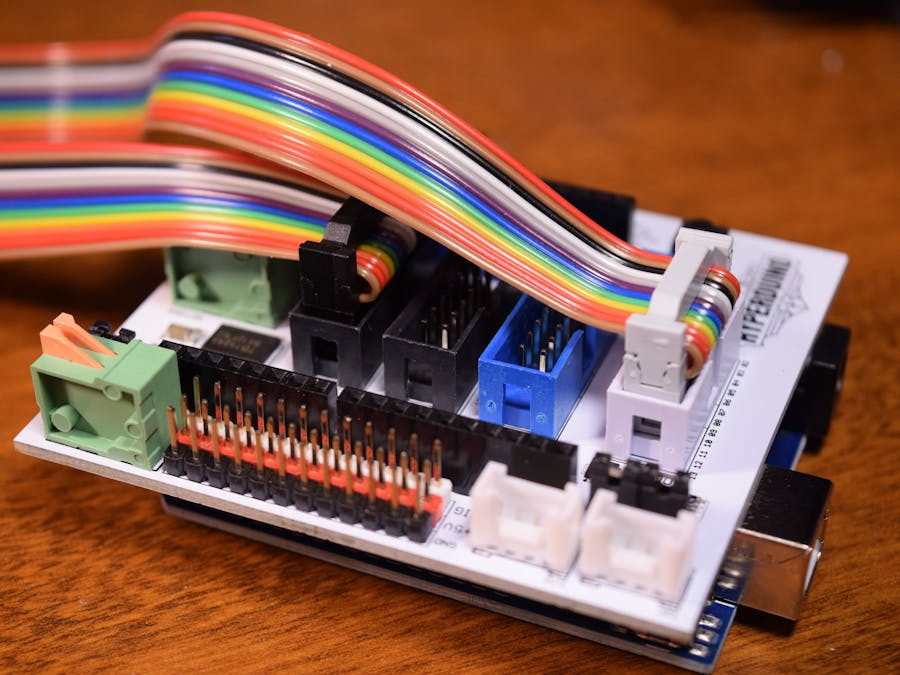
I was recently sent a media-electronics linking kit called the HyperDuino from its creator, Roger Wagner. It lets users easily add narration, lights, and touch interactivity to school projects, such as science fair posters or dioramas.
I received the HyperDuino+R version of the kit, which can be used as the controller in smart cars. The company also included a bonus of an LCD and MP3 player for me to try out.
The box arrived in good condition with plenty of packing materials. I started by removing the “+R” portion to the right of the main box first.
Then, I unclasped the main box and removed the main board, ribbon cables, and the miscellaneous components. The ribbon cables came nicely bundled and organized, as did the LEDs and documentation.
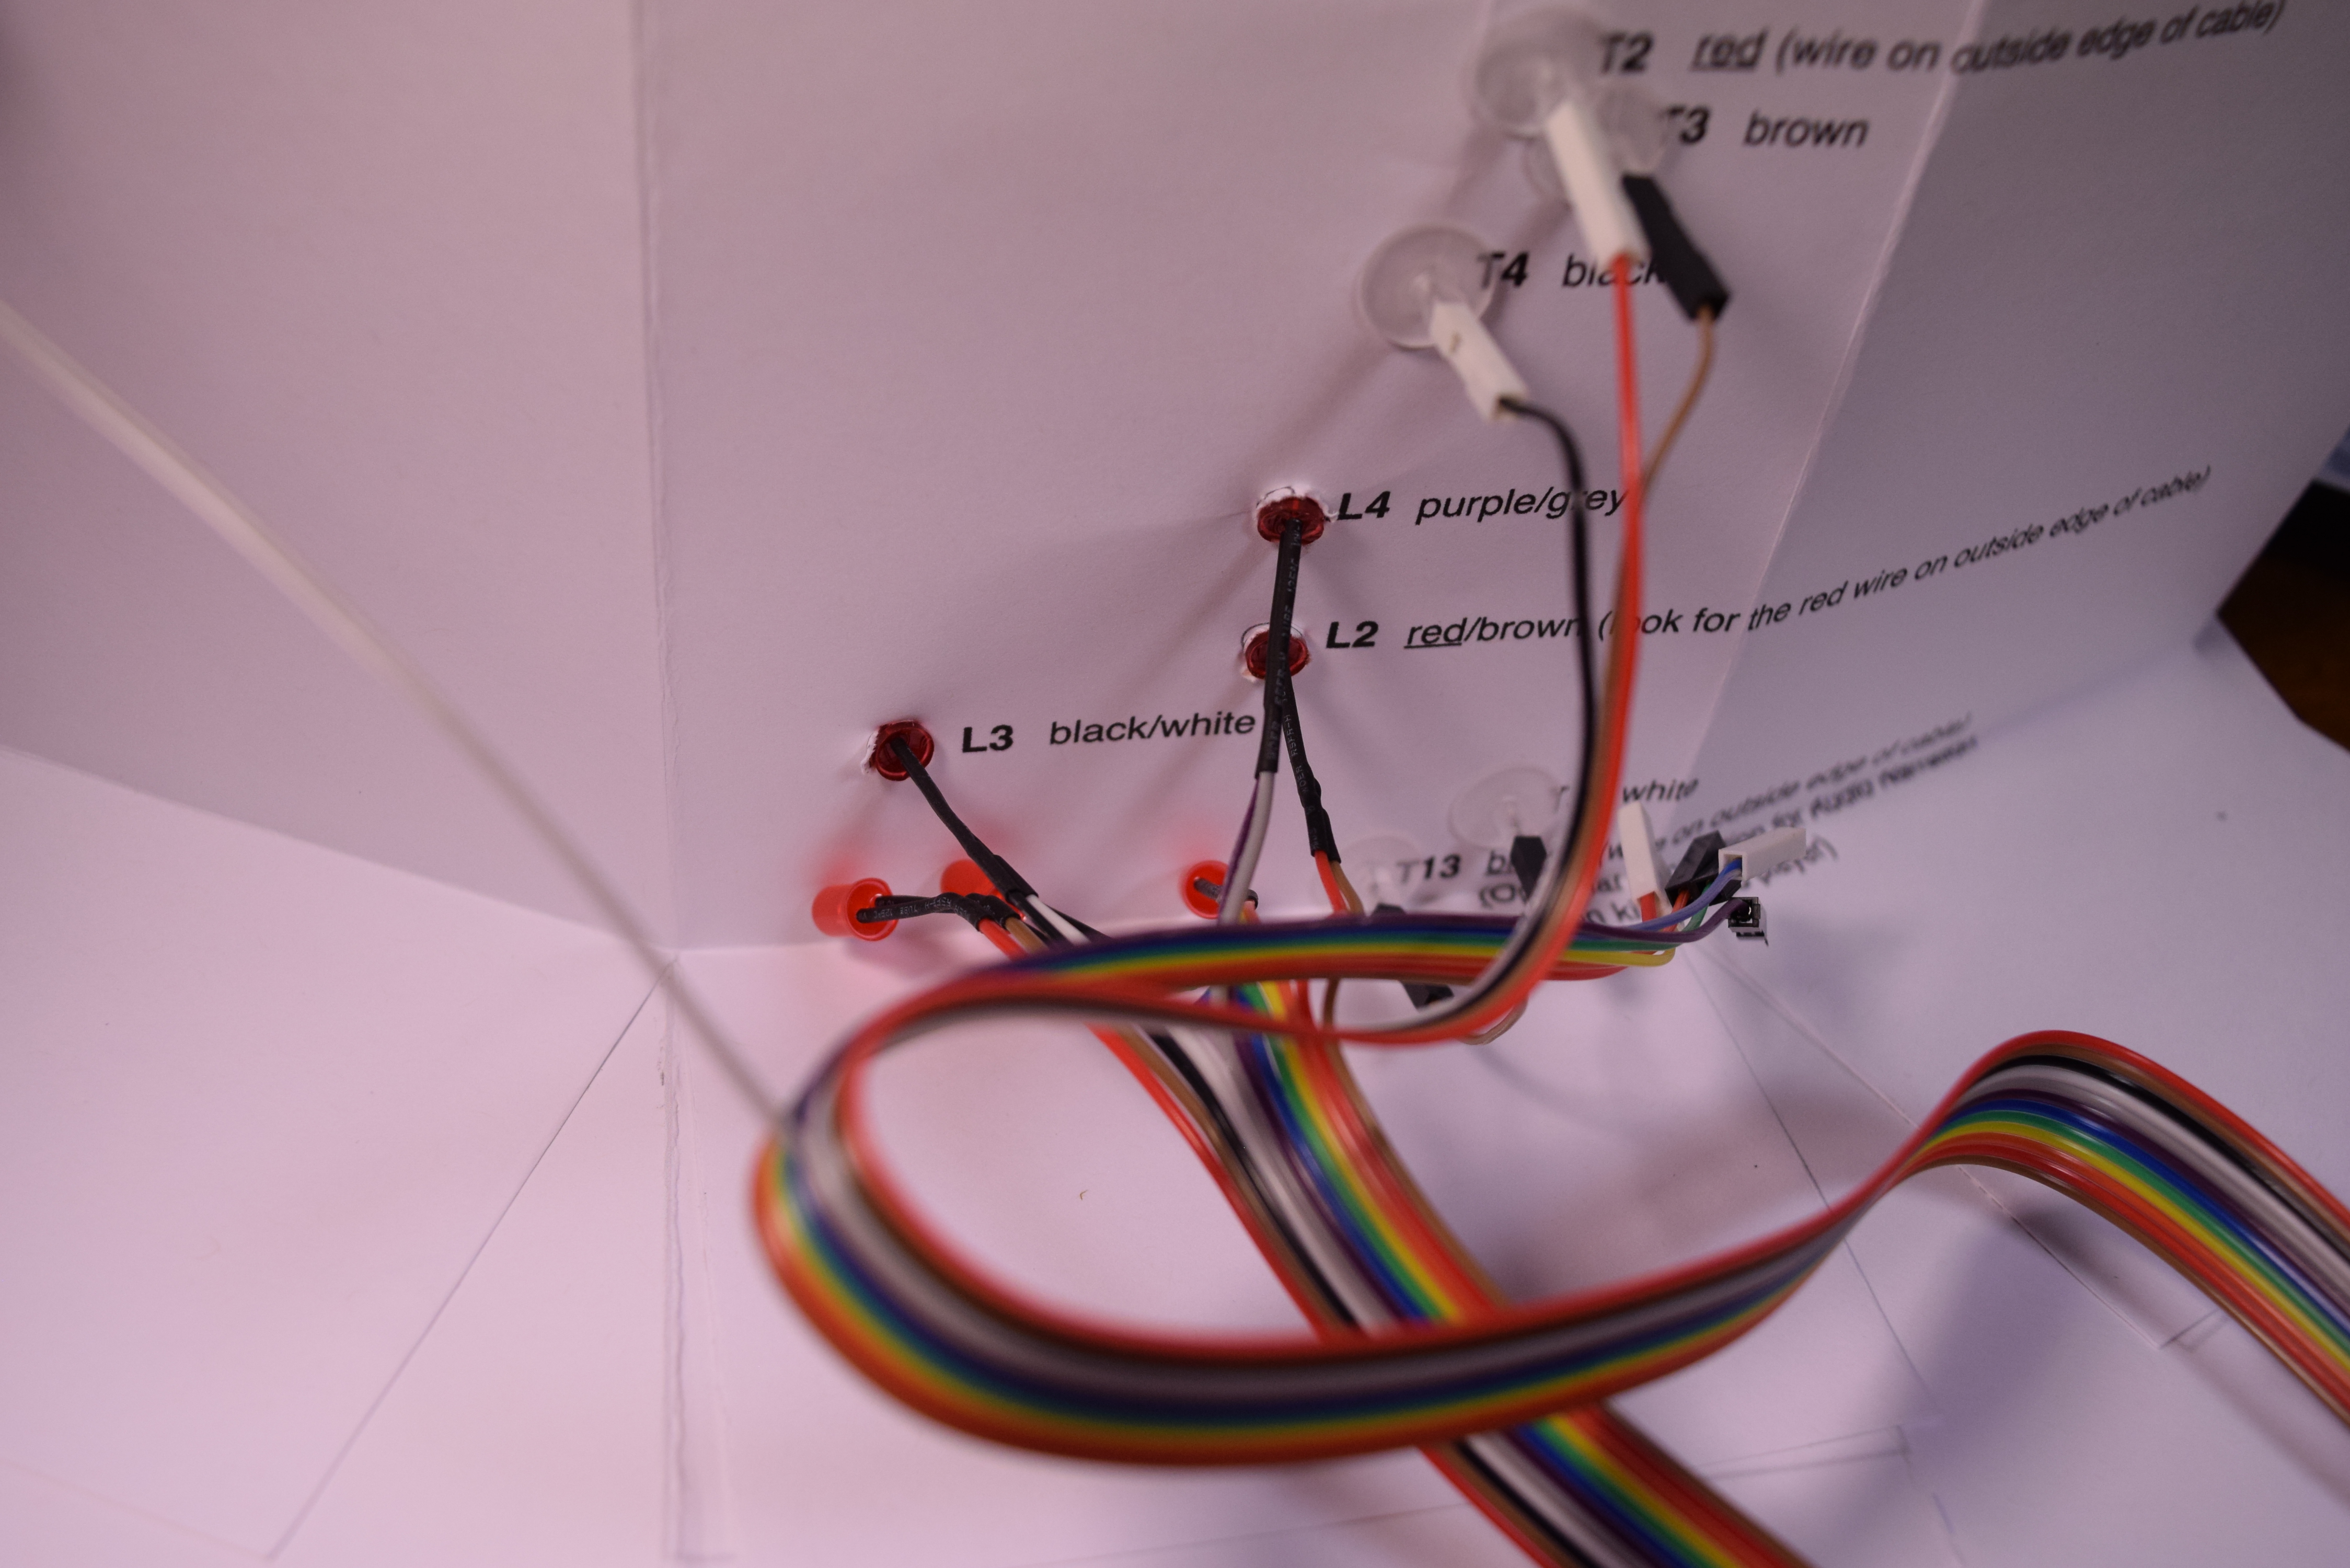
Thankfully, the first project came included with the kit. It is a mini volcano poster that demonstrates the capabilities of the kit very well. I started by downloading the tutorial at https://hyperduino.com/resources/HyperDuino%20Graphic%20Guide.pdf and then gathering the necessary components.
Next, I installed the metal touch pins into their respective locations, along with their silicone backstops to hold the pins in place.
Then I poked holes into the printed volcano and installed its respective LEDs. I also attached the correct jumper wires to the corresponding touchpoints and then connected everything to the HyperDuino shield.
Since I received the +R version, I also joined the MP3 player module with the shield and speaker. Now that everything was connected, it was time to plug in the included 9v battery.
I was able to touch each point and cause the speaker to output the relevant information. Here is a very short video to see how it functions:
Media Linker ExtensionWhile messing around with a volcano project printed on cardstock is fun for about ten seconds, it soon becomes necessary to utilize more of the functions on the board. This is where the media linker software comes in. It allows for videos and images to become virtually “linked” with the HyperDuino board, letting users control the playback of media just by using physical controls on their project. It also allows students to make videos that toggle various physical outputs, such as servos and LEDs, with ease.
To install it, I went to https://bit.ly/HyperDuinoApp to install the Chrome extension.
By using the media explorer on the right, students can link to a video and then add it as a media element on the left. Then, by using timestamps, various events can be triggered. Likewise, inputs on the HyperDuino shield can be used to trigger media as well. And media is not just limited to YouTube videos. The HyperDuino Media Linker supports Google Drive files, Google Earth, and even webpages. This allows for plenty of flexibility when it comes to designing interactive exhibits.
If further flexibility is needed, the HyperDuino can also be controlled by using a Scratch-like block programming interface. This allows for the creation of complex patterns using loops, variables, and math. For more information about the capabilities of this kit, go to https://hyperduino.com/tutorials/start-here.html.


Comments
Please log in or sign up to comment.