


Intro
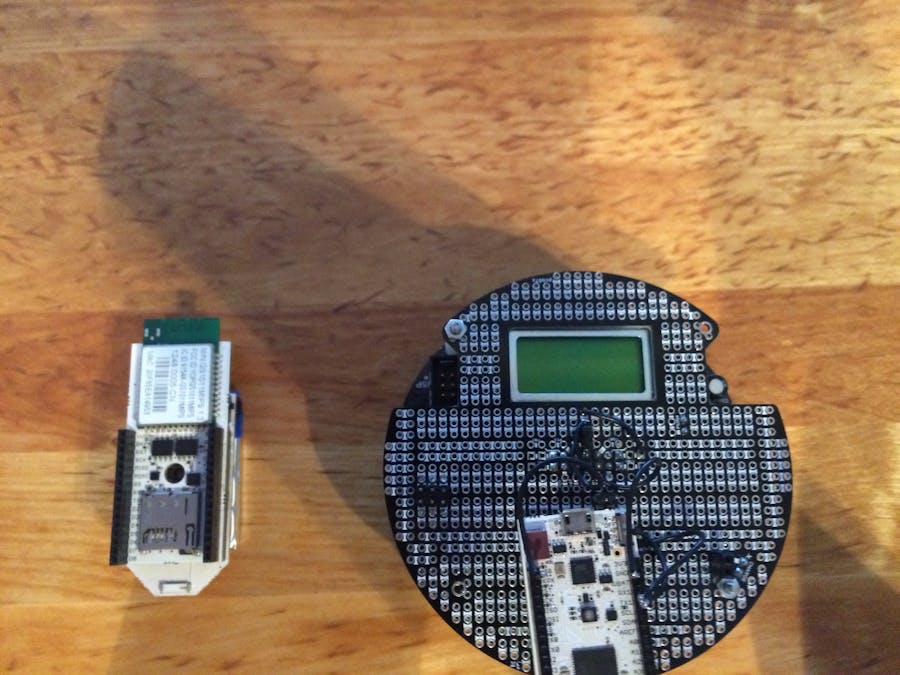
Using a Pinoccio Scout and Lead Scout, makes it easy to control the Pololu 3PI robot from anywhere, even the virtual world of Minecraft!!
Yeah, this is gonna be awesome!
Supplies
Setup
Your Lead Scout is going to need to be updated to the latest firmware because we're going to be using some new commands. Visit, http://hq.pinocc.io/debug to update the firmware.
This project does require some soldering of wires form the Pinoccio Scout to the Pololu Robot, but nothing too crazy. The schematics for soldering are included with the Pololu.
Once you get the Pinoccio Scout soldered to the Pololu we get to code the heck out of it, connect to the web. Flash the code below onto your Pinoccio Scout.
This code allows us to send commands to the Pololu through the Pinoccio Scout. Next you need to get the Mesh Information from your Lead Scout by running mesh.report and mesh.getkey copy the channel, troopId and the key from these two commands somewhere, they are necessary for you to connect the Pinoccio Scout to the mesh.
Open up the Serial Screen when the Pinoccio Scout is plugged into the computer, and run the command mesh.config({{scoutId}}, {{troopId}}) , replace {{scoutId}} with the scoutId you want this scout to have, replace {{troopId}} with the troopId you got from earlier. Next you need to run the command mesh.setkey({{key}}), replace {{key}} with the key you got from earlier. This Scout is now connected to your Lead Scout's Mesh.
Now we can get to connecting this rover to the net, in the Pinoccio HQ, go to your lead scout and run the scoutscript, command.scout({{scoutId}}, "rover.right") , replace {{scoutId}} with your Pinoccio Scout's ID you just set, if your mesh is setup correctly your rover should start rotating right.
YAY!!
Connecting
In this tutorial we're going to connect this rover two different ways, the first way is using the Mobile Device Accelerometer. For this we're going to need a server I chose Github Pages because it's the easiest and fastest.
For the accelerometer, I'm using a Juery Plugin titled Gyro.js, information on this plugin can be found here: http://tomg.co/gyrojs.
This code doesn't have any UI, except for writing of the accelerometer values. We only need to read the X and Y values of the accelerometer.
When the phone is held flat the rover will stop. This code is optimized for holding the phone sideways.
Now we're gonna connect it into the Virtual World, that's right Minecraft.
For the basic functionality check out my previous project introducing the basics of sending commands from inside Minecraft.
This is the wiring inside Minecraft, the code inside the computer block is below:
All you need to do is change out {{api token}} with your api token.


Comments
Please log in or sign up to comment.