


Hardware components | ||||||
 |
| × | 1 | |||
 |
| × | 5 | |||
 |
| × | 1 | |||
 |
| × | 1 | |||
 |
| × | 1 | |||
 |
| × | 1 | |||
Nowadays we're used to the modern, mushroom-shape, thumb-driven joystick and the old school, big stick, chunky '80s joystick seems odd (and today hard to find, sometimes).
Although I still own some old joysticks, they don't work fine like they did. But, since I had few Arduino Nano clones and a couple of joystick modules, I decided to make an Arduino Joystick for my Commodore 64 and VIC-20.
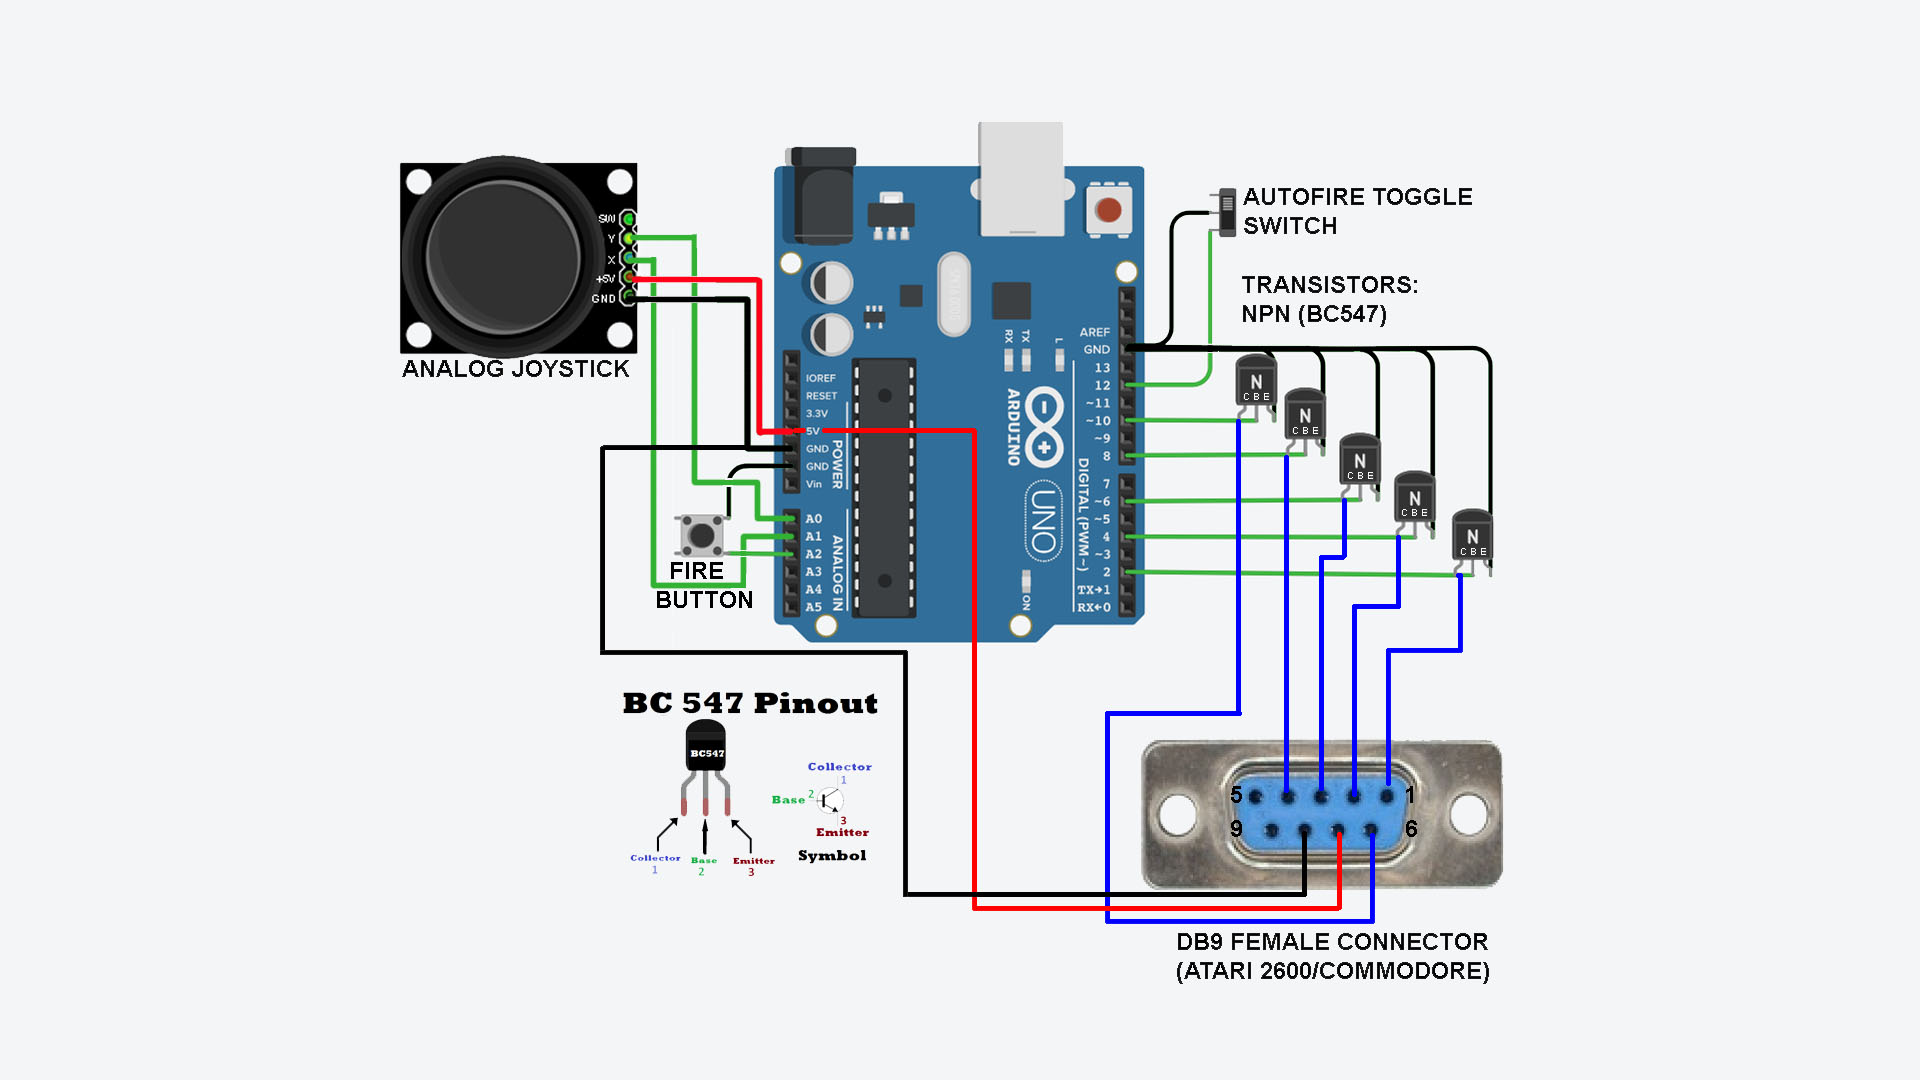
As I suspected, a direct drive by Arduino doesn't work, so I opted for a transistor-driven joystick: five cheap NPN transistors were enough to do the magic. I used BC547 because I have hundreds of them here, but probably it will work fine with 2N3904... or (almost) any other NPN transistor.
I made this (rather bad and ugly) schematics to show how to connect the Arduino (I used an Arduino Nano clone, but any Arduino - Nano, Uno, etc. - should be fine if it works with +5V -don't use an Arduino Due or Arduino Mini/Mini Pro with 3.3v power).
The Joystick module is analog, so it's connected to the analog lines on Arduino. The fire button could be connected to a digital line (and at first I did it) but it suffered of some strange behavior, so I opted to connect it to an analog line.
As you can see, there's also an autofire switch, that is optional: you can simply omit it if you don't like the autofire lazyness.
The wiring is soooo easy that it doesn't deserve a dedicated PCB; a simple prototype board is more than enough. I used an old, broken printer cable that lied in my toolbox as joystick cable.
I then decided to make one of my notorious TinkerCad project and 3D print an ugly but pratical shell. I opted for transparent filament so I can see the Arduino LEDs. I glued everything and voilà!
the worst and ugliest joystick on Earth, but it works like a charm!


Comments
Please log in or sign up to comment.