Analytical Power Strip
We know if we talk on the phone too much we will use up our battery faster. What happens to our energy usage if we open the refrigerator door more often or turn up the volume on our stereo? This is important if you have a limited source such as solar cells, batteries, or a gas generator. The analytical power strip will allow you to characterize and prioritize your loads.
The hardware part of the strip is accomplished in two parts: AC Power Portion and the Microcontroller Portion. The microcontroller software is also accomplished with two parts: the Phone Portion that uses a database for analysis and the Bundling Portion in the microcontroller.
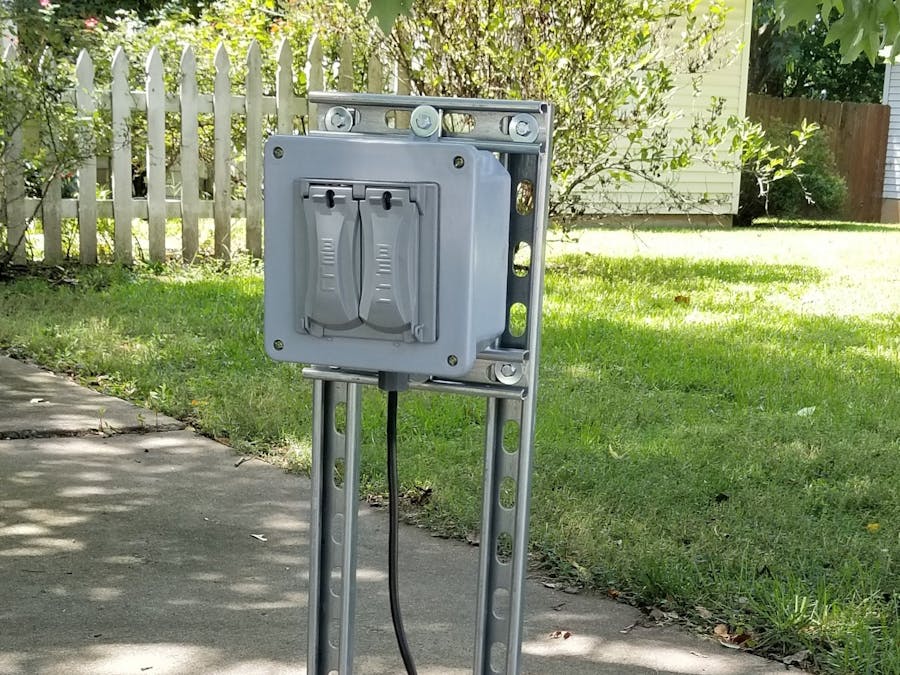
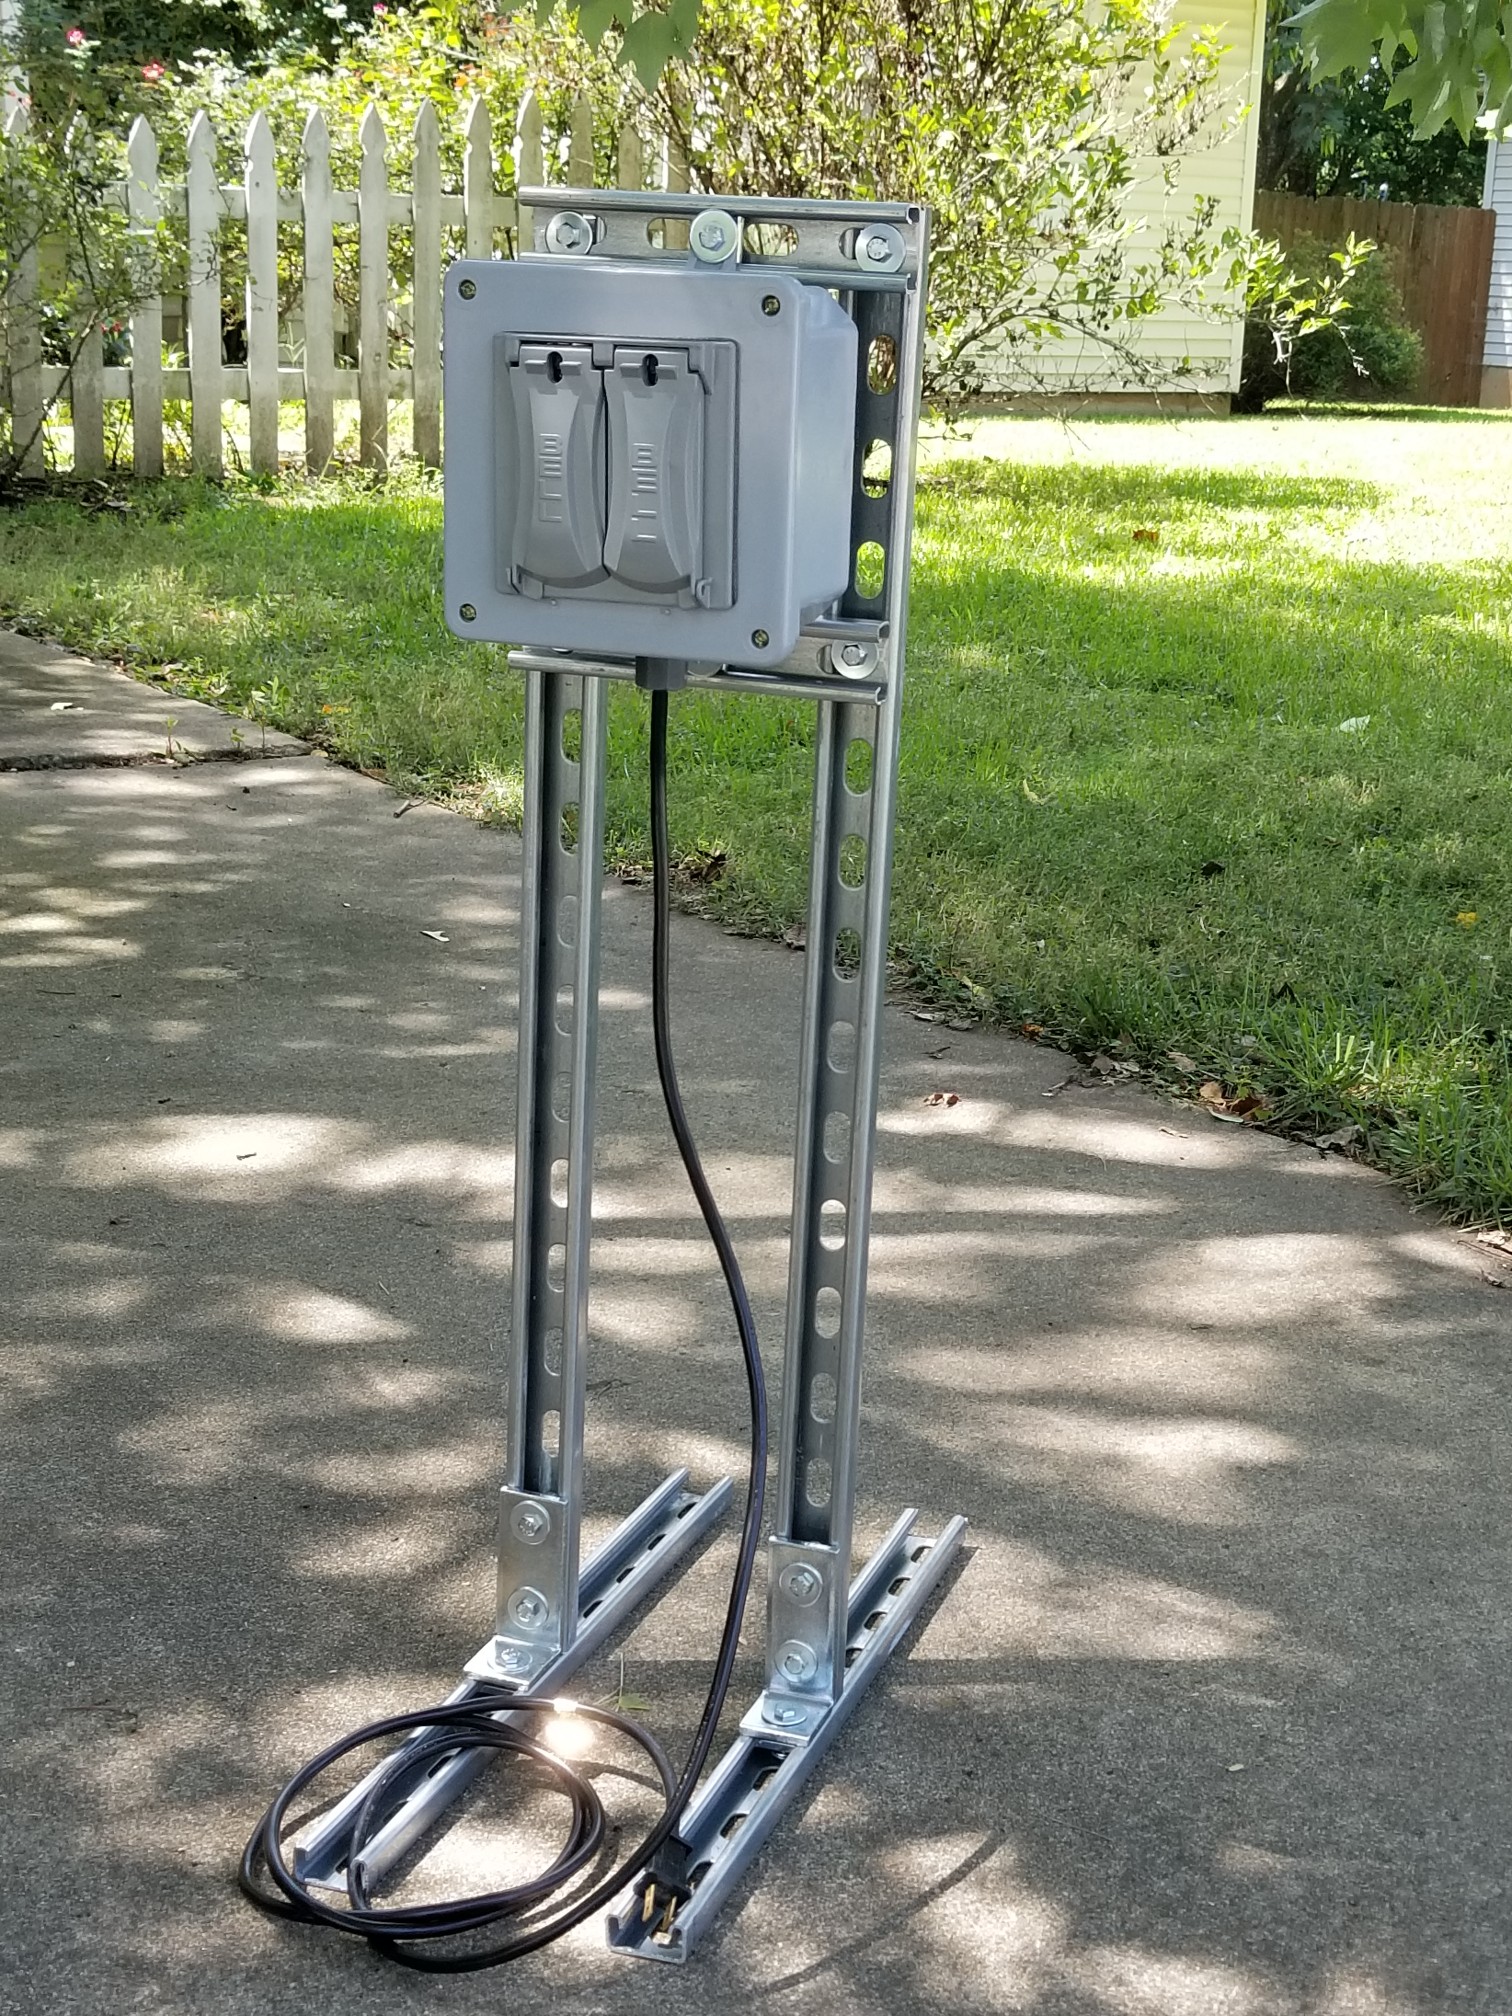
AC Power PortionWe'll start by understanding the AC power. First let's talk about the physical configuration. Generators are operated outside because they produce carbon monoxide. A rugged, water-proof box should be constructed for the Analytical Power Strip. (See the diagram below.) We purchased an eight channel relay board and used only four receptacles (one relay for each receptacle). You would need a larger PVC Box to use all eight. We used 14 gauge wire because it can handle up to 15 amps.
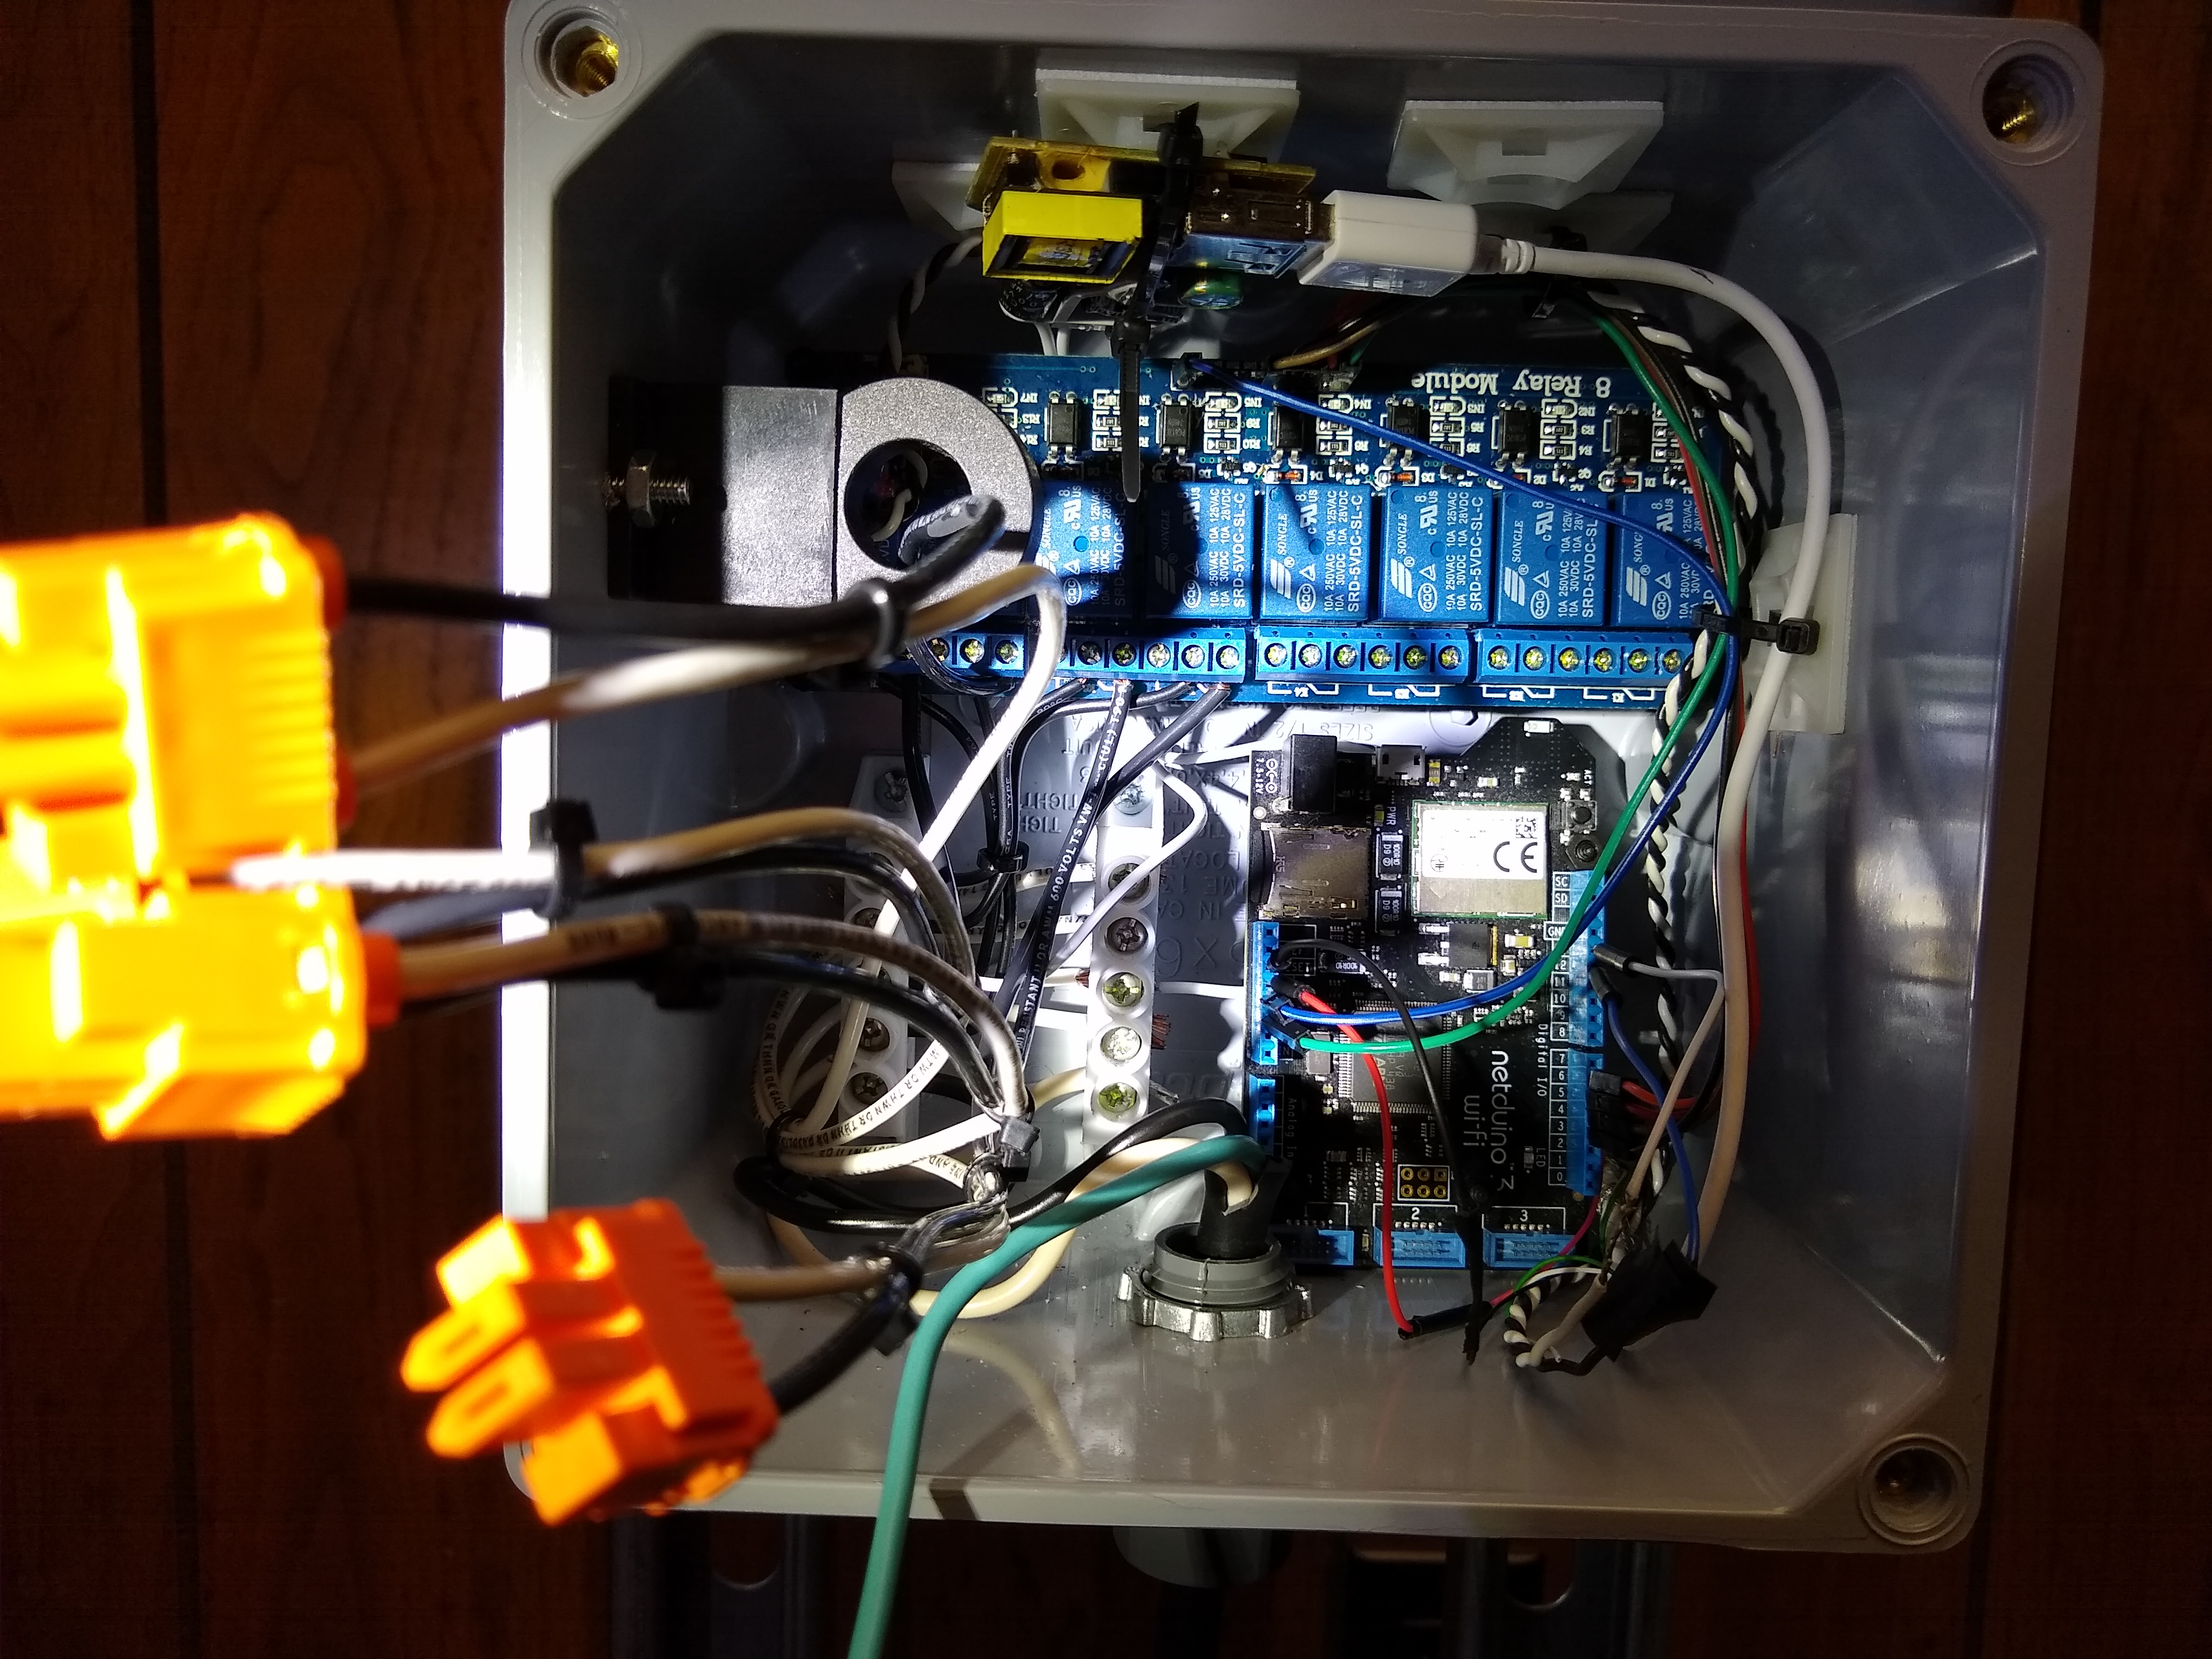
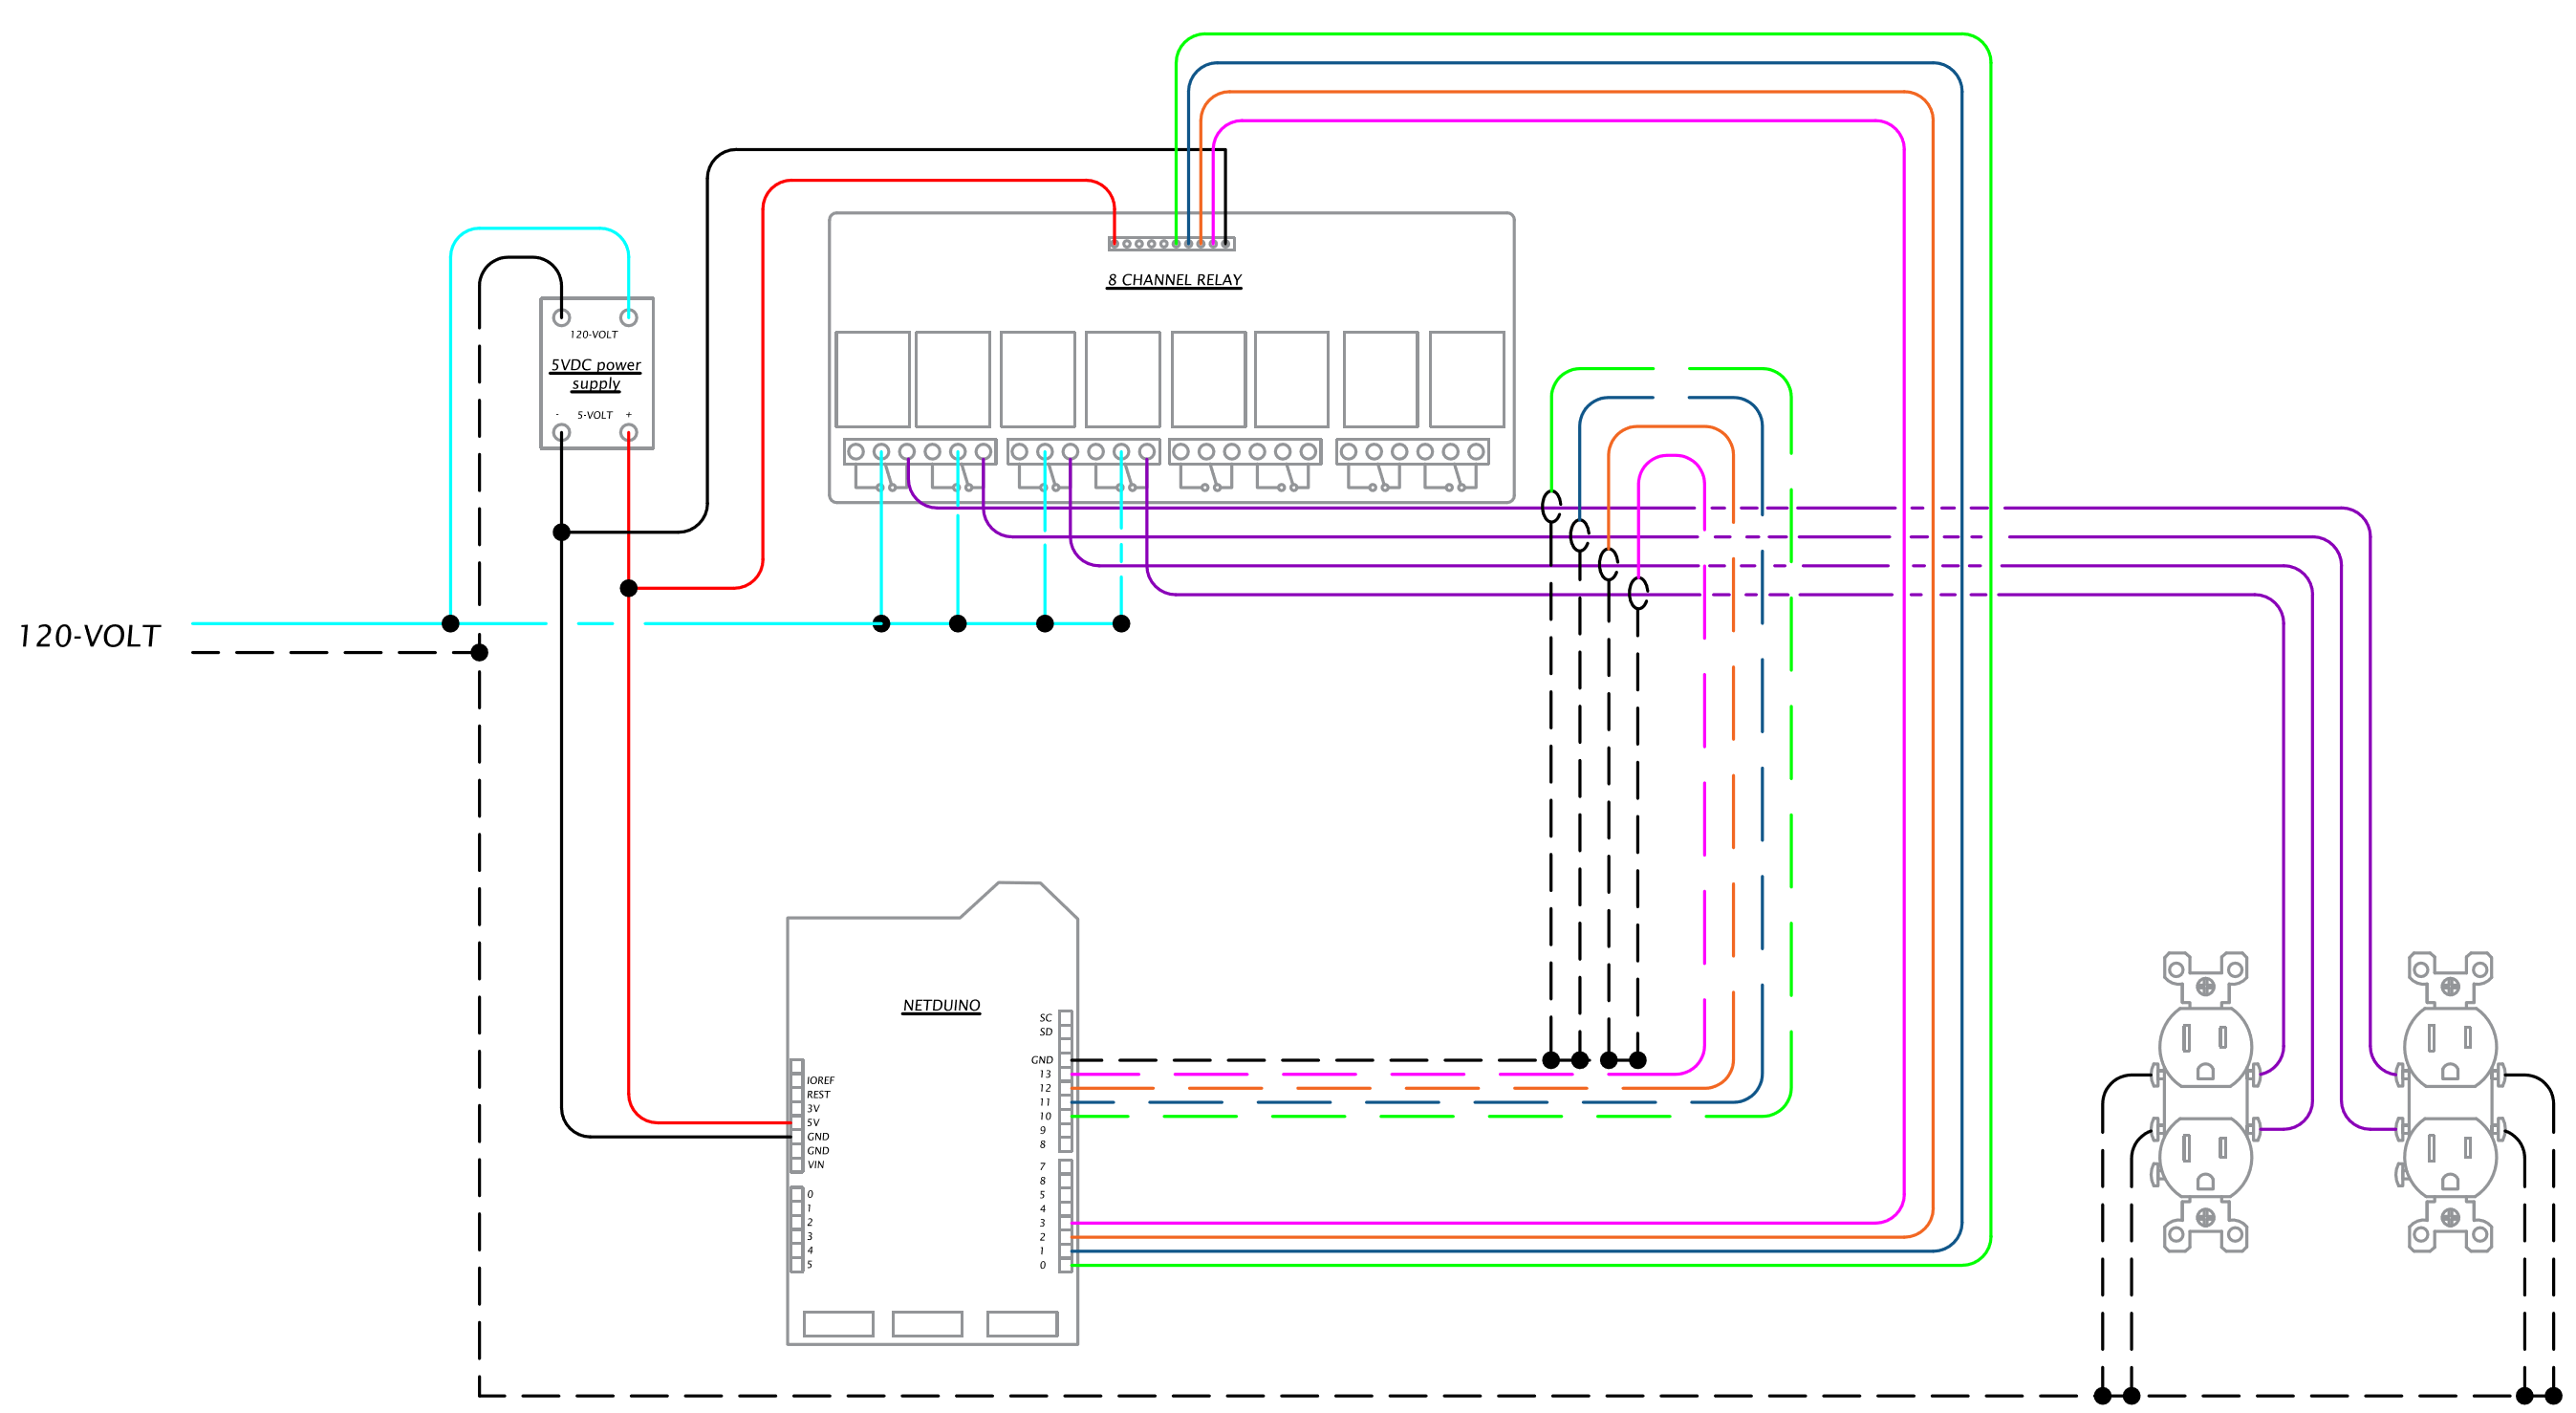
This project controls AC power which has enough energy to be unsafe without taking safety precautions. It is important to check the AC wiring prior to connecting it to the source. Maintain separate wiring for low voltage (generally less than 50 volts) and AC voltage. The only point of electrical connection (component) between the Netduino and AC is the relay and current transformer (CT). Otherwise, the wiring is physically separated as much as possible. It is wrong to connect any other components to AC. The CT and the relay are electrically isolated. (See the diagram below.)
AC Power Portion - Electrical ConfigurationA power circuit in the U.S. is 120 Volts alternating current (AC). There are two wires for the circuit and one wire for safety (green). The circuit uses a common neutral (white) that is not allowed to be switched and a hot (any color besides green and white). It is red in this case. We use a digital output from the microcontroller that turns on or off a relay coil. If the coil is on, the relay contact is closed. This isolates the AC power from the DC output from the microcontroller. The isolation also provides a level of safety.
The green wire should be connected to all metal parts between the interfaces: AC plug and receptacle. The function of these connections are to make all of the metal parts the same voltage (or potential). This is called bonding. The second requirement of the green wire to connect to the ground part of the AC Plug. The function of this connection is to force the circuit breaker to trip during unsafe conditions; otherwise, the green wire does not carry current. An example of an unsafe condition would be that the insulation of the hot wire is faulty. It can force the circuit breaker to trip by creating a low resistance to ground. Low resistance means higher current. Ground is connected to the circuit at the breaker panel.
The sensor for monitoring the load is a current transformer. It uses inductance like a transformer to monitor the current of the load (refrigerator in this case). The hot wire runs through the center of the hole through the CT. It divides the current and places it on the analog input of the transducer circuit. In this case, we purchased a CT/Transducer combination so that the output is 0-5 VDC.
Microcontroller Portion
See the attached Circuit Diagram. You will notice the 5 VDC power supply (a wall-pack removed from it's cover) tied to the 120-volt input and the pin connections of the Netduino. It is drawn for using four receptacles at a time, but the picture reflects only one receptacle being tied to the CT and the relays.
Software
Coding for a Person with a Hardware Background Only
Utility electric design for a power company is my background. Coding is a passion and has paid great dividends in predicting future electric loads. I understand the difficulties of learning to code. That is why I'm starting with basic definition and locations in Visual Studio. Skip this section if you are an experienced coder. Use the Solution Explorer in Visual Studio to follow along.
Definitions
- Assembly - minimum unit of deployment (we commonly incorporate other's assemblies into our programs, i.e. mscorlib from Microsoft).
- Namespace - grouping that provides context for a component that allows reusing names (i.e. Models namespace and ViewModels namespace could both have a receptacle object)
- Class - template or blueprint of a unit of code. It encapsulates variable members, functions, structures, properties and many more components.
- Object - an implemented instance of a Class.
- Inheritance - enables you to create new classes that reuse, extend, and modify the behavior that is defined in other classes.
- Constructor - a special type of subroutine called to create an object.
Basic Component Examples
These definitions put into action with specific names might make more sense. The Assembly File (AF), Namespace (NS), object, and file are hierarchical. 'Mscorlib' (AF) contains 'System.Threading.Tasks' (NS) contains 'Task' class used in 'SSwClient.cs' file. 'Task' class is the template for creating TurnOnAsync, TurnOffAsync, etc. objects. 'Mscorlib' is the heart of.NET framework and differentiates Netduino from Arduino (also called NET Micro Framework). It is automatically loaded when you create a Netduino project. Any AF that is not automatically loaded has to be added in the References.
'SSwClient.cs' file contains 'SSwClient' class that inherits from 'MapleClient' class. The colon indicates this relationship. 'MapleClient' modifies the 'Task' class by defining a 'ServerItem' class and using it as an object. Summarizing, 'SSwClient' uses a modified version of 'Task'. You put your cursor within the word and hit <F12> to go to the definition (at least, you can in the paid version of Visual Studio).
Codeand Object Initialization
Let's back up a second. Everything starts in the file 'Program.cs' in the class 'Program' with the method Main(). For the Netduino it looks like:
   public class Program
   {
       public static void Main()
       {
           App app = new App();
           app.Run();
           Thread.Sleep(Timeout.Infinite);
       }
   }
'New' creates an object instance 'app' from the class template 'App'. It is common to create a object with the same name as the class, 'app' in this case (disregarding case). Within the class, code within the constructor is run during the object creation. The constructor is a method with the same name as the class. In this case, the constructor is 'public App()' in 'App.cs' file.
       public App()
       {
           InitializePeripherals();
           InitializePowerServer();
       }
In the case of the phone code, it all starts in the same place as the Netduino 'Program.cs' and Main(), but for the Xamarin template provides this code. Instead, the practical starting point is 'StatusPage.xaml'.
Each gray box below starts with the object, then a colon, followed by the class used to create it. The 'MapleClient' is used in the phone code. The 'RequestHandler' is used in the Netduino. 'SSwController' is used in the Netduino.
Architecture for a Person with a Hardware Background Only
For this program we use the following patterns:
Events are functions raised by the forms used in this application. Tasks are functions that transmit HTTP requests and receive responses.
Bundling PortionTime-value pairs are bundled and stored in a file on the SD Card. Ideally, these pairs could be stored in a database directly on Netduino, but there isn't one available. Instead, the pairs are decoded and sent through JSON to the phone. As the phone receives the data it is uploaded to a SQLite database and ready to be processed.
I have tried to create a visual basic (VB) project for coding the Netduino.
Phone PortionThe phone portion is built in Visual Studio 2017. It uses the SQLite database for storing time-sequence data. There is a clean break between the Netduino and the phone. The phone code is a separate solution. With exception of the common C# coding, there is a completely different thought process to programming the phone code. You must search for documentation on Xamarin in order to understand it. The code provided only uses Android interface, but others are available including IOS (Apple) and UWP (Universal Window Platform, such as a windows tablet).
Form WiringOnce again, let's get specific to this program. 'MainPage.xaml.cs' below is the code behind the form 'MainPage.xaml'. 'BindingContext' refers to the class where any command referred to in the 'MainPage.xaml' will point.
public partial class MainPage : ContentPage
{
	public MainPage()
	{
		InitializeComponent();
                BindingContext = new MainViewModel();
       }
}
So the button text 'Turn On' within 'MainPage.xaml' looks like below. The binding context is 'MainViewModel' and within 'Send Command' is run with a parameter 'TurnOn'.
   <Button Text="Turn On" Style="{StaticResource ButtonStyle}"
        Command="{Binding SendCommand}" CommandParameter="TurnOn">
In turn, the 'SendRgbCommand' task is run with the "TurnOn" parameter which runs specific code from the Select Case.
async Task SendRgbCommand(string command)
The is followed by the HTTP Request/Response.
Coding HTTP Request/Responseusing Maple
'Task' class is inherited from 'MapleClient' class which was created by Wilderness Labs. Its function is to send information back and forth via HTTP (hyper-text transport protocol) using a request-response model. The cargo is shown in the return value enclosed in the SendCommandAsync method (i.e. "TurnOn", "TurnOff", etc.)
The whole solution is composed of two AFs or Visual Studio projects. The code running on the Netduino is the 'SSwHost' project and the Phone runs the 'SSwRemote' project. The 'SSwRemote' project was created from a Visual Studio 'Xamarin' template. It is the heart of.NET framework for Android, IOS, and Universal Windows Platform (UWP). We are only using Android in this case. I used two different development environments. Visual Studio 2015 was required for the Netduino. I wanted to use Visual Studio 2017 for the Phone environment because of the additional tools and documentation that are available for Xamarin.
'MapleServer' class runs on the Netduino. The class 'RequestHandler' is stored in the file 'RequestHandler.cs'. It inherits from 'Maple.RequestHandlerBase' which uses the 'System.Net.HttpListenerContext' class and the method, 'Send'. Its main function is to respond to requests from the phone. It responds with whatever method is pointed to with the 'Microsoft.SPOT.EventHandler' class.
'InitializePowerServer();' maps the delegate function set up with the 'EventHandler'.
ConclusionThe CT gathers the time sequence data and it is stored on a SD card within the Netduino. When the phone requests the data it is transferred, parsed into a database, and analyzed. This characterization is downloaded back into the Netduino and used to determine the priority and time necessary for switching. Relays are used for switching. This allows us to efficiently use the generator.


Comments
Please log in or sign up to comment.