


Hardware components | ||||||
| × | 1 | ||||
| × | 1 | ||||
| × | 1 | ||||
| × | 1 | ||||
Software apps and online services | ||||||
| ||||||
Like many geeks, I've experimented extensively with lucid dreaming. However, since my methods distance me from the waking world, it's an occasional hobby. (Last phase, I started a short-lived tumblr and addressed this issue in a post. That will probably start growing again, since I'm building this project.)
I'm building a fairly advanced wearable this time. You may be familiar with the various masks that exist to help with this, such as the Remee ($95) and Mitch Altman's NeuroDreamer ($70), which I beta tested during the first EMF Camp. And back in 2010, Nima and I made a basic mask with an Arduino Pro Mini. But the result was always the same: I pulled them off in my sleep.
Now I've been messing around with the TinyDuino and TinyLily I backed on Kickstarter. These things... these things are amazing. They are so small, and so smart. And I knew exactly what to build.
The Project
I'm augmenting my glasses with dual-mode lucidity triggers:
- Randomly-timed low-profile amber LEDs (to match the frames because dork) at night, to wake me up just enough to trigger a lucid dream state.
- A haptic motor that vibrates at random intervals during the day, to remind me to check whether I'm dreaming. When the glasses are on, the pendant hangs behind the right ear; when they're on the chain, it hangs from the earpiece, at the very bottom of the chain/glasses assembly.
The "brain" of the glasses is embedded in a hand-carved amber pendant modeled on Japanese netsuke, also to match the glasses.
This constant use encourages me to wear my glasses and NOT PUT THEM DOWN, as does the chain attachment. I lose my glasses, a lot, so I order them online for cheap. This, along with my comfort with nerdy looks, means I'm fairly open to experimenting with them. (I wore a pair for months after the arms broke off, pince-nez style, which is a great way to jumpstart a conversation when people notice after five minutes...)
I've previously attached glasses to a chain, using a hole drilled in the earpiece. But the placement was awkward because the glasses would open up. This version puts the chain attachment at the temple, while the pendant will hang from the right earpiece.
When the glasses are on, the pendant hangs behind the ear; when they're hanging down, it will dangle from the earpiece, at the very bottom of the assembly.
Step 1: LEDs
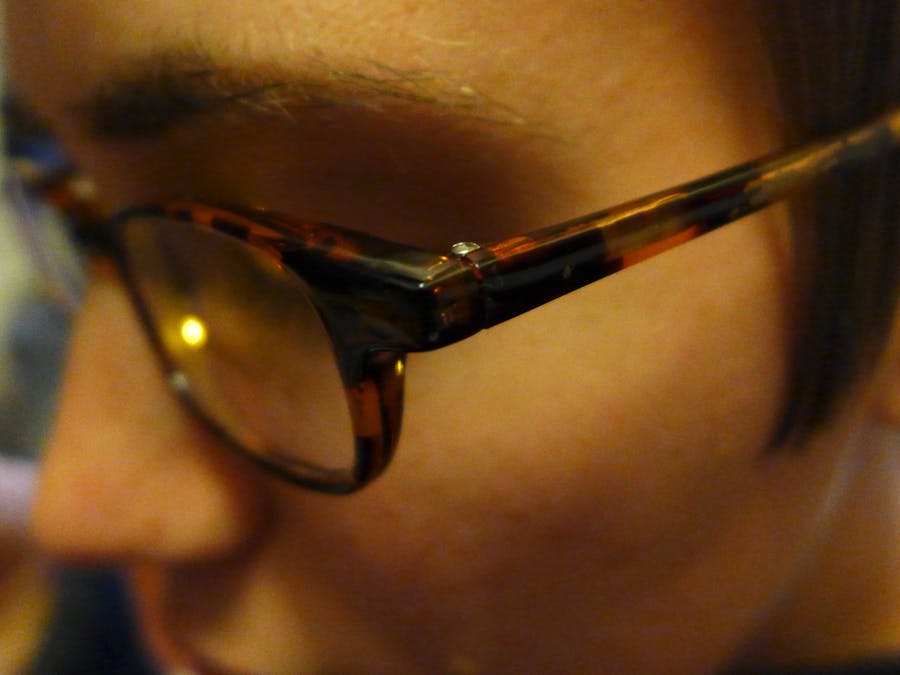
I epoxied the TinyLily's amber LED segments to the nose-rests, so that they'll shine across my eyes. I remember being irritated by direct LED stimulation from other masks, so to help me keep these on, they'll be side-lit.
The two LEDs are wired in series, for ease of attaching, though I might do them in parallel if re-creating this... I think I could do a better and more protected circuit.
Phase A: Conductive Ink
I've got a couple of tubes of Bare Conductive Electric Paint from 1-2 years ago. I was afraid they'd have dried out, but evidently, they keep well. I applied the thick black liquid around the glasses' rim and let it dry overnight. It was still a bit squishy, but I tested the circuit with a 3V CR2032 coin cell, and it worked!
...Sorta. The first LED was dim, and the second didn't light up at all. I figured this was due to the resistance in the conductive ink (which later turned out to be false).
Then, I wore the partially completed glasses to brunch. While walking over in the California sun, I wiped sweat off the side of my nose and my hand came away black.
Crap. I hadn't yet put on a coat of clear nail polish, as planned, to waterproof the ink.
Phase B: Teeny Wire
For the next try, I considered taking apart a small speaker for its magnet wire (a coil of very thin copper wire with a nonconductive coating), but ended up simply using some thin wires from a stripped stranded cable. This works very well – I've attached it using the clear nail polish mentioned above, since I know it's tough, easy to brush on precisely, practically invisible, and spreads out well. I coated the LEDs with it as well, then tested the circuit.
Same result as before: dim first LED, second one off. I figured this time that I just wasn't giving it enough juice, so I tore a 3.7V LiPo battery out of a wrecked toy helicopter and hooked it up. POSITIVE FUNCTION!
The LEDs look dim in the image, but at night, they will be plenty bright.
Step 2: Haptic Motor
Step 3: The Pendant
Since the battery is the biggest piece, and wouldn't fit comfortably inside either piece of amber, I've modeled a separate enclosure for it using Autodesk's Fusion 360 CAD software. (It's free for independent users!)
I've put up a dedicated tutorial for the case, too, but you can rotate the model or grab the .stl and other filetypes here—so shareable!—and here's a preview. I have yet to print it, so I suppose we'll see how it comes out.


Comments
Please log in or sign up to comment.