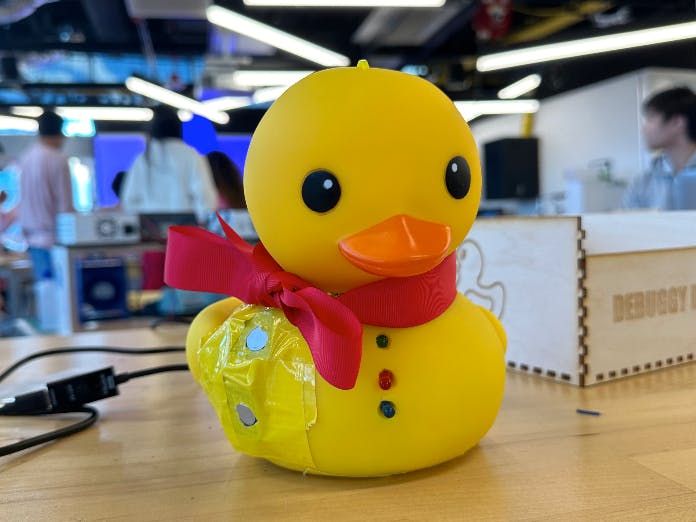
Coding can be very frustrating at times and sometimes all you want is someone or something to talk your problems out with. That is why the Rubber Duck Debugging method was created. Rubber Duck Debugging is where programmers will take a rubber duck, place it next to their computer, and talk to it about their issues or ideas. We wanted to take this a step further and create a desk buddy, called Debuggy Ducky, that talks back and helps you with your work. Incorporating a Pomodoro timer, note-taking with LLM analysis, and the ability to verbally ask ChatGPT questions makes Debuggy Ducky a great problem solver and assistant.
Related Projects and Inspiration- https://rubberduckdebugging.com/
- https://en.wikipedia.org/wiki/Rubber_duck_debugging
- https://projecthub.arduino.cc/ashraf_minhaj/ai-assistant-robot-with-arduino-and-python-ff8980
- https://deepgram.com/learn/llms-the-rubber-duck-debugger-for-creative-work
- https://www.infoworld.com/article/3697653/when-the-rubber-duck-talks-back.html
A video of working Debuggy Ducky can be found in the link below or you can download the video which is in Schematics.
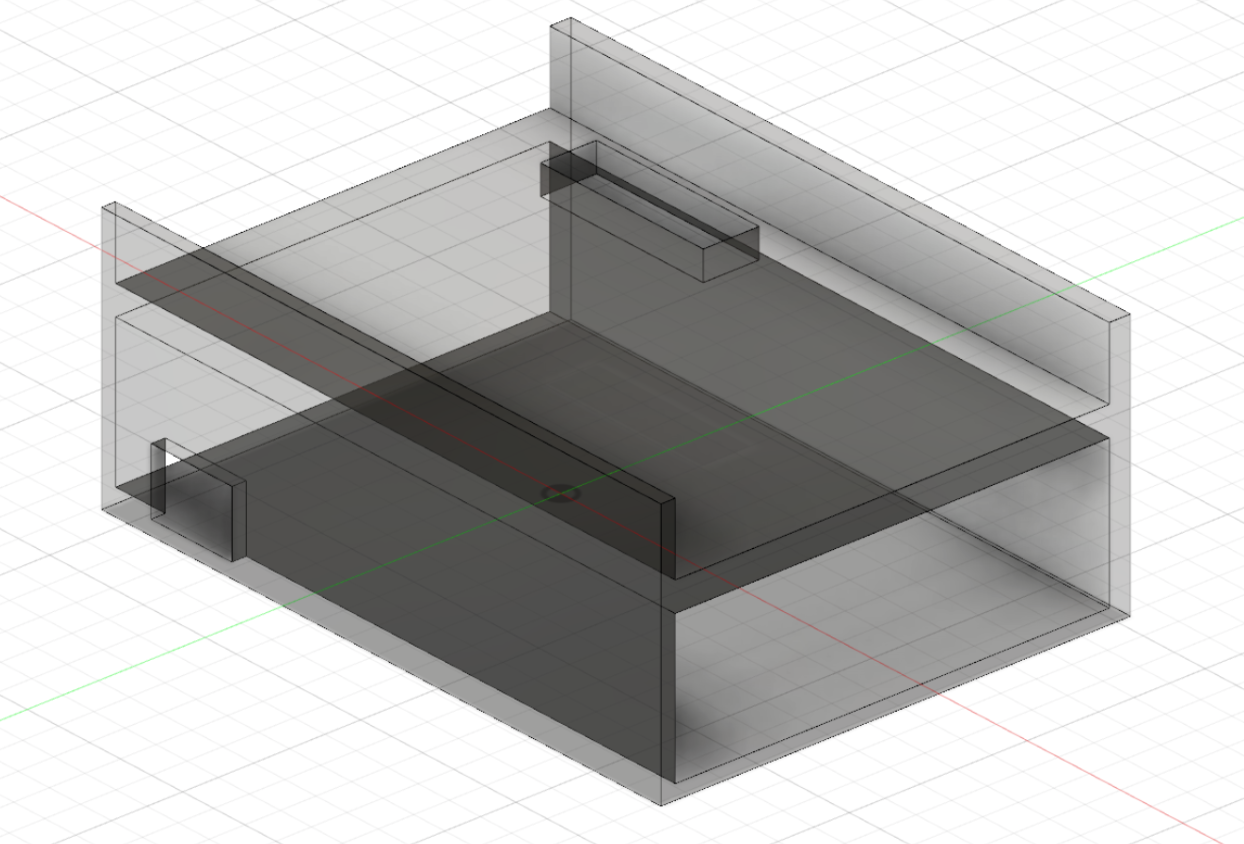
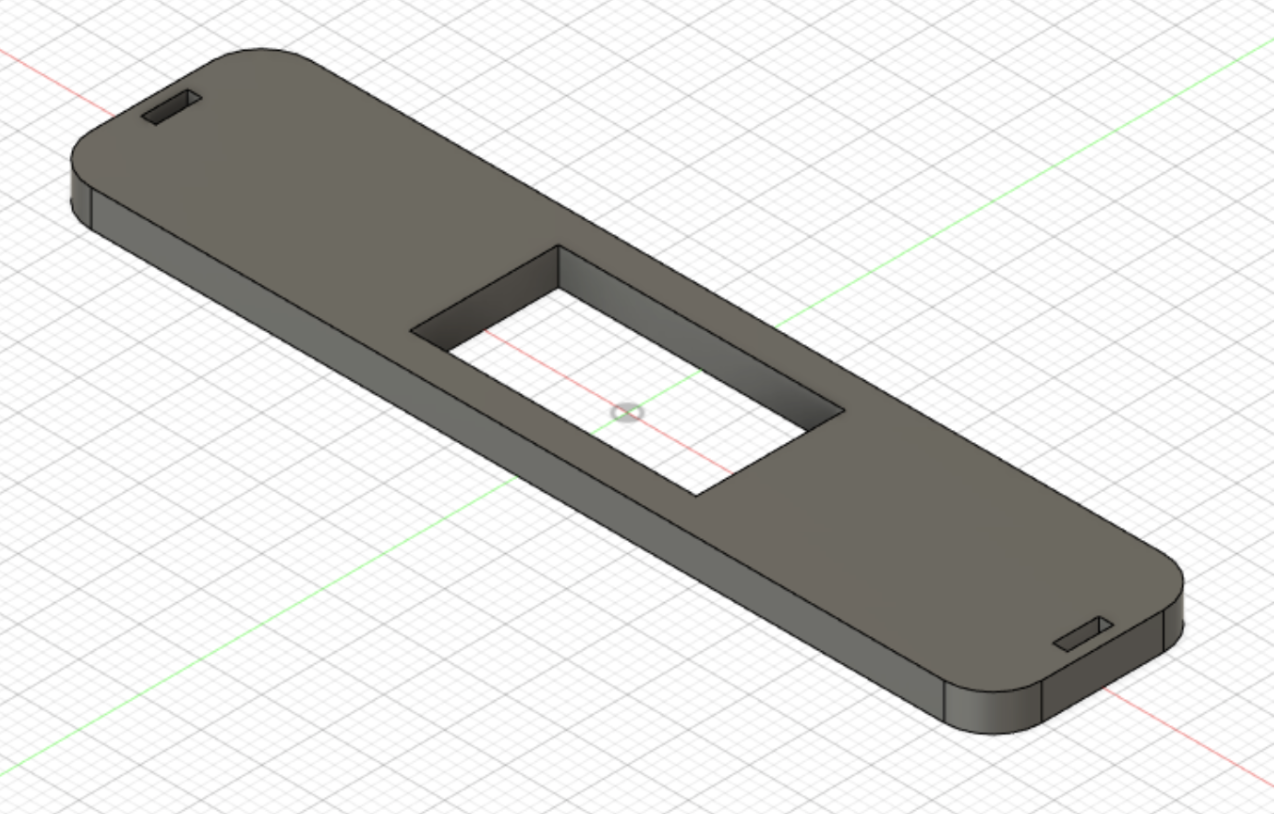
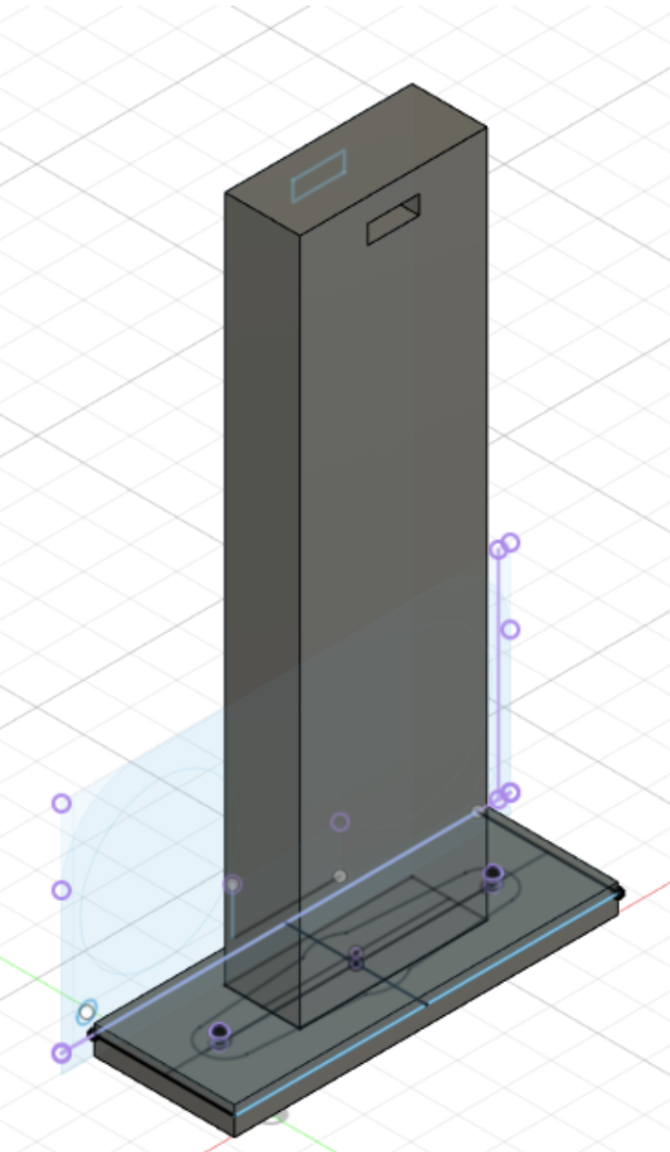
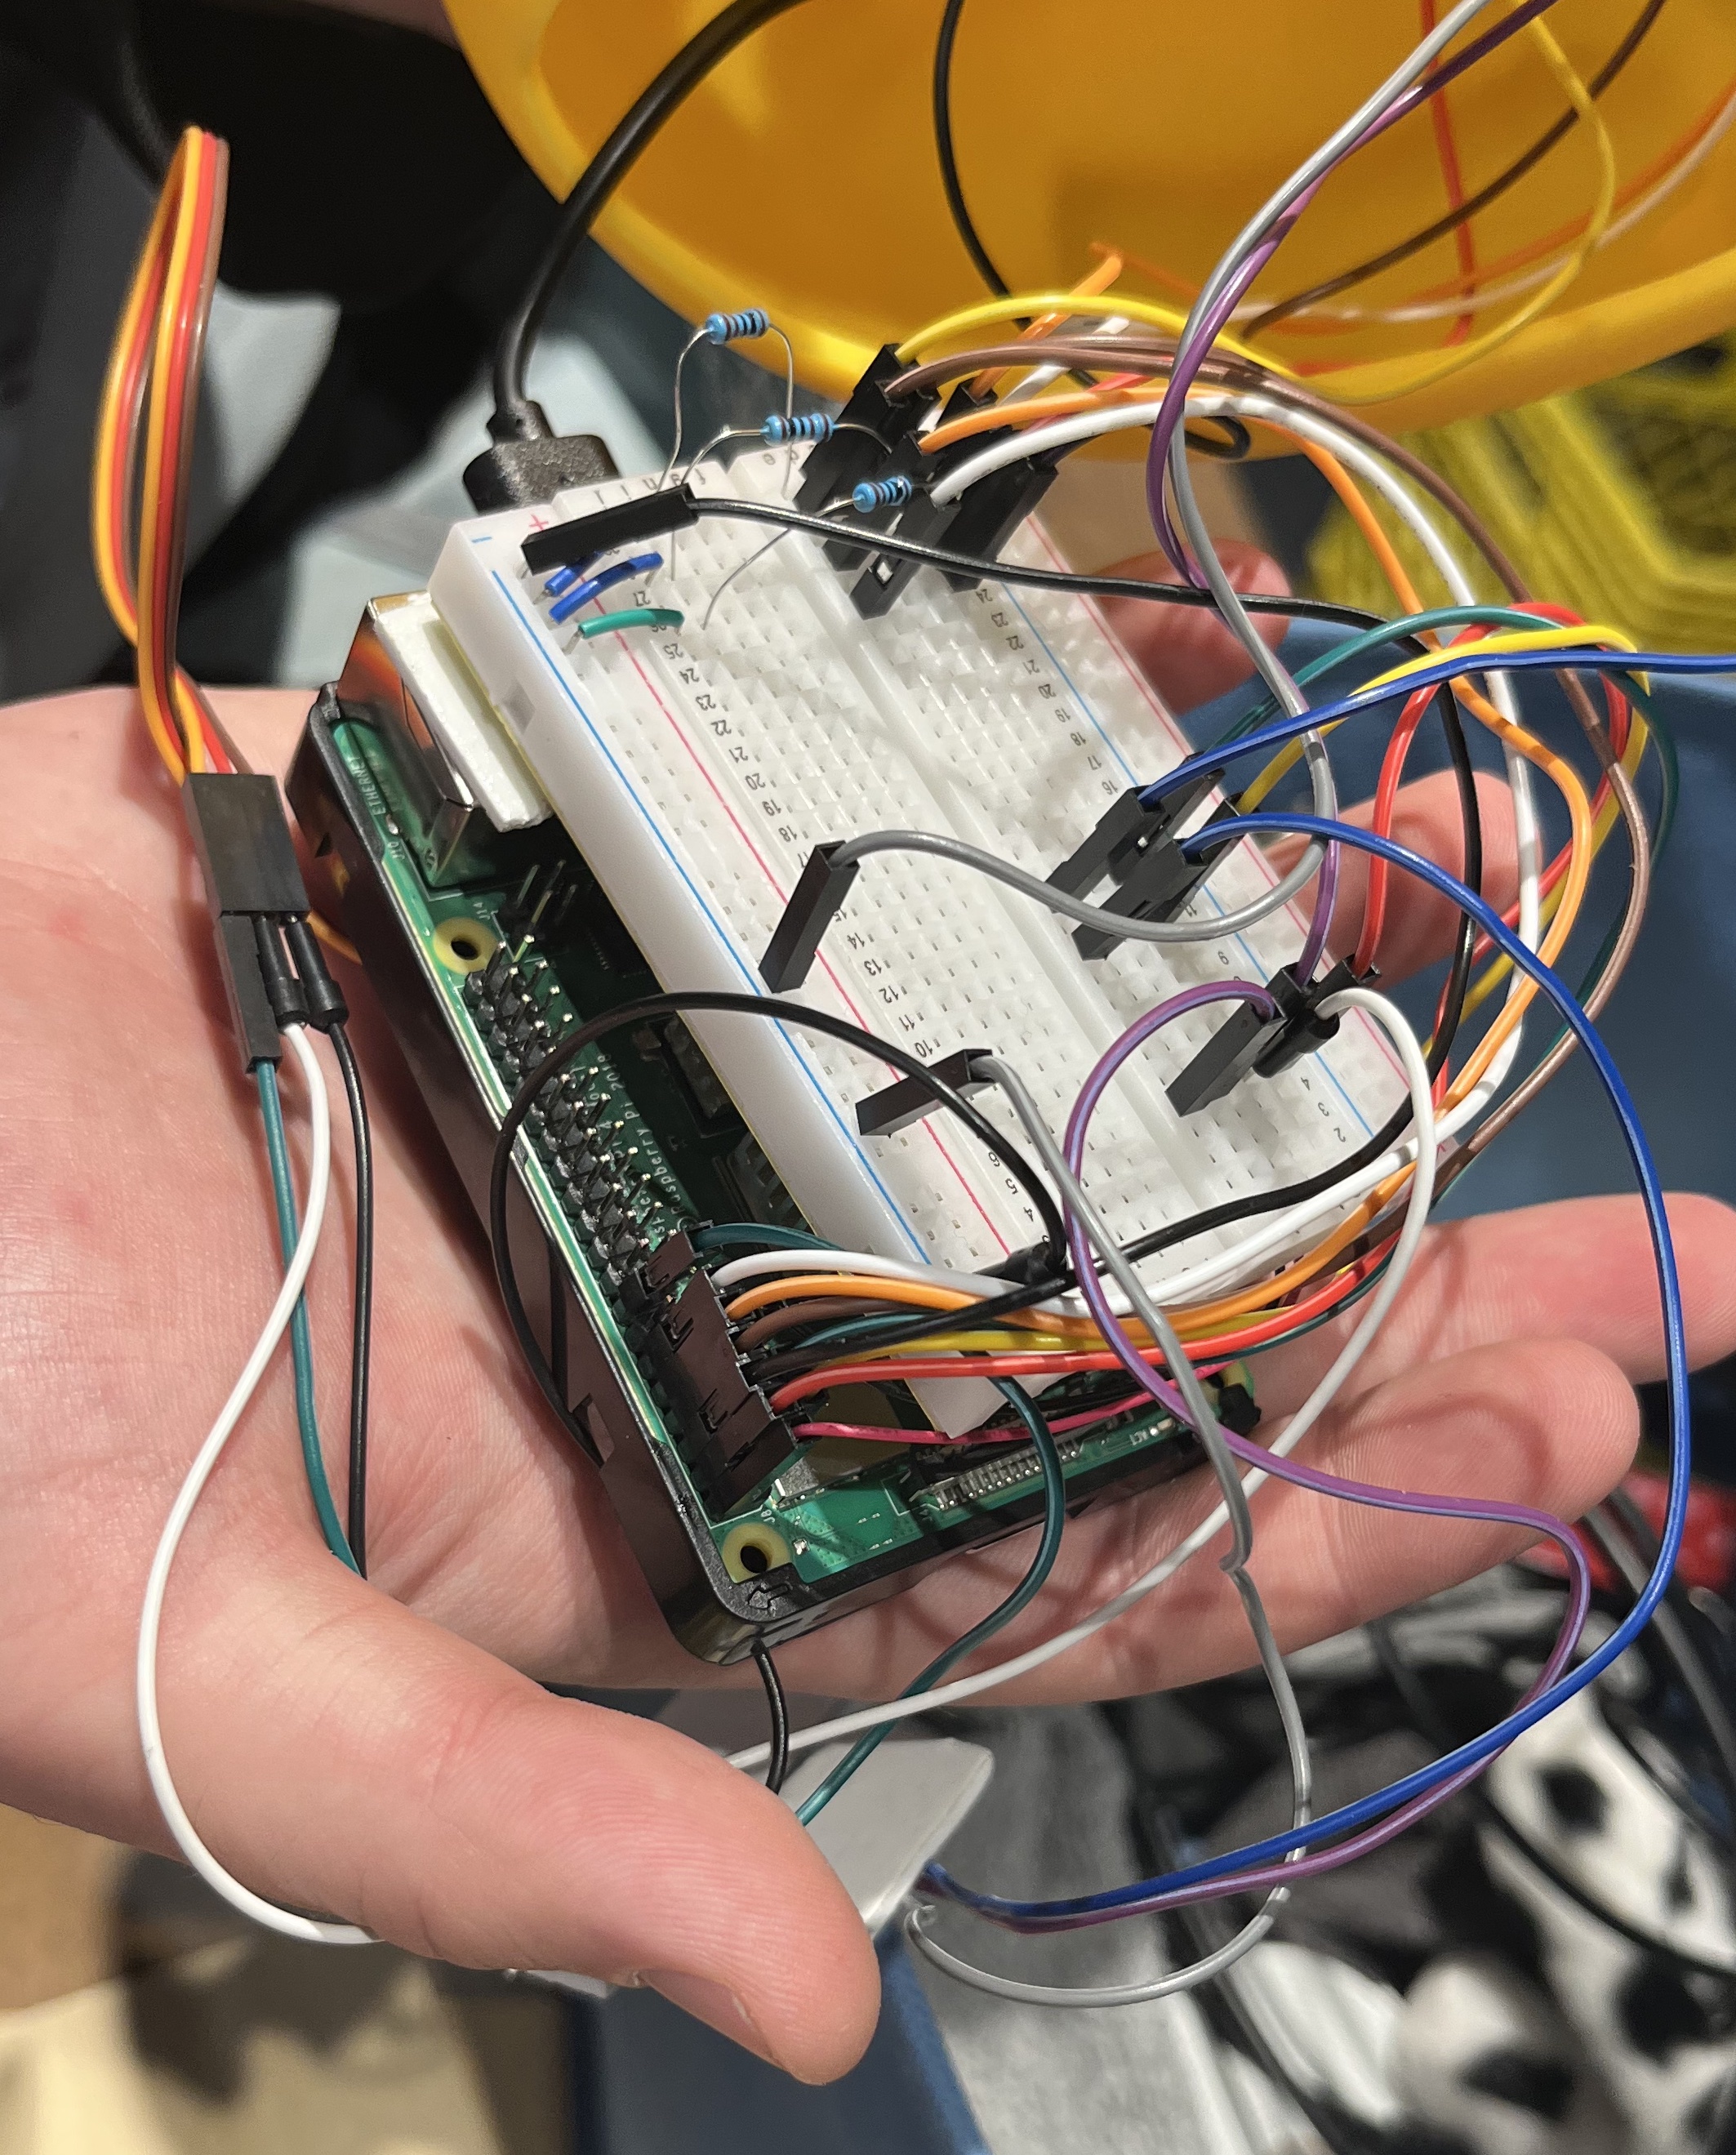
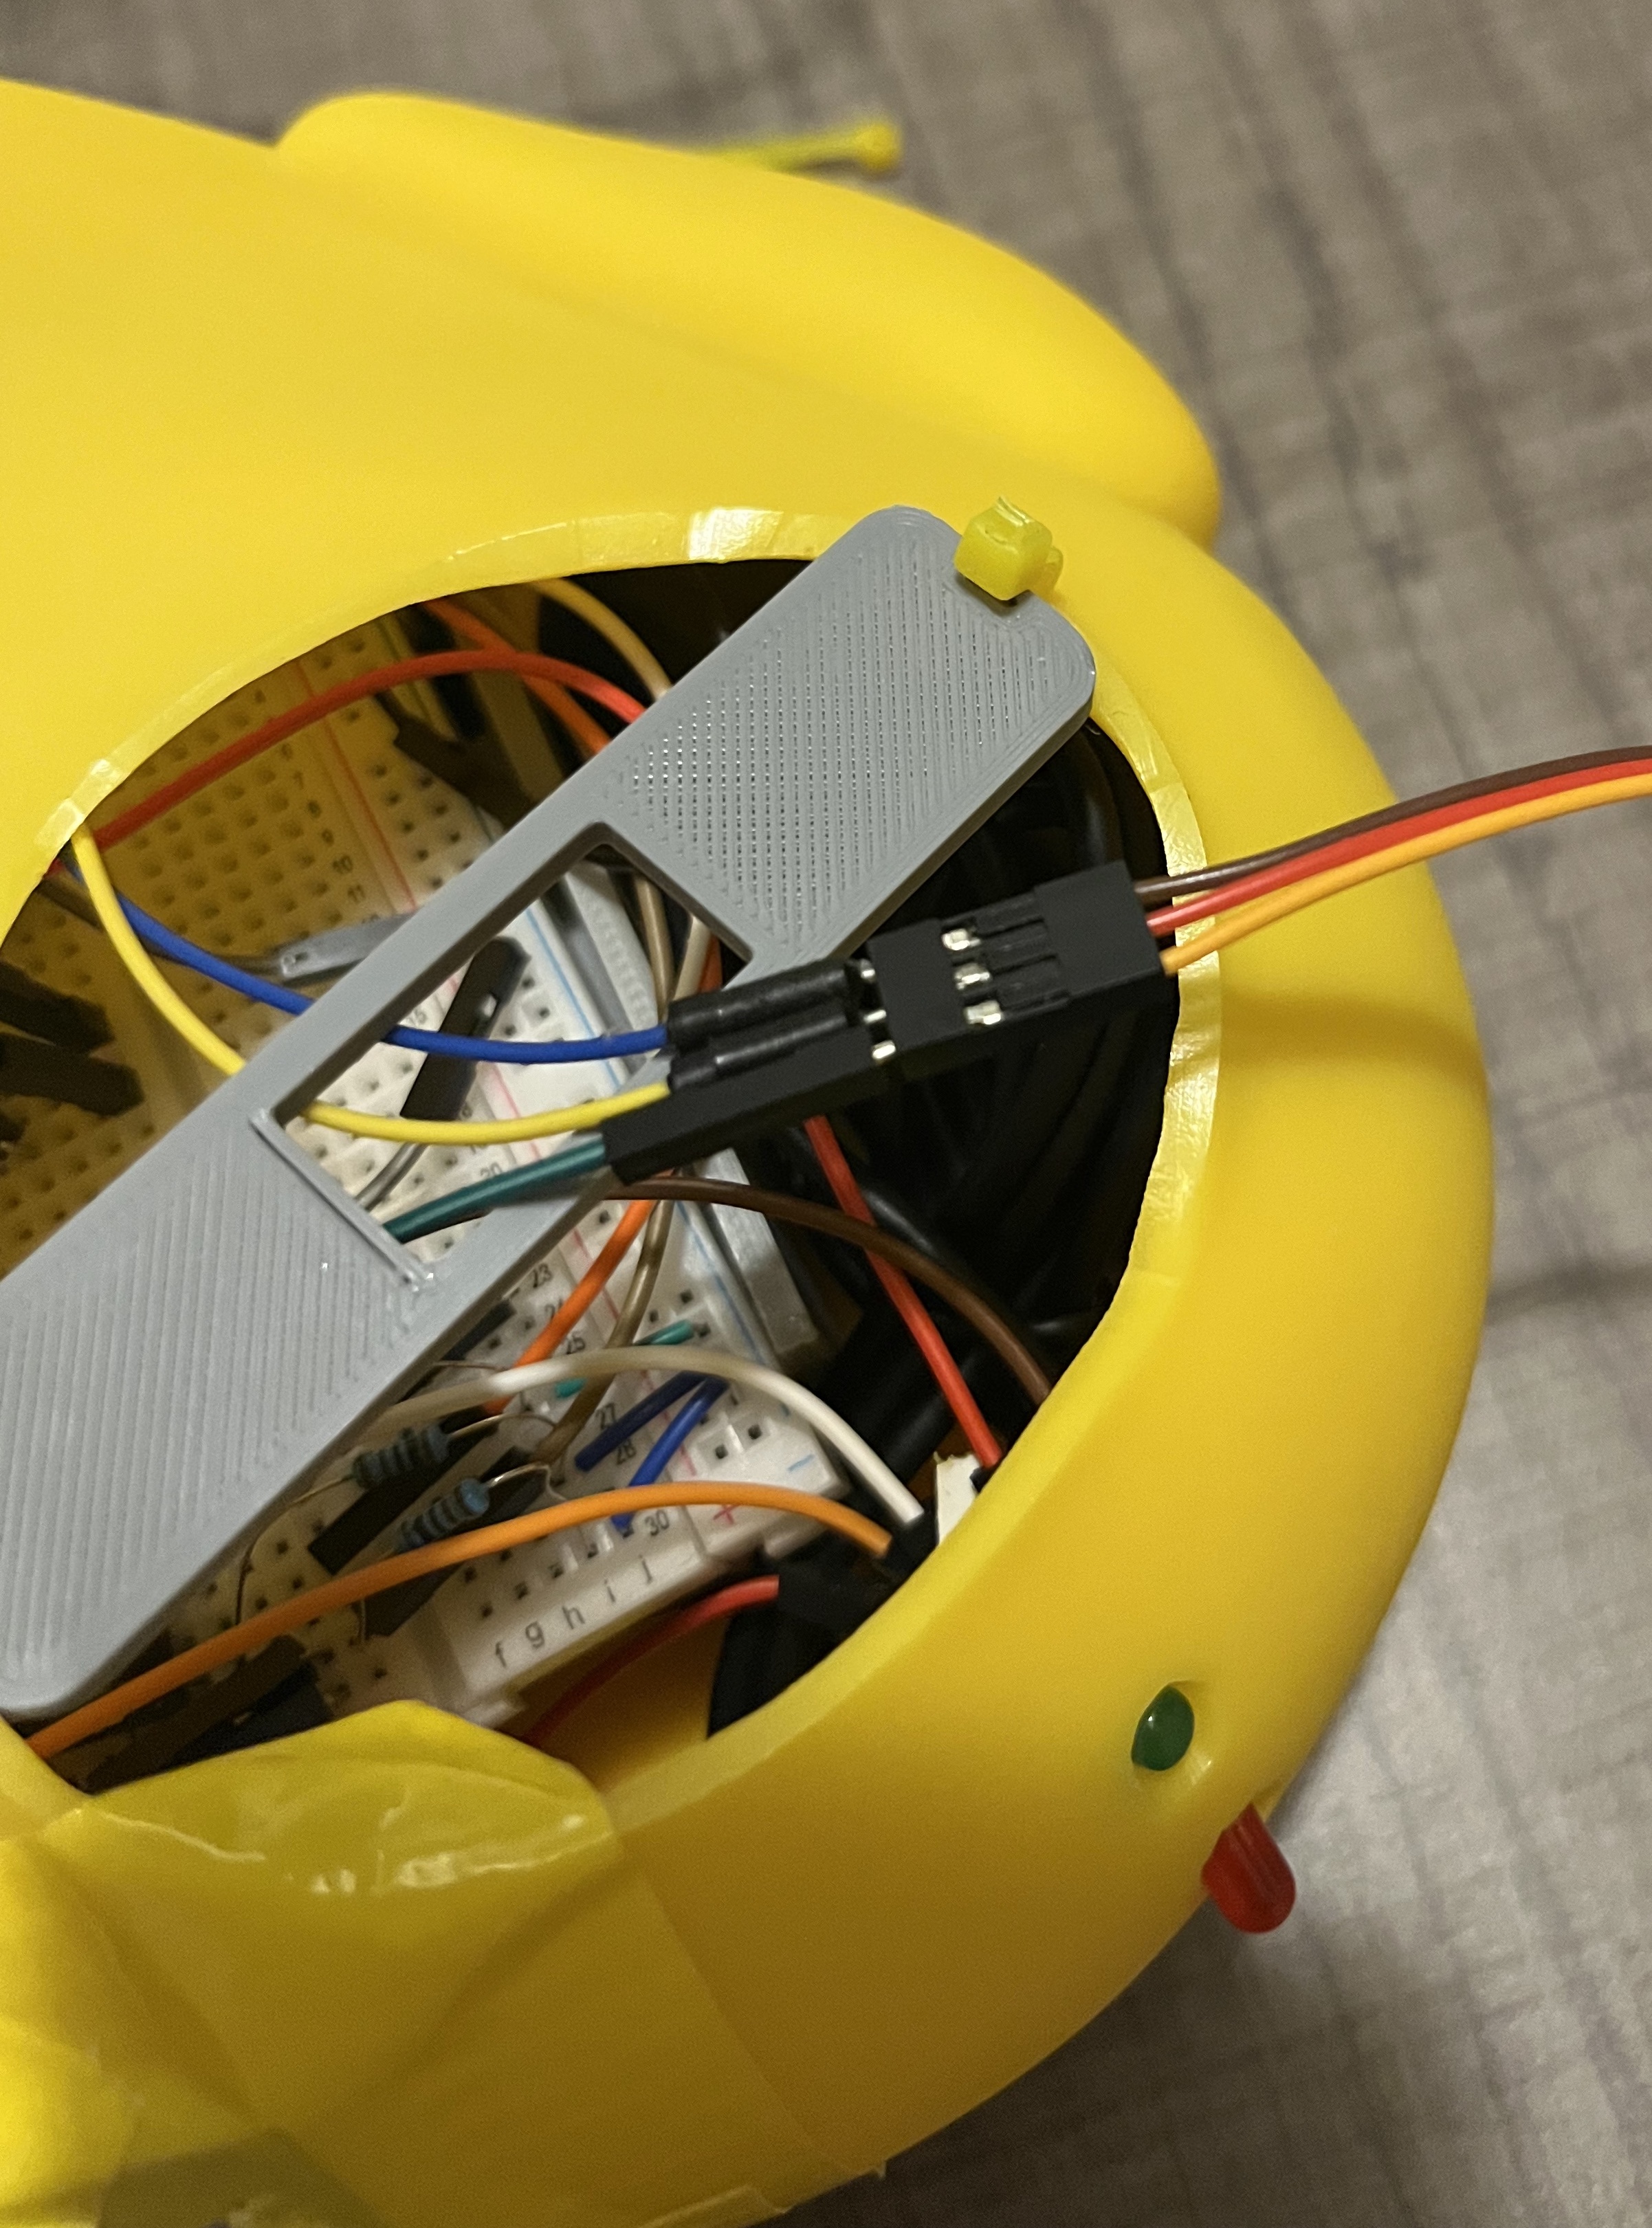
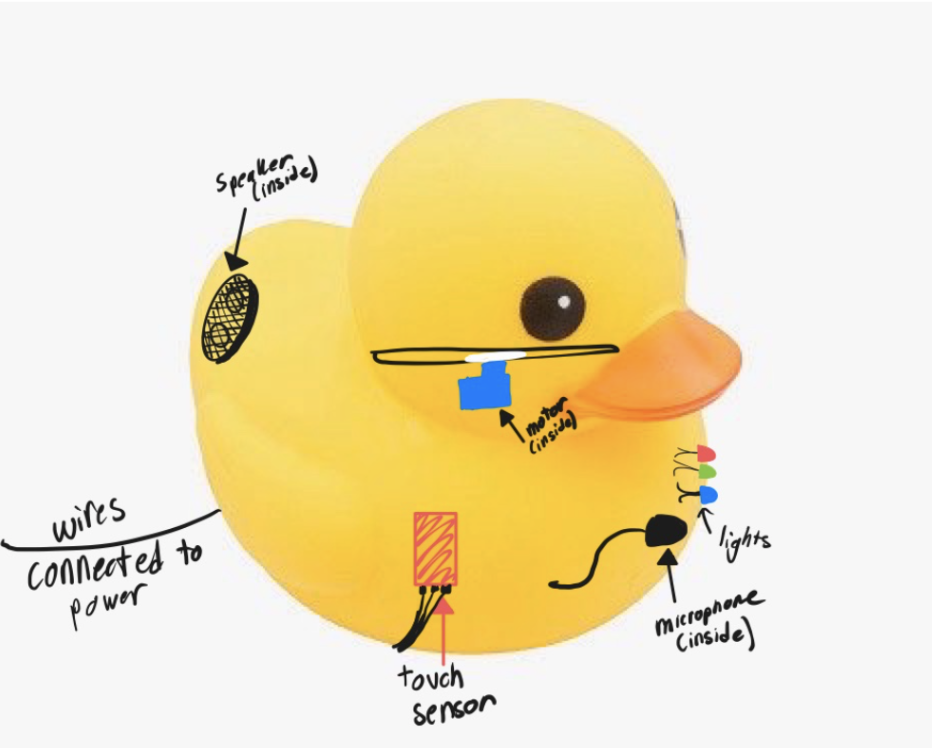
HardwareDebuggy Ducky was built using both off-the-shelf and custom 3-D printed components. The brain of the duck is a headless Raspberry Pi 4 loaded with PiOS that is set to automatically run the duck’s software. Connected to the Pi’s ports are a USB microphone and speaker. Further, there are two touch sensors, three LEDs, and a servo connected to a breadboard utilizing the Pi’s GPIO pins. To house the Pi and the breadboard, we 3-D printed an enclosure that shields the Pi from the other components inside the duck and positions the breadboard in an optimal configuration to connect everything. We also 3D printed a servo-mount and corresponding servo-head piece to enable Debuggy Ducky’s head to swivel. All the 3-D printed pieces can be seen in Custom Parts and Enclosures and the final structure design can be seen in Schematics.
SoftwareDebuggy Ducky’s software was written in Python due to its extensive library support. The duck leverages libraries to perform speech-to-text, text-to-speech, audio recording and playback, OpenAI LLM prompting, Google Drive storage writing, and Raspberry Pi GPIO control. The software for the duck is available through the GitHub repository linked at the bottom of the page.
RecordingA single touch on the upper sensor enables the ducks ‘Recording Notes’ feature. This starts a variable length audio recording, illuminates the green ‘record’ LED, and turns Debuggy Ducky’s head. Upon another touch to the sensor, the duck ends the recording, performs speech-to-text, and saves both the raw output and a chat-GPT organized output to the user’s Google Drive.
ChatA simultaneous touch on both the upper and lower touch sensors enables Debuggy Ducky’s chat feature. This action starts a variable length audio recording in which the user can dictate a question it wants to ask chat-GPT, illuminates the green ‘record’ LED, and turns Debuggy Ducky’s head. Once another simultaneous touch is registered the duck ends the recording, performs speech-to-text, and prompts chat-GPT for a response. The output from chat-GPT is then both saved to the user's Google Drive and spoken back to the user using the speaker.
Pomodoro TimerA single touch on the lower touch sensor toggles the Pomodoro timer. Once pressed, a time interval starts. It will first start a 25-minute ‘work’ timer, turning on the red ‘work’ LED. Then it will start a 5-minute ‘break’ timer, turning on the blue ‘break’ LED. After 4 working sessions and 3 break sessions, the ‘break’ will be a longer, 15-minute interval. When the timer goes off, the duck alerts the user by quacking 3 times, and the next interval starts when the user touches the lower touch sensor.
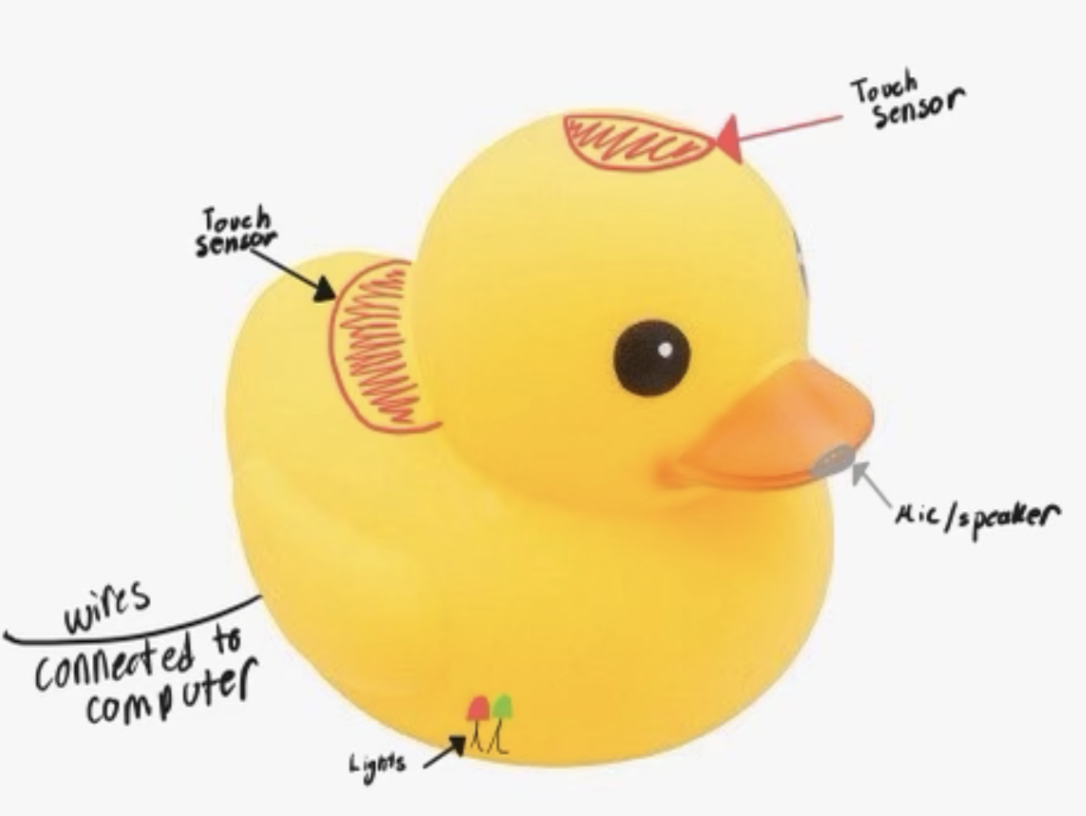
Summary of Milestone 1In milestone 1 we focused on flushing out our project as well as determining the actions Debuggy Ducky would be able to perform. Our main goal was to take the classic Rubber Duck Debugger and make it an interactive helper. We decided that Debuggy Ducky would have 3 main functions: a Pomodoro timer, note-taking skills, and the ability to ask ChatGPT questions. The note-taking would use speech-to-text to create a note file and then analyze that note file using ChatGPT. Similarly using speech-to-text would allow you to ask ChatGPT a question. Once ChatGPT has come up with a response we would be able to relay it to the user using text-to-speech. A diagram of our first physical design concept can be seen in the Schematics labeled "Milestone 1 Design".
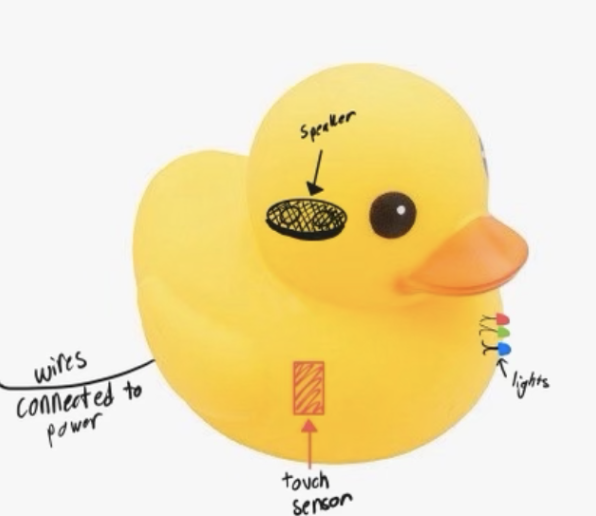
Summary of Milestone 2Milestone two was focused on planning out the hardware connections and building our first iteration of the duck. For the Pomodoro timer, we decided to use the touch sensor to activate and stop each cycle of the timer and used the lights to represent which timer was currently on, if any. We connected all the hardware pieces to the breadboard and Raspberry Pi. After doing test runs of all the hardware and software components we were able to get everything up and running except for the speech-to-text, due to issues with the microphone, and the head motions, we decided to mount the servo in the next milestone. Once we had completed the tests we attempted to get all the working hardware components inside the duck. While there were some space challenges everything did effectively fit inside. All the goals we did not complete in this Milestone were later completed before Milestone 3. You can see a diagram of the duck design concept in Schematics under "Milestone 2 Design" and an image that depicts the space limitations in the same area called "Space Constraints in Debuggy Ducky".






Comments
Please log in or sign up to comment.