- This project is an application for the retail industry is a prime example of an industry that can be automated through the use of Artificial Intelligence and Robotics. I was motivated to do this project by finding two different solutions for the same problem as described below.
- This project is a proof of concept that shows how Computer Vision can be used to create an automated process using the NVIDIA Jetson Nano and the Edge Impulse platform.
- Additionally, I will repeat the experience but using OpenCv and YOLO v7 to finally compare the results.
Main features:
- GPU 128-core Maxwell™ GPU
- CPU Quad-core ARM A57
- Memory 4 GB 64-bit LPDDR4 | 25.6 GB/s
- 10/100/1000BASE-T Ethernet
- Storage microSD
- Video Encode 4Kp30| 4x 1080p30| 9x 720p30 (H.264/H.265)
- Video Decoder4Kp60| 2x 4Kp30| 8x 1080p30| 18x 720p30| (H.264/H.265)
- USB 3.0 Type A
- USB 2.0 Micro-B
- HDMI/DisplayPort
- Gigabit Ethernet
- GPIOs, I2C, I2S, SPI, UART
- 2x MIPI-CSI camera connectors
All the documentation related to setting up the Jetson Nano, installing dependencies and Edge Impulse CLI can be found at the following link: https://docs.edgeimpulse.com/docs/edge-ai-targets/officially-supported-cpu-gpu-targets/nvidia-jetson-nano
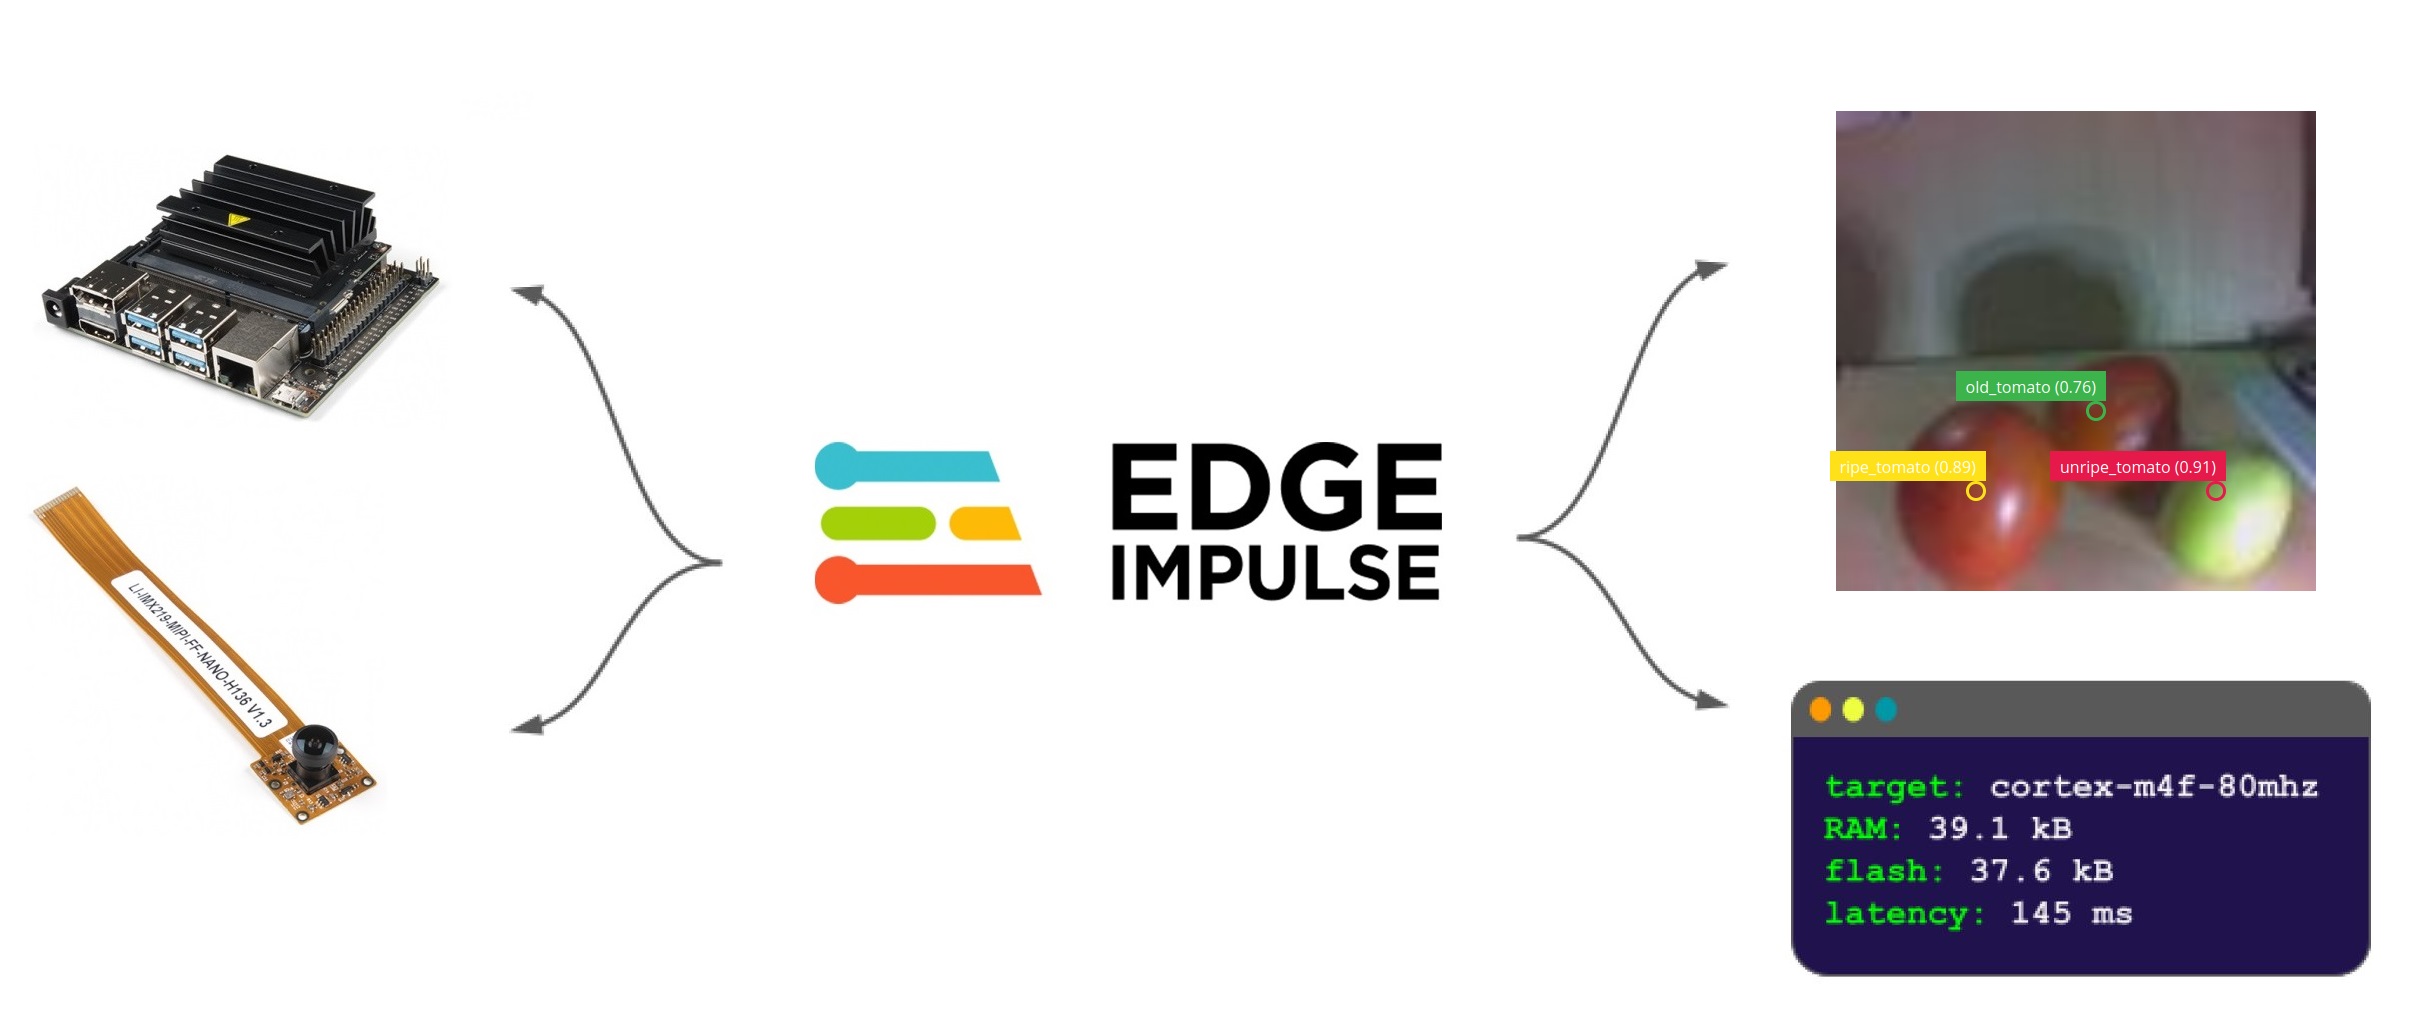
As you can see in the schematic diagram, I will use the Leopard Imaging Camera. This device is a 136° field of view, is great for machine vision applications, and to be compatible with the NVIDIA Jetson Nano Developer Kit. Also this camera incorporates a Sony IMX219 8.08MP color sensor.
Edge Impulse is a leading development platform for machine learning on edge devices, free for developers and trusted by enterprises. Head over to Edge Impulse, and create your account and login.
Once logged in you will be taken to the project selection/creation page. In my case I have created the Tomatoes-Quality-Control project.
Connect your device
Once the required dependencies and firmware has been installed enter the next command:
edge-impulse-linuxFollow the instructions to log in to your Edge Impulse account. Below I show you the device named "jetson-nano" that I have created in my project.
In this example I will use images from the old tomatoes (296 items), ripe tomatoes (299 items) and unripe tomatoes (270 items). The total items are 515, and please use a ratio of 80% of the dataset images for training and 20% for testing.
The images used are both from image capture with the jetson nano board camera, and images from next kaggle´s dataset: https://www.kaggle.com/datasets/iamdatascientist99/vegnet-vegetable-dataset
I had to preselect the best representative images of each class. In other words, I chose the best illuminated images and those with the best resolution.
Edge Impulse: Create Impulse- Now we are going to create our neural network and train our model.
- Head to the Create Impulse tab. Next click Add processing block and select Image.
- Now click Add learning block and select Object Detection (Images).
- Finally click Save impulse.
- Head over to the Image tab and click on the Save parameters button to save the parameters.
- If you are not automatically redirected to the Generate features tab, click on the Image tab and then click on Generate features button.
- Your data should be nicely clustered and there should be as little mixing of the classes as possible. You should inspect the clusters and look for any data that is clustered incorrectly. If you find any data out of place, you can relabel or remove it.
- Now we are going to train our model. Click on the Transfer Learning tab then click Data augmentation and select FOMO MobileNetV2 0.35, then Start training.
- Once training has completed, you will see the results displayed at the bottom of the page. Here we see that I have 84.2 % F1 Score. Lets test our model and see how it works on our test data.
Head over to the Model testing tab where you will see all of the unseen test data available. Click on the Classify all wait a moment. In my case I obtained an accuracy of 82.18%.
Now we will deploy the software directly to the NVIDIA Jetson Nano. To do this simply head to the terminal on your Jetson Nano, and enter:
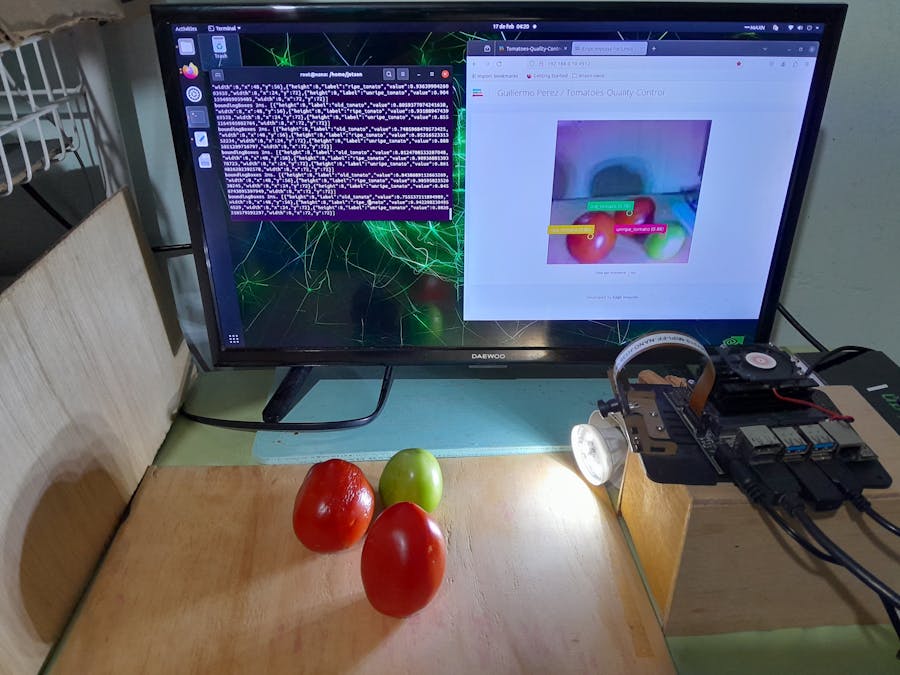
edge-impulse-linux-runnerOnce the model is downloaded, it runs on the Jetson Nano board. The model readings begin to appear in the terminal, we take note of the IP address and write it in our web browser. In my case the IP is: 192.168.0.10:4912. In this way, in the image below we can see that the left terminal shows us the precision values and the browser shows the image captured from the camera with its corresponding values.
Test
Conclusion
- I have demonstrated the usefulness of using Edge Impulse in quality control of tomatoes with good precision.
- You can now take data, train this data on the Edge Impulse platform, and then deploy the newly trained model back to your Jetson Nano with zero lines of code.
- We must consider good lighting and resolution of the objects when we train and download the model to our Jetson Nano board to test the model.
- This project is public on the Edge Impulse platform. If you want to clone, improve and make changes, please go to the following link:
https://studio.edgeimpulse.com/studio/350460
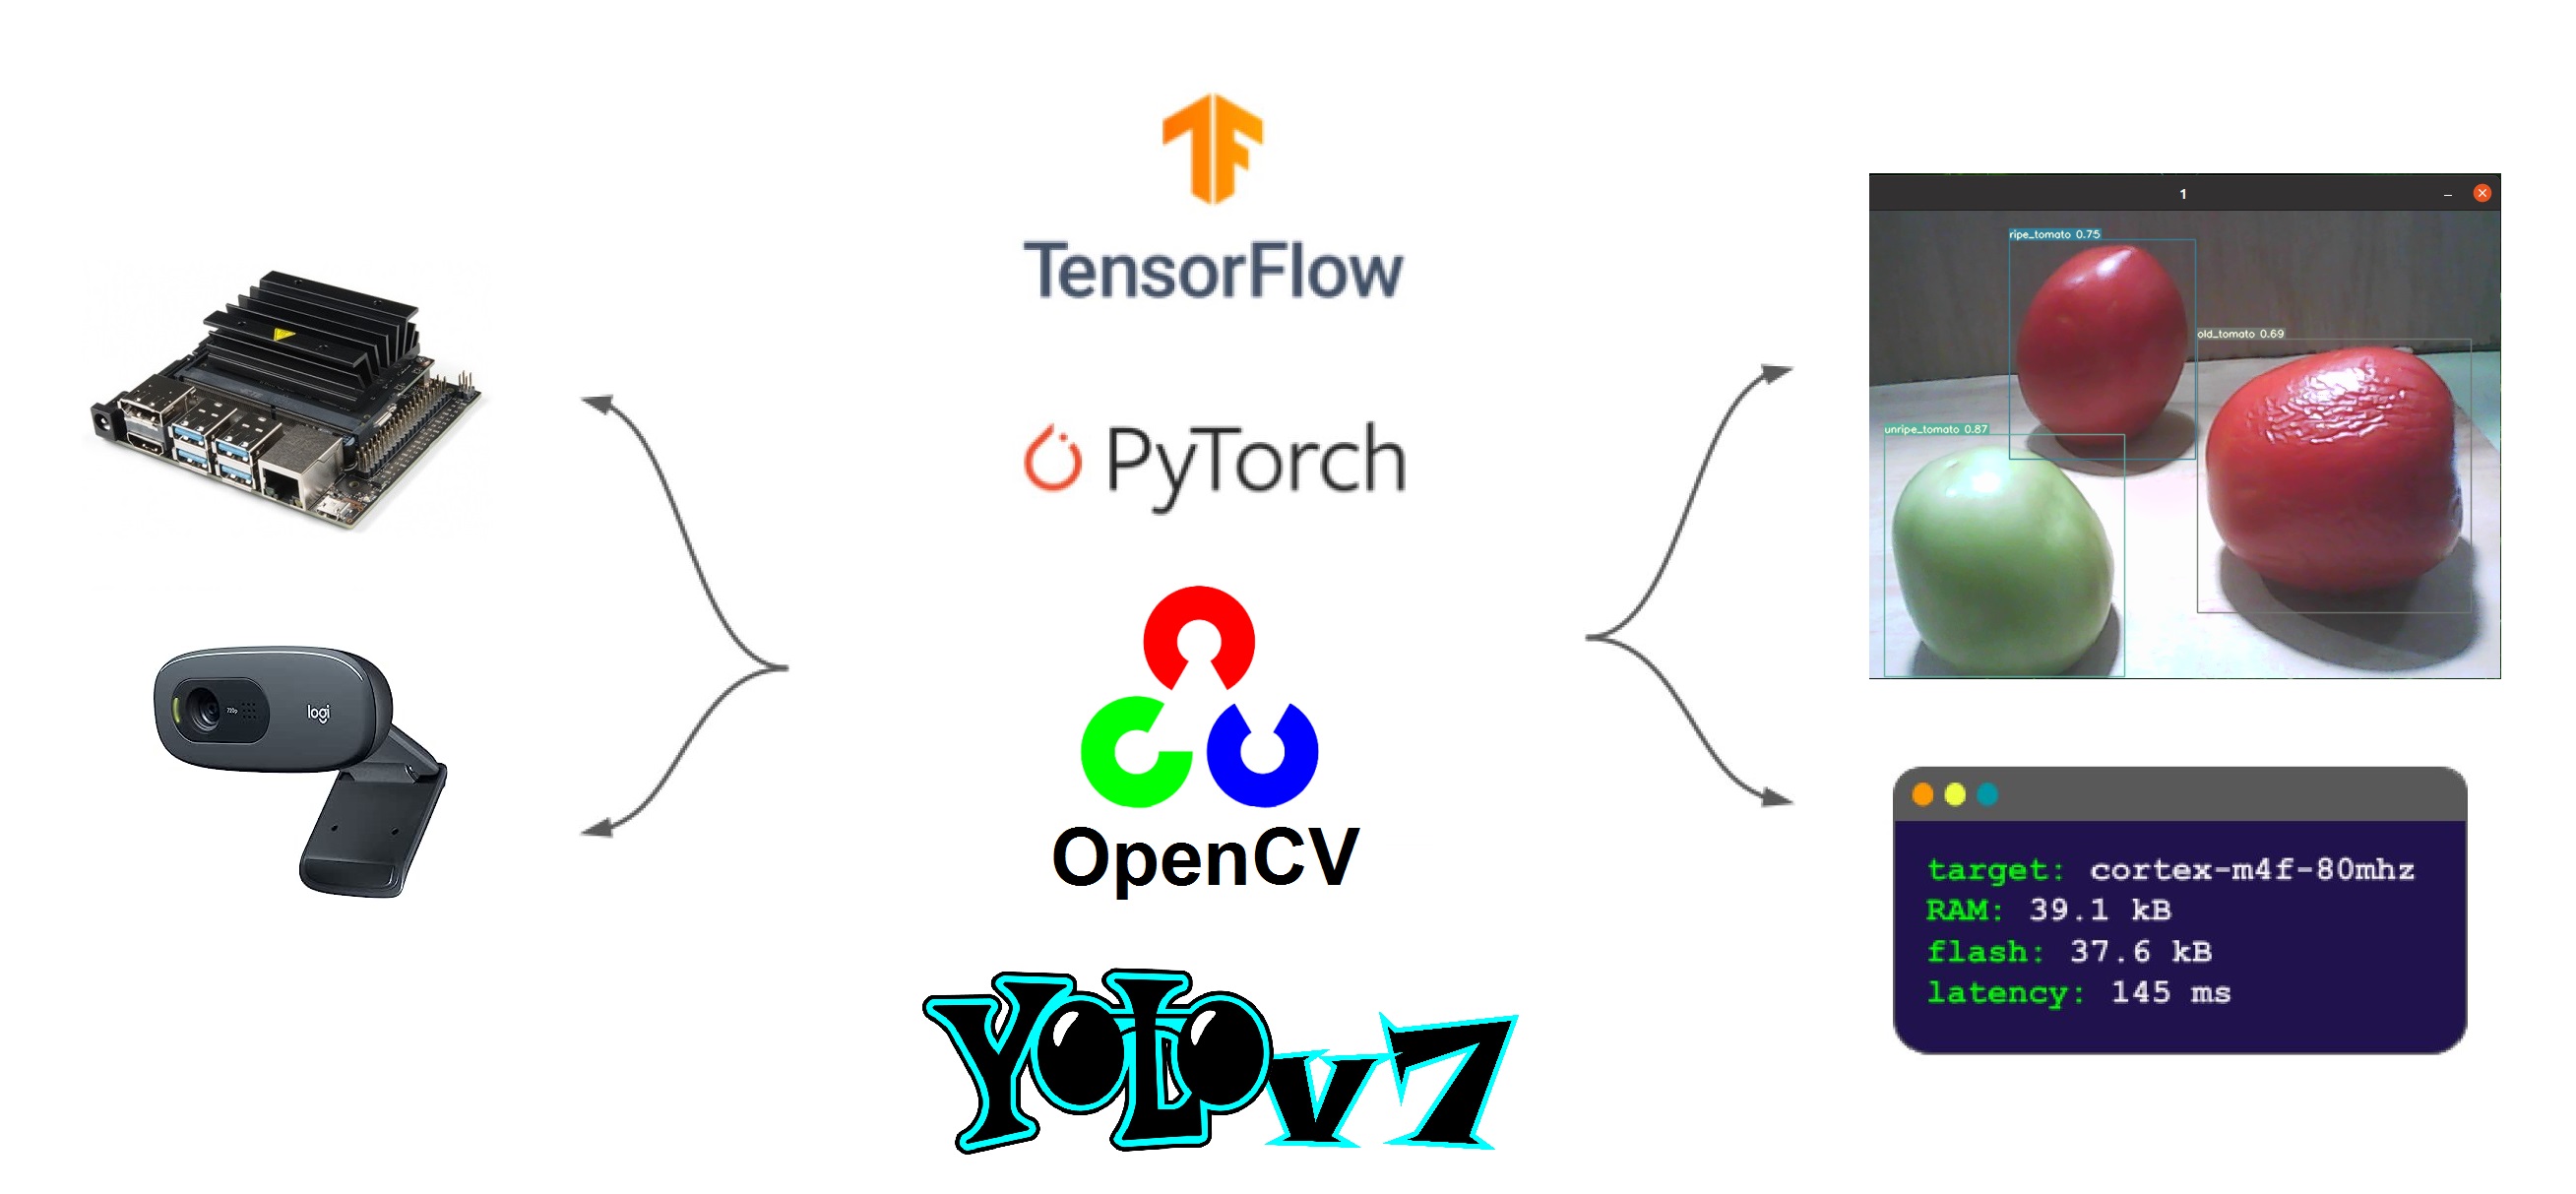
YOLO v7: IntroductionNow we will make some interesting changes to demonstrate the power of the Jetson Nano in detecting old, ripe and unripe tomatoes. As shown in the schematic diagram I will use the Logitech webcam C270. Likewise, the software used will be TensorFlow, PyTorch, OpenCV and YOLO v7.
Adding Swap Memory
By default the Ubuntu 20.04 distribution of Jetson Nano comes with 2 GB of Swap memory. In my case I have added 4 GB following steps in next tutorial: https://www.forecr.io/blogs/programming/how-to-increase-swap-space-on-jetson-modules.In total, my jetson nano board has 10 GB of memory, 4 GB of RAM and 6 GB of swap memory as shown below.
- InstallOpenCV4.8
First I installed OpenCV 4.8 and all the dependencies following the guide shown in this tutorial: https://qengineering.eu/install-opencv-on-jetson-nano.html
- install YOLO v7
$ git clone https://github.com/WongKinYiu/yolov7.git
$ cd yolov7
Edit and run requirements.txt file
$ gedit requirements.txtComment out Matplotlib, Numpy, opencv-python, Torch, Torchvision, thop because these will be installed later
$ pip3 install -r requirements.txt- InstallNumpy 1.20.3
$ pip3 install numpy==1.20.3- Install Tensorflow 1.13.0
Reference: https://qengineering.eu/install-pytorch-on-jetson-nano.html
# get a fresh start
$ sudo apt-get update
$ sudo apt-get upgrade
# install pip and pip3
$ sudo apt-get install python-pip python3-pip
# remove old versions, if not placed in a virtual environment (let pip search for them)
$ sudo pip uninstall tensorflow
$ sudo pip3 uninstall tensorflow
# install the dependencies (if not already onboard)
$ sudo apt-get install gfortran
$ sudo apt-get install libhdf5-dev libc-ares-dev libeigen3-dev
$ sudo apt-get install libatlas-base-dev libopenblas-dev libblas-dev
$ sudo apt-get install liblapack-dev
$ sudo -H pip3 install Cython==0.29.21
# install h5py with Cython version 0.29.21 (± 6 min @1950 MHz)
$ sudo -H pip3 install h5py==2.10.0
$ sudo -H pip3 install -U testresources numpy
# upgrade setuptools 39.0.1 -> 53.0.0
$ sudo -H pip3 install --upgrade setuptools
$ sudo -H pip3 install pybind11 protobuf google-pasta
$ sudo -H pip3 install -U six mock wheel requests gast
$ sudo -H pip3 install keras_applications --no-deps
$ sudo -H pip3 install keras_preprocessing --no-deps
# install gdown to download from Google drive
$ sudo -H pip3 install gdown
# download the wheel
$ gdown https://drive.google.com/uc?id=1DLk4Tjs8Mjg919NkDnYg02zEnbbCAzOz
# install TensorFlow (± 12 min @1500 MHz)
$ sudo -H pip3 install tensorflow-2.4.1-cp36-cp36m-linux_aarch64.whl- Install PyTorch v1.13.0
Reference: https://qengineering.eu/install-pytorch-on-jetson-nano.html
# get a fresh start
$ sudo apt-get update
$ sudo apt-get upgrade
# the dependencies
$ sudo apt-get install ninja-build git cmake
$ sudo apt-get install libjpeg-dev libopenmpi-dev libomp-dev ccache
$ sudo apt-get install libopenblas-dev libblas-dev libeigen3-dev
$ sudo pip3 install -U --user wheel mock pillow
$ sudo -H pip3 install testresources
# above 58.3.0 you get version issues
$ sudo -H pip3 install setuptools==58.3.0
$ sudo -H pip3 install scikit-build
# download PyTorch 1.13.0 with all its libraries
$ git clone -b v1.13.0 --depth=1 --recursive https://github.com/pytorch/pytorch.git
$ cd pytorch
# one command to install several dependencies in one go
# installs future, numpy, pyyaml, requests
# setuptools, six, typing_extensions, dataclasses
$ sudo pip3 install -r requirements.txt- Install TorchVision0.14.0
Reference: https://qengineering.eu/install-pytorch-on-jetson-nano.html
# the dependencies
$ sudo apt-get install libjpeg-dev zlib1g-dev libpython3-dev
$ sudo apt-get install libavcodec-dev libavformat-dev libswscale-dev
$ sudo pip3 install -U pillow
# install gdown to download from Google drive, if not done yet
$ sudo -H pip3 install gdown
# download TorchVision 0.14.0
$ gdown https://drive.google.com/uc?id=19UbYsKHhKnyeJ12VPUwcSvoxJaX7jQZ2
# install TorchVision 0.14.0
$ sudo -H pip3 install torchvision-0.14.0a0+5ce4506-cp38-cp38-linux_aarch64.whl
# clean up
$ rm torchvision-0.14.0a0+5ce4506-cp38-cp38-linux_aarch64.whl- We verify the versions of the installations:
- We're going to use a small pre-trained YOLO v7 model because this version is ideal for real-time applications and deployment in embedded devices like Nvidia Jetson boards. Download the trained weights for this model and copy it into yolov7 folder:
$ cd /yolov7
$ !wget "https://github.com/WongKinYiu/yolov7/releases/download/v0.1/yolov7-tiny.pt"- In the video below I show you a simple demonstration where I am verifying the good performance of Yolo v7 with video file.
$ python3 detect.py --weights yolov7-tiny.pt --conf 0.25 --img-size 640 --source /home/jetson/Documents/test/objects.mp4- I have created the Dataset folder to group the project. This Dataset contains 745 images belonging to the 3 classes, as well as their bounding boxes in the PASCAL VOC format. The classes are: old_tomato, ripe_tomato and unripe_tomato
- I have used labelImg tool to make the annotations in XML format. LabelImg is a graphical image annotation tool and the installation steps on different operating systems you can find in this github repository: https://github.com/HumanSignal/labelImg
- I also used labelImg to convert the annotation-data format from PASCAL VOC to YOLO.
- And all the labels are now in the expected YOLO format, eg:
0 0.533203 0.255859 0.332031 0.503906- Now, I split the data into train, val, and test-folders.
- Next, I created the tomatoes_ver2_data.yaml file, and inserted it into the data folder. The content of this file is as follows:
train: /home/jetson/yolov7/Dataset/tomatoes_ver2/images/train/
val:  /home/jetson/yolov7/Dataset/tomatoes_ver2/images/val/
test: /home/jetson/yolov7/Dataset/tomatoes_ver2/images/test/
# number of classes
nc: 3
# class names
names: ["old_tomato", "ripe_tomato", "unripe_tomato"]
In YAML file we have to specify the train, val and test folders path. Also we have to add the classes: "old_tomato", "ripe_tomato", and "unripe_tomato".
- I also need to create the labels.txt file with the following content, and inserted it into the labels folder:
old_tomato
ripe_tomato
unripe_tomato- The folders and files are as shown below:
The data is now compatible with YOLO v7 and can be used to train a model to recognize tomatoes quality for us.
python3 train.py --workers 4 --img 640 --cfg cfg/training/yolov7-tiny.yaml --hyp data/hyp.scratch.p5.yaml --batch 2 --epochs 20 --data data/tomatoes_ver2_data.yaml --weights yolov7-tiny.pt --name tomatoes_ver2_modelWhere,
- --data: This accepts the path to the dataset YAML.
- --workers n: This parameter defines the number of cores that can be used for the training job.
- --weights: As we are using the small model from the YOLO v7 family, the value is yolov7-tiny.pt
- --img: We can also control the image size while training.
- --epochs: This argument is used to specify the number of epochs.
- --batch-size: This is the number of samples that will be loaded into one batch while training.
- --name: We can provide a custom mode name where all the results will be saved.
Once the training completes, we will have two weights in weights/ directory: best.pt and last.pt. The best.pt weight is the one that gives better performance. In my case, the path is runs/train/tomatoes_ver2_model/weights/best.pt. The run took around 2 hrs with the following successful results:
Precision measures how accurate are the predictions. It is the percentage of your correct prediction. And Recall measures how good it finds all the positives. The confusion matrix is shown below:
Below I show you a test during training.
Now, we can focus on the inference and check out the results.
- Image file
$ python3 detect.py --weights runs/train/tomatoes_ver2_model/weights/best.pt --conf 0.5 --img-size 640 --source /home/jetson/Documents/test/tomatoes_image.jpg- Live video
$ python3 detect.py --weights runs/train/tomatoes_ver2_model/weights/best.pt --img-size 640 --conf 0.5 --source 1Below you can see the demonstration from an external camera.
But if you want to see a video capture from the webcam and using YOLO v7, below I show you the video when I try to properly place three tomatoes.
Conclusion
- I am satisfied with the accuracy obtained with the YOLO v7 model in both training and testing.
- I have followed the strategy of carefully selecting the images for training. That is, they must have good lighting, and the characteristics of the tomatoes must be clearly seen.
- An unripe tomato has a shiny paleness and texture. In a ripe tomato you begin to notice red pigments uniformly giving a color between orange and red. Finally, the old tomato has a strong red color, and dehydration causes cracks and wrinkles everywhere.
- If you want to repeat the experience, you can obtain the repository in the download area or at this link: https://github.com/guillengap/tomatoes-quality-control/tree/main


Comments