

Hardware components | ||||||
 |
| × | 1 | |||
| × | 1 | ||||
 |
| × | 1 | |||
_zhWsCcSEcl.jpg?auto=compress%2Cformat&w=48&h=48&fit=fill&bg=ffffff) |
| × | 1 | |||
 |
| × | 1 | |||
Software apps and online services | ||||||
| ||||||
 |
| |||||
| ||||||
Hand tools and fabrication machines | ||||||
 |
| |||||
 |
| |||||
Are you a wannabe gamer streamer? Do you like recording music and podcasts? Do you have a microphone that you can't leave still without occupying one hand? Then this product must be for you!
The BackstoryHaving my PC for five years now, a major concern of mine is communication and sound recording for a different class I have involving the recording of music, podcasts, etc. While searching for old electronics in the household, I found a small, high quality microphone my dad had that was really sweet.
However, my only caveat was that the given microphone didn't have a stand, so if I was in a call or had to record anything, I had to use up a whole hand to do so. This was extremely frustrating as I had to constantly pick up the microphone to speak. Unfortunately, since I am not a Hindu deity, I only have two hands, which makes recording any musical instrument impossible, especially for my sound engineering class which required that.
Nonetheless, I persisted with the idea of having a microphone stand that can adjust positions at ease with a simple user interface, so that I can fit any instrument or any object in the studio and fix the microphone in place. Let's dive into it.
WiringThis was actually the first portion that I tried getting down as it determined whether or not my equipment would actually work for the job before I consider investing more for the mechanical components.
My initial plan started out with a wiring diagram that involved me connecting both the MG995R and the SG90 to be connected to the positive power rail and ground power rails, which were connected to the Argon's 5 Volt VUSB pin and ground pins respectively. However, when setting up the servos, there was a major problem that was encountered as that specific wiring setup did not provide a consistent 5 volt induced current to power the MG995R for more than 10 seconds after startup before it jammed.
I originally believed it was a faulty servo, and later on tested a similar wiring setup with a stepper motor, the motor occasionally jammed as well. When I swapped the servo out for another one, the other one jammed. I swapped out Argons, etc. and still encountered the same error, but not for the SG90 which was able to function off of a lower current. It was then when I encountered the solution which was that the SG90 and the MG995R cannot be powered by the same VUSB pin or on a power rail without it jamming. Therefore, I instead changed the SG90 to gain current from the 3V3 pin of the Argon, which worked well for both servos.
Additionally, supplying the argon with a current from my PC's USB ports caused occasional jamming as well, so instead I used a wall wart to provide a 5 volt induced current. Any wall charger for android smartphone device also works.
The next portion was more straightforward as it involved pushing data from my smartphone to the Argon, which is an MCU that can receive data from Particle's cloud via Wi-Fi. This part just needed me to set up a UI with a virtual pin that can be pushed to Particle's cloud and written as an integer that can be used to write the position of the Servo motor. This method was done by pushing data through a virtual pin and taking the parameters in the Argon's firmware to write to the signal to the Servo motor.
I have officially decided I am not going to become a mechanical engineer anytime soon. If anyone that is more experienced wants to make their take, go ahead.
My initial drawings for 3D modeling was drafted on the idea that I could attach the model to the end of my desk in a C-Clamp design and have the MG995R control the horizontal rotation axis as the SG90 controls the vertical rotation axis. The dimensions and the pitches that I had to make to develop custom screws, etc. had to be altered over time.
The 3D modeling part on OnShape was especially difficult as I had to completely self teach myself each of the components. However, my final design of the 3D components still held a similar design plan that I am proud of as they appear to fit well with the dimensions of each part of my project.
This portion was painstakingly difficult. However, if I were to finalize this design, I would change the assigned servos of each component so that the MG995R would control the vertical axis of rotation that holds the SG90, which controls the horizontal axis of rotation.
It was then when I realized I had one big problem: Finding a printer that could actually print this.
The Base PrototypeFiguring out that I wouldn't be able to print this out on time, I decided instead to get a few craft supplies from Michaels and put together a rough prototype of this design using wood.
My initial problem was that I had to use counterweights to hold each part of the project together as it was loosely fixed on the desk (I can't drill holes on my desk). I went through drawing and figuring out the displacement between each component on each axis using a Free Body Diagram (FBD) in labeling all of the possible forces.
My first (FBD) worked but was inefficient as the servos were so far apart I had to use multiple jumper cables to have them reach the Argon and they could only rotate so far. The other problem is the longer the connection means the greater the resistance, which could result in performance issues and stuttering for both of the Servos as they are not supplied a stable current.
My second FBD worked more efficiently as the displacement between both components was minimal as the vertical axis of rotation was placed on the middle. To compensate, however, I had to use counterweights. The major problem with counterweights was that they increased the rotational inertia of each rod used, which provided a challenge for the SG90 micro servo as greater rotational inertia means greater countertorque by gravity, so I swapped the positions of the SG90 and the MG995R to find the project working more efficiently.
The only problem that remained was that I could not accelerate the servos that quickly, or else the rods would stay at the same velocity and cause the whole project to fall apart.
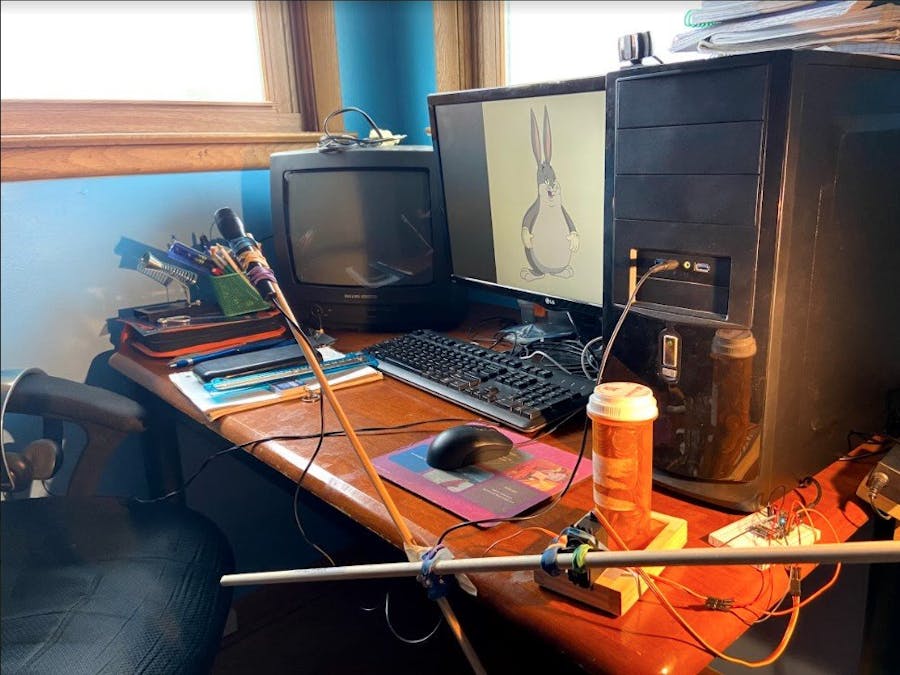
Anyways, this was the final product of my rough prototype.


Comments
Please log in or sign up to comment.