


Hardware components | ||||||
| × | 1 | ||||
| × | 1 | ||||
 |
| × | 1 | |||
Software apps and online services | ||||||
 |
| |||||
Hand tools and fabrication machines | ||||||
 |
| |||||
| ||||||
Update Jan 11 2021: I've updated this documentation with the latest code and updated STL files. The fermlock attachment is now stronger and a DS18B20 temp sensor got added to track the temperature.
I started home-brewing (DIY brewing) during the Corona pandemic in August 2020. During the fermentation process you typically leave your fermentation tank a few days in a cellar and check on the fermentation a few times a day. That's not a lot of work but being a nerd, I thought there must be a more a more data-driven way to determine the end of the fermentation.
Note: there are commercial solutions available to track the fermentation blubbs as well as the temperature, but these cost north of EUR 150 and they connect via WiFi, which is not available in my cellar. So I started to work on my own fermentation counter for the official Speidel Fermentation Lock.
If you have LoraWAN (via The Things Network) available in your area, the total cost to build this solution is around EUR 20 - if you don't have Things Network Coverage, I recommend to buy The Things Indoor Gateway which will add another EUR 70. It will add coverage for a large area, likely not just your home and cellar.
Let's start building...Start by 3d printing all the parts - the ring for the original Speidel fermentation lock (it will fit very snugly, it's intended), the sensor holder and the cake stick attachment. Also purchase the cake pop sticks (make sure you got the 4mm diameter cake pop sticks).
Note: print at least the sensor holder in black to maximize the IR light sensor function.
If you need to make changes, I've included the OpenSCAD source files so you can create your own STL files for 3d printing.
Attach the sensor holder to the original speidel fermentation lock.
You can now hot-glue the cake pop stick attachment to the top of the fermentation lid. It will fit the center. Don't attach the cake pop stick at this point - you will later have to cut it to the correct length.
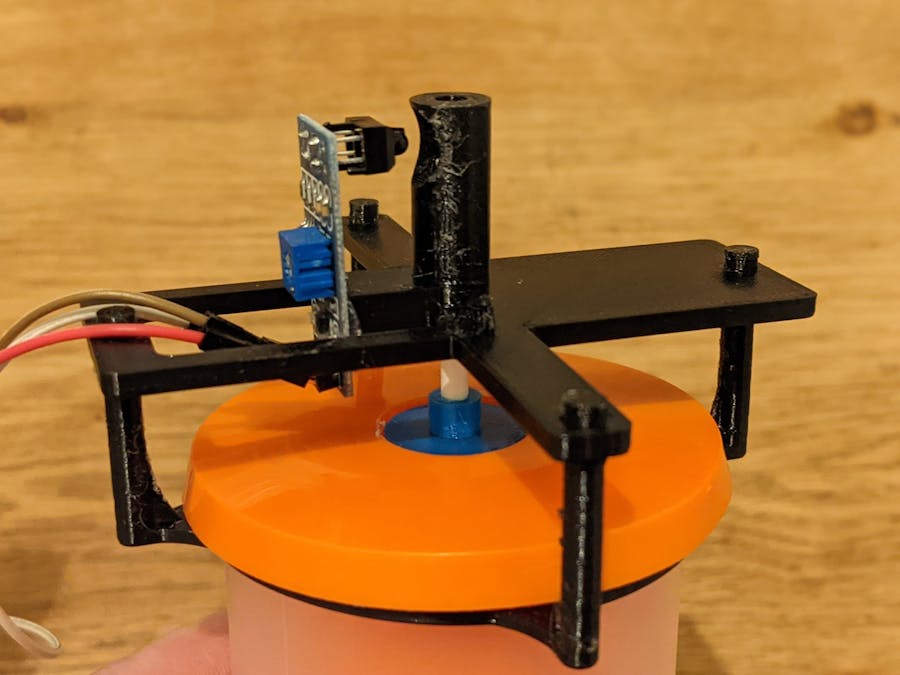
Build the sensor holder
The sensor used is a very cheap line following sensor. These sensors will detect the levels of IR light reflected. Attach the sensor to the little pin that sticks our of the holder and. make sure it's well hot-glued. I also broke away the pins to point upwards.
You can now put it all together and test it via any Arduino. Powere the sensor via the 5V/GND and A1 pin - and make sure you connected to the analog output pin (A) not the digital output pin (D) of the sensor.
Also, shorten the cake pop stick so it is slightly under the opening when the fermentation lock lid is completely in down position. When the CO2 later pushes the fermentation lid to the top, it will push the white cake pop stick, too, and we will be able to detect this change.
For testing the sensor, feel free to use the Arduino code provided.
The final step includes creating an account with The Things Network, flashing the CubeCell code and making sure it transmits data to The Things Network. In my case I integrated The Things Network with the Ubidots STEM plan to visualize the fermentation status with some nice dashboards.
Note: please see the CubeCell Arduino code in the code section. Be sure to change the values for connecting to TTN.
Note: if you do have WiFi or other connectivity in you cellar, it should be quite easy to transmit the data in a different way and to other platforms. I'd love to hear how you tracked the fermentation process.
Have fun brewing!


Comments
Please log in or sign up to comment.