The Arduino-based Mini Piano project helps in understanding the sound capabilities of Arduino. The project focuses on Arduino’s ability to generate different tones. The Arduino Uno microcontroller can sense the environment by receiving input from a variety of sensors and can affect its surroundings by controlling lights, motors, and other actuators. One of the senses on which our project focuses is sound. We have created a miniature version of a piano that produces notes like a normal piano.
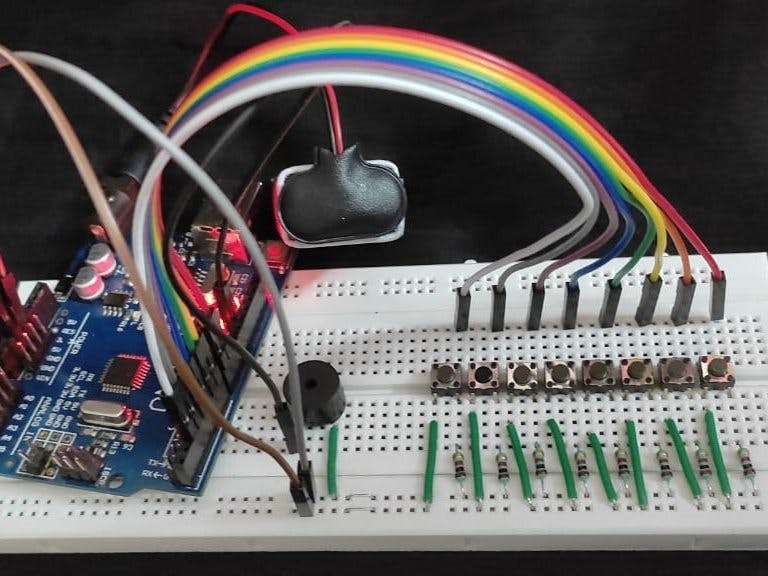
How does it work?After completing the connections and uploading of code to the board, connect a 9v battery as a source of power to the Arduino. When you press the respective pushbuttons, you can hear the corresponding notes played through the piezo buzzer. You can adjust the tone value in the source code and try with different pitches.
Code Explanation.int pb1 = 2;
int pb2 = 3;
int pb3 = 4;
int pb4 = 5;
int pb5 = 6;
int pb6 = 7;
int pb7 = 8;
int pb8 = 9;
int buzz = 13;
Here, I have declared all the Push Button pins as pb1, pb2, pb3, and so on. And declared the buzzer pin as "buzz".
pinMode(pb1,INPUT);
pinMode(pb2,INPUT);
pinMode(pb3,INPUT);
pinMode(pb4,INPUT);
pinMode(pb5,INPUT);
pinMode(pb6,INPUT);
pinMode(pb7,INPUT);
pinMode(pb8,INPUT);
pinMode(buzz,OUTPUT);
Here, I have declared whether Arduino UNO should accept the INPUT or give the OUTPUT.
tone(buzz,262,100);
The tone function has three parts:-pin, frequency, duration.
- In the Pin, you should give the Digital pin no. where the buzzer is connected.
- In the frequency, you should give the value of frequency(Hz) you want.
- In the duration, you have to give for how many milliseconds should the tone play, it is measured in milliseconds.
This is my youtube channel video on how to prepare Mini PianoHope you liked this mini-project!! Follow and like this project for more Arduino Projects
Don't forget to Subscribe to my Youtube channel and click on the bell icon for notifications.

_ztBMuBhMHo.jpg?auto=compress%2Cformat&w=48&h=48&fit=fill&bg=ffffff)


Comments