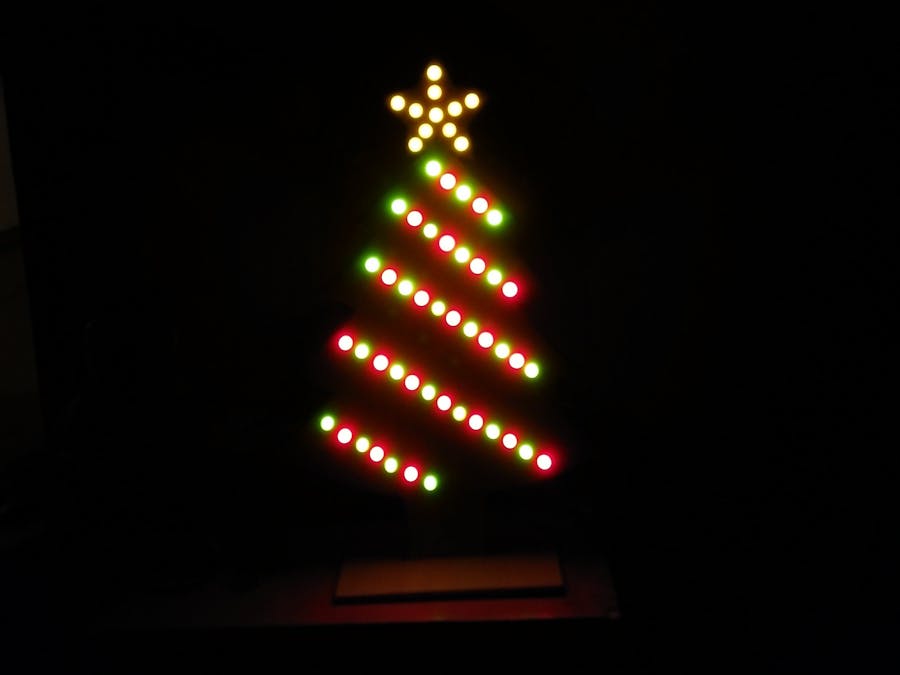
This project was intended as a Christmas present for my girlfriend and was also the first electronic project I've implemented. It was highly inspired by @Arduino_Jarod project Wooden LED Christmas Tree.
The ideaWooden Christmas tree decoration, with led rows representing string lights of a Christmas tree and a star on top of it. Each row has different colors, which I'm able to control independently (as well as the rows it self) via arduinos micro-controller. This way I can bring tree to life by coding my own light show programmes.
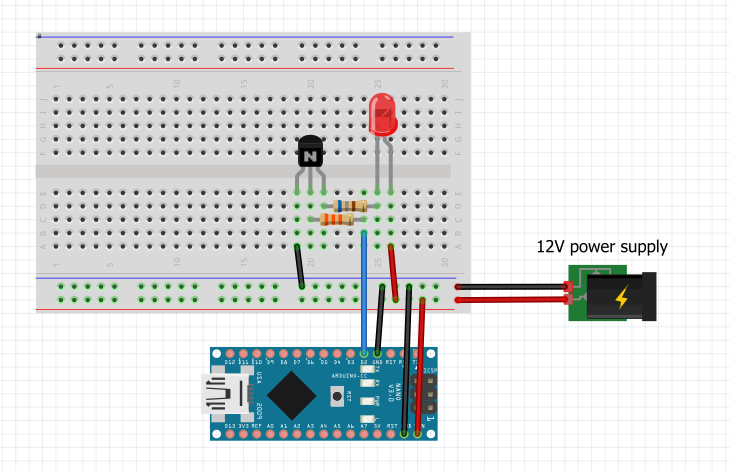
Arduino nano has limited amount of dio (Digital input/output) pins, therefore I've decided to go with 13 circuit layout to build my tree. (5 rows * 2 colors) for the tree + 3 rows for the star. A single dio pin doesn't provide enough voltage (nor does it withstand enough current draw) to power any circuit of more than 2 LEDs so I've had to figure out an external power source. Luckily I've dug up an old 12 volt (max 1 amp) wall power supply and used that as a single power source for my project. I've used NPN transistors to manage power supply to my circuits using lower voltage signals from dio pins.
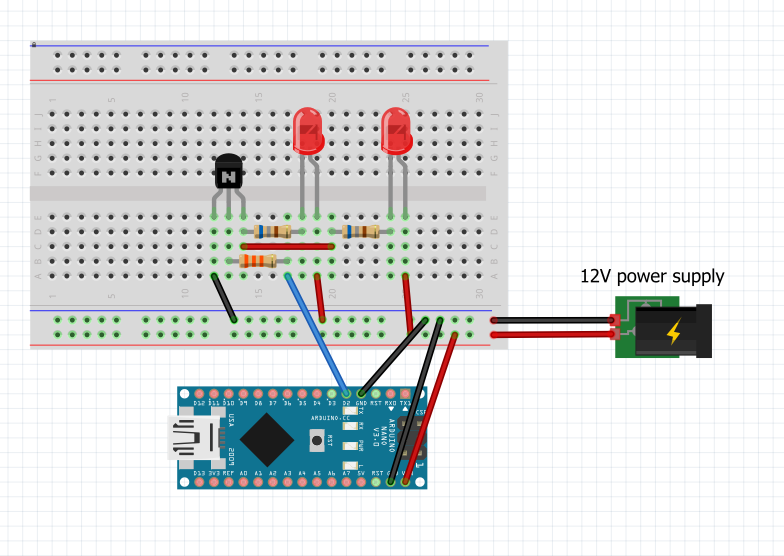
Although 12V is a significant improvement over 5V arduino pin can provide, it still wasn't enough to power some of the longer LED rows connected in a series circuit. This is where I've had to use a slightly more complicated design and split my circuit load in to two parallel circuits before connecting it to the transistors collector. This way I've compensated my shortage of voltage by allowing more current draw, and as a result slightly increasing the main circuits resistance
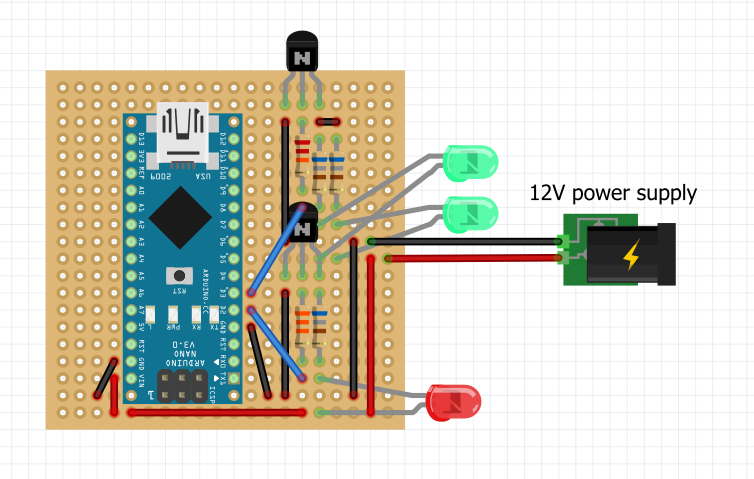
With most of the thinking completed, It was time to fit everything onto a pref-board. I've fitted all 13 circuits in a 2 column layout, green ones on top and reds on the bottom. I've figured it would be useful to have horizontal power and ground stripes, similar to the ones on a breadboard, so I've included those in my design.
Now I was finally ready to start constructing. The first activity turned out to be quite basic. I've simply cut the tree figure, a stand and drilled holes for all the LEDs.
Soldering LEDsNext, I had to solder all the LEDs together. I've found LED legs to be lengthy enough, and avoided using any additional wires. Although it wasn't completely necessary, I've isolated soldered connections with heat wrapping wire tubes.
This was the most time consuming task by far. I've soldered all the components in a similar pattern as previously described, and then all the wires, which would later connect to my LED circuits. Hot glue turned up useful at times, to isolate the open wires from the board.
After all this work, I could finally put it all together. I've glued the board to the back of a tree, connected all the wires and came up with some test code. In the end, it took some more time to debug many of the hardware issues (mainly caused by lack of soldering experience), but eventually I got it to work, and it came out beautifully :)


_3u05Tpwasz.png?auto=compress%2Cformat&w=40&h=40&fit=fillmax&bg=fff&dpr=2)
Comments
Please log in or sign up to comment.