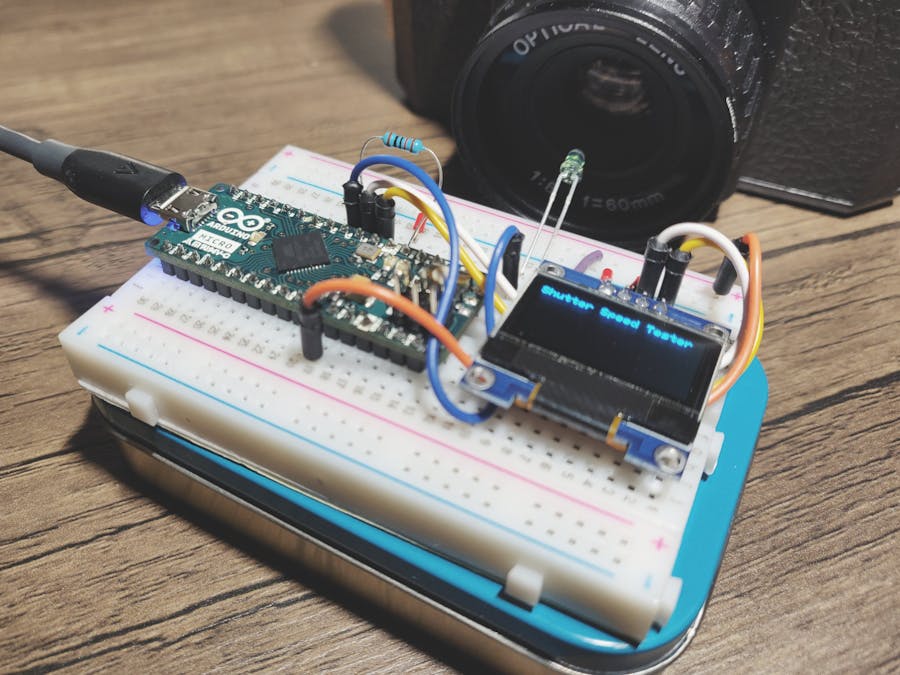
This is a project to build a simple shutter speed tester for film cameras.
Classical film cameras have a mechanical shutter that doesn't require a battery. However, film camera shutters that have not been used for many years may not work properly. The Shutter Speed Tester checks if the shutter speed of the film camera is correct.
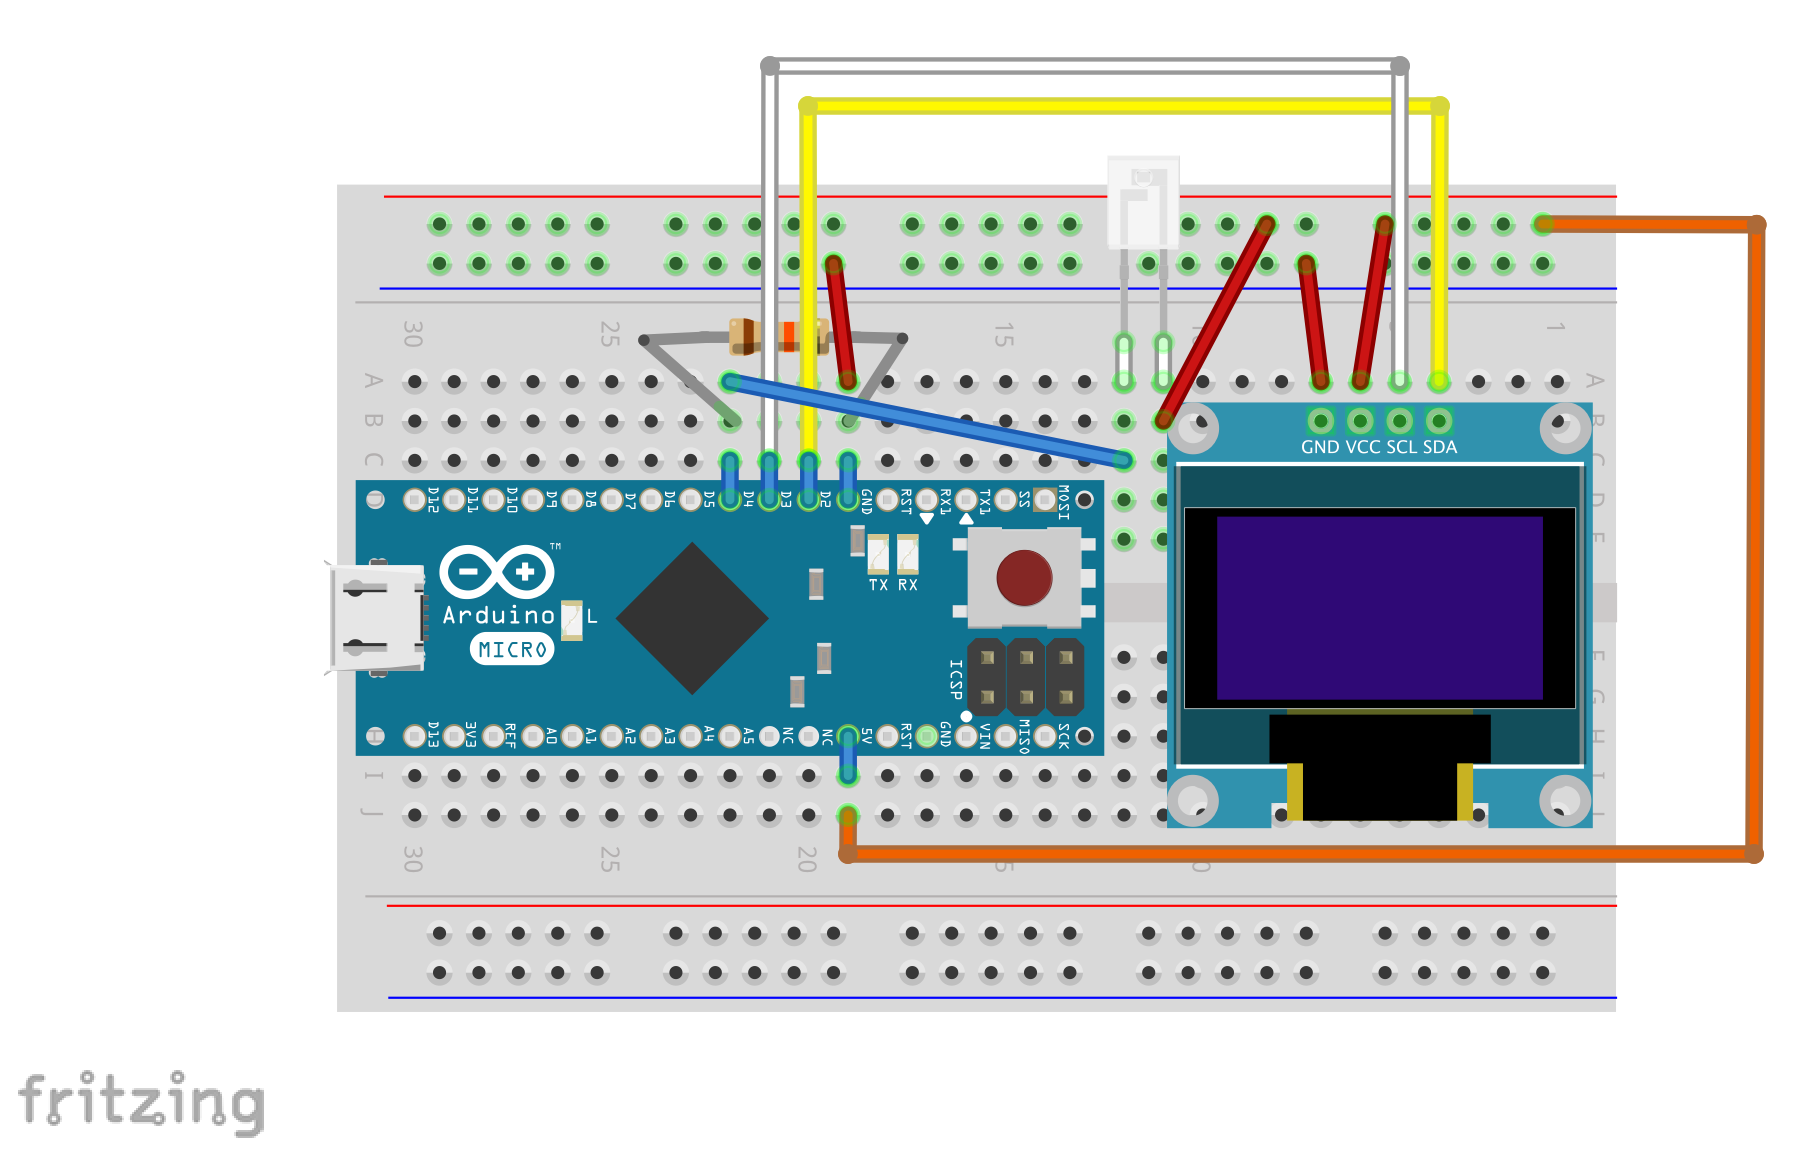
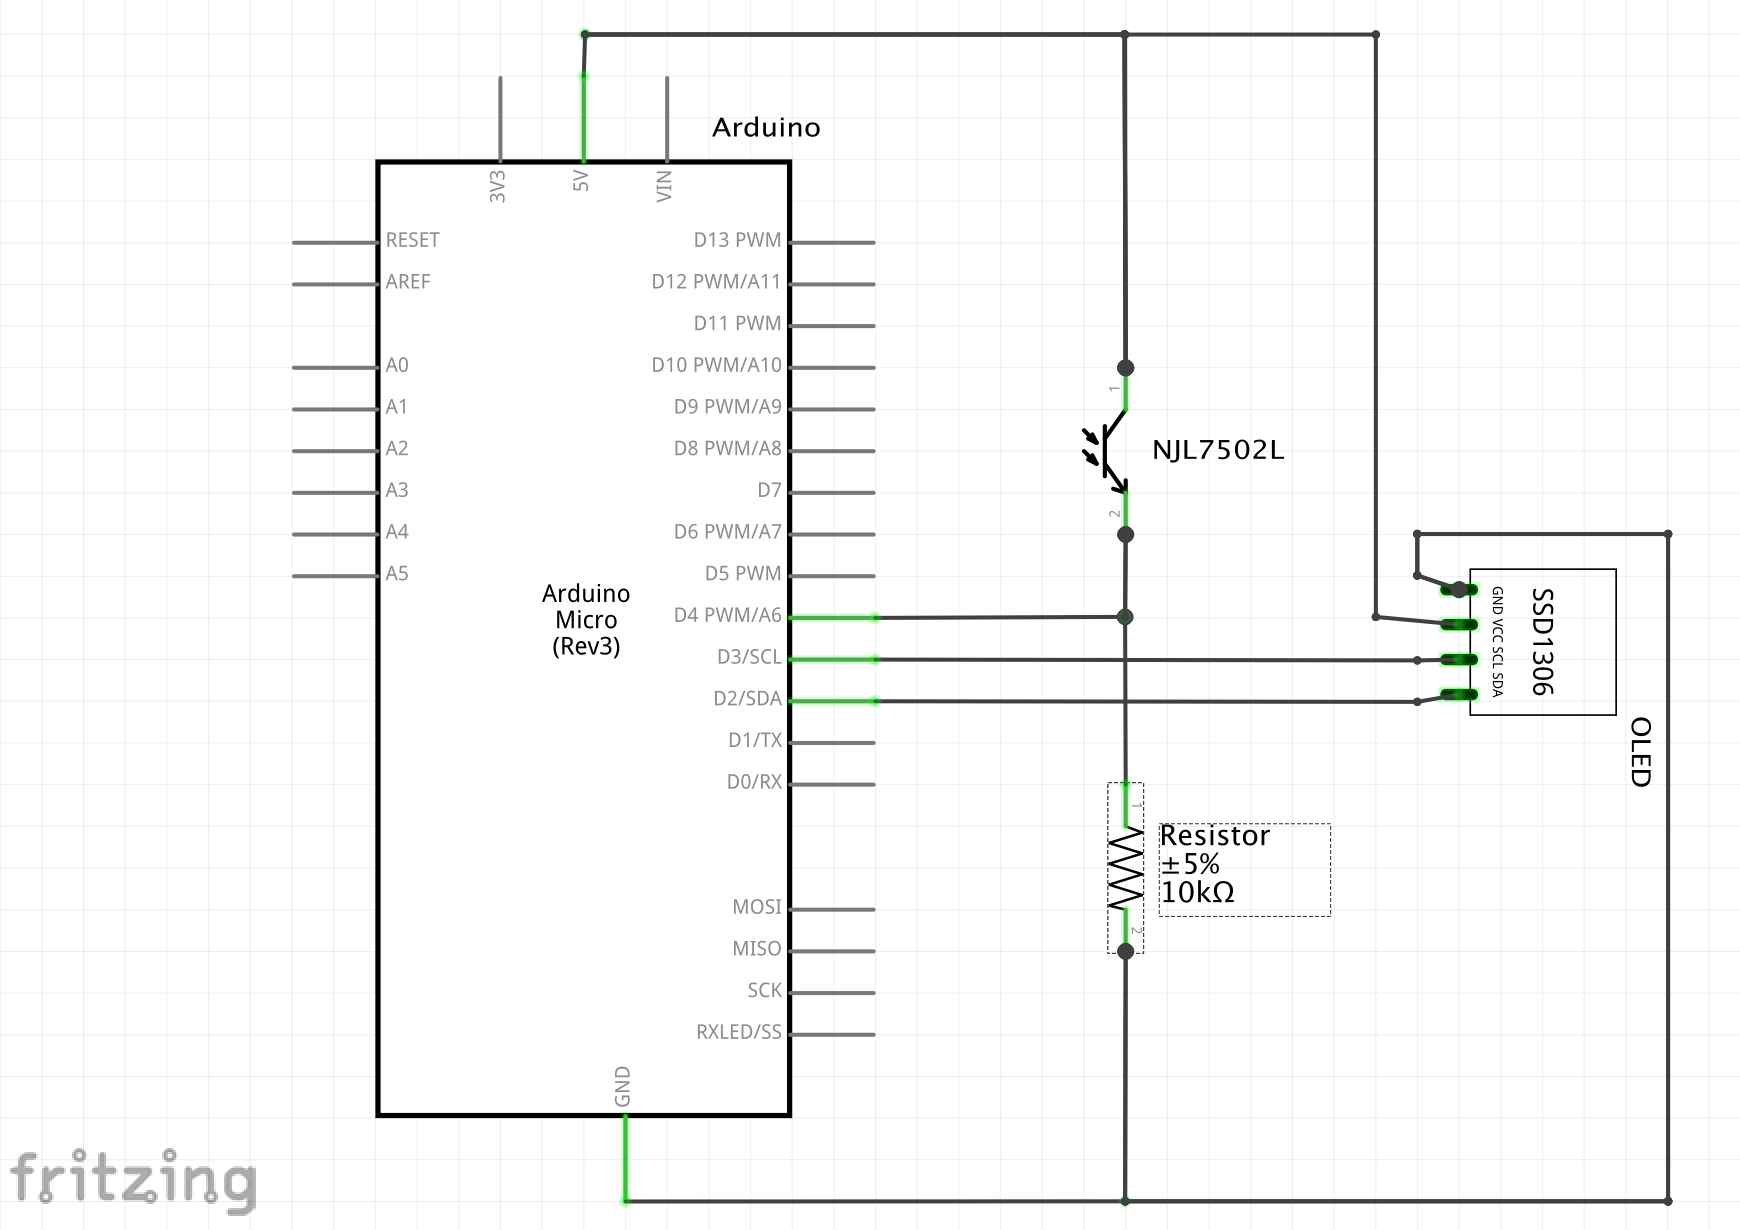
The shutter Speed Tester uses Arduino as the main controller and the phototransistor as the light sensor to capture the light transmitted by the flashlight behind the camera body. The captured shutter speed is shown on the SSD1306 OLED display.
How to use1. Place the camera on the desk.
2. Open the back cover of the camera.
3. Place the Shutter Speed Tester in front of the camera lens. Point the phototransistor toward the camera lens.
4. Place the flashlight behind the camera. Point the flashlight toward the phototransistor of the shutter speed tester through the camera lens.
6. Power the Shutter Speed Tester.
7. When the title screen is being displayed on the Shutter Speed Tester, release the shutter of the camera. The shutter speed result is displayed on the screen of the shutter speed tester.
8. Repeat 7 to continue the test.
- Replacing phototransistor. If you want to use a different phototransistor, read the datasheet carefully, and pick the right phototransistor. I tried SFH309-4, and I got good results without modifying the schematic.
- Using another model of Arduino. You can replace Arduino Micro used in this project with any other Arduino. Currently the schematic uses A6 pin to get the analog data from the light sensor/phototransistor. You might want to use a different pin for the analog data. I also used Seeeduino Xiao (Operating Power 3.3V) with the same schematic, and also got good results. (I connected A10 to the light sensor instead of A6)


_PnKPri8a6q.jpg?auto=compress%2Cformat&w=48&h=48&fit=fill&bg=ffffff)


Comments
Please log in or sign up to comment.