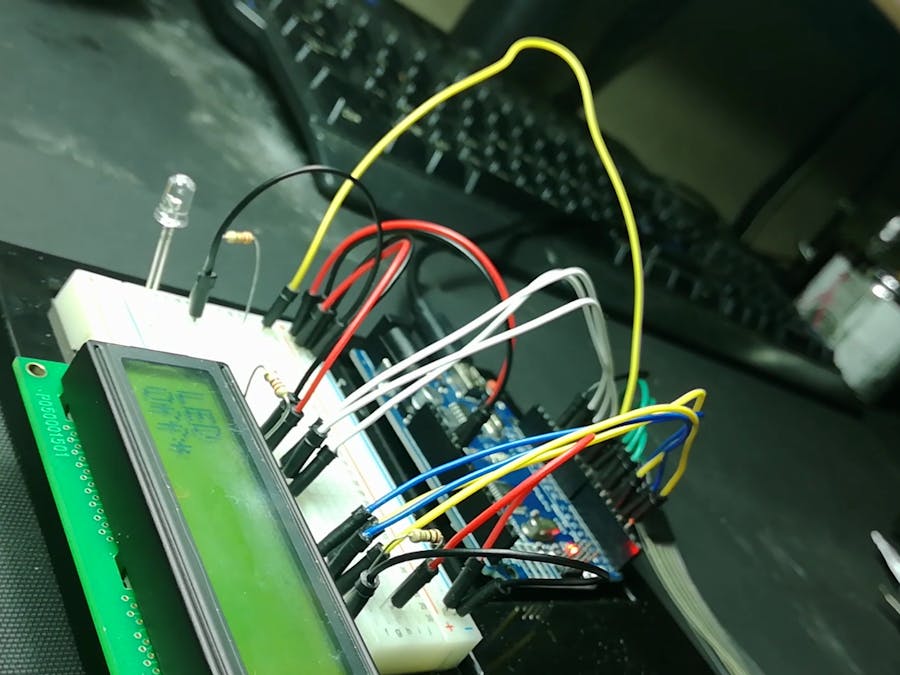
Today we are hooking up a LCD screen and controlling a LED all with a simple Menu program.
We will need the following:- Some Jumper wires
- Some Buttons (I'm using a 4 by 1 Button Membrane)
- 1 x LCD Screen, (I'm using the LMB 162ABC 5v LCD)
- 2 x 220 ohm resistors
- 1 x 1 ohm resistor
- 1 x LED
- A Breadboard and
- An Arduino
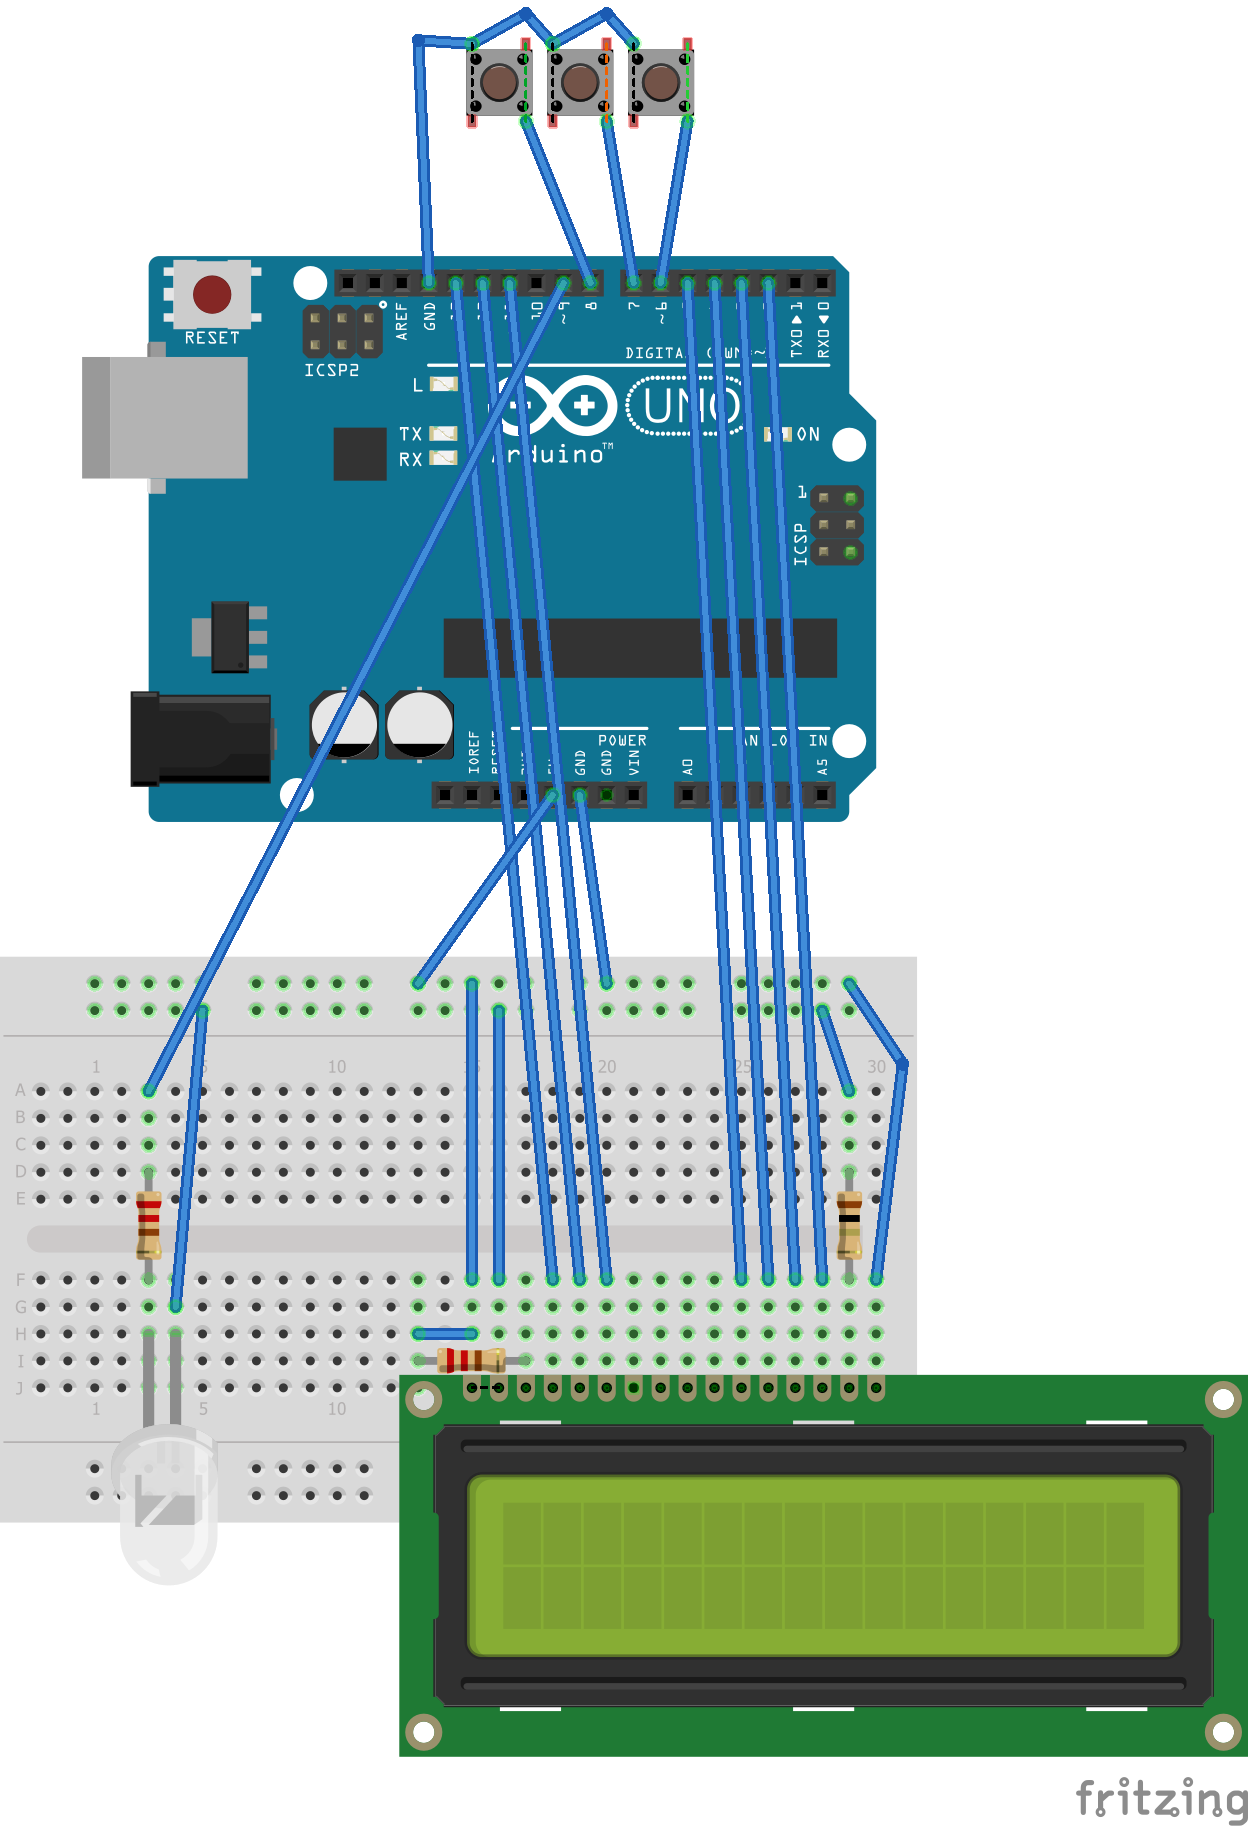
As I always do, I connect ground from the Arduino to negative Rail and connect 5v of the Arduino to the 5v rail.
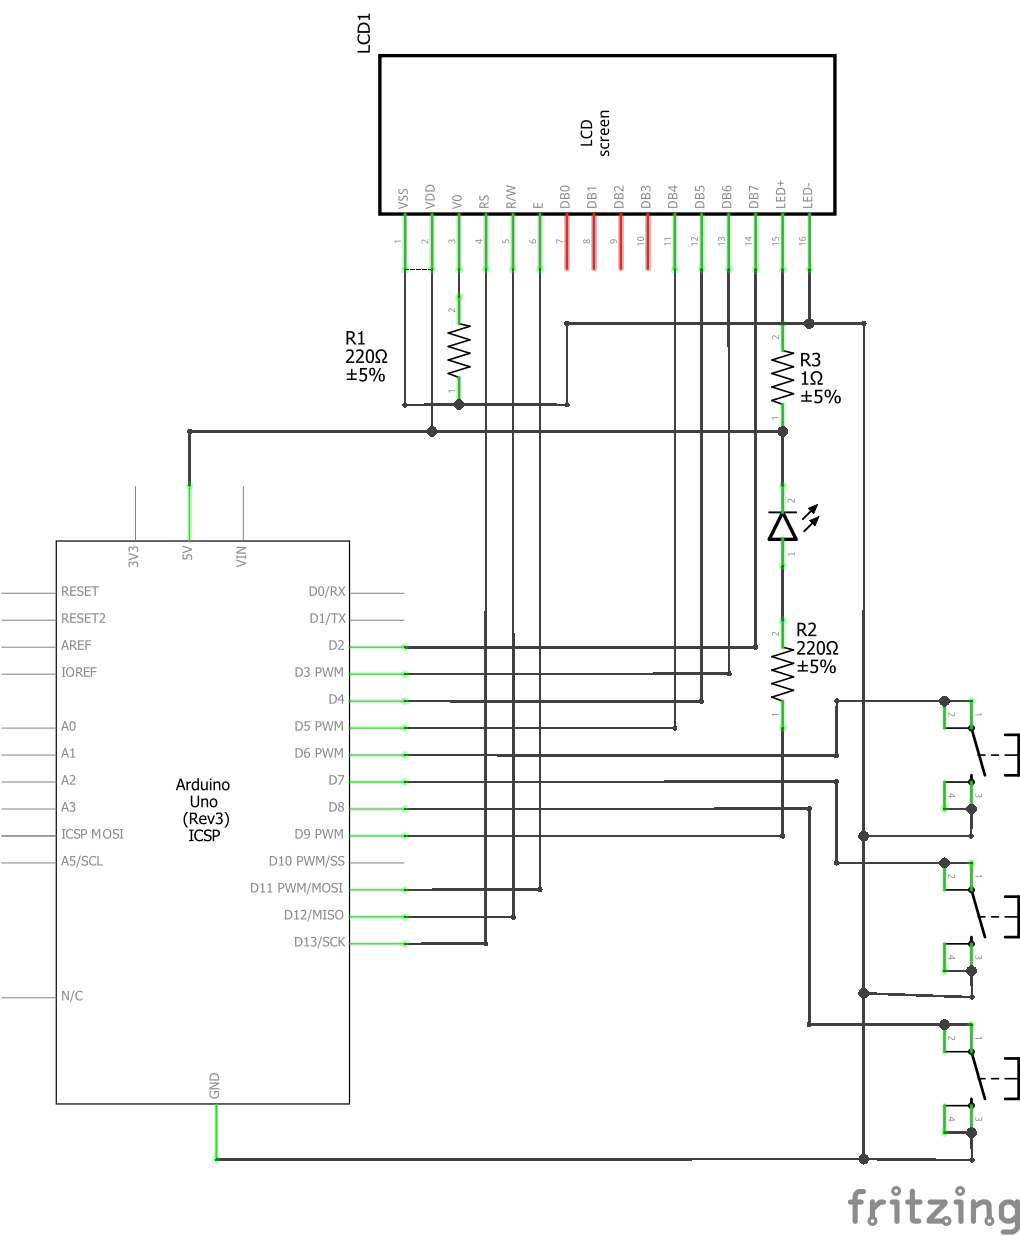
I'm going to start with the LCD Section:The LMB162ABC has 16 pins. Pin 1 and 16 are numbered.
- Place the LCD onto the Breadboard. (You might need to solder header pins onto your LCD screen first)
- Place a lead from the Ground rail to pin 1 of the LCD
- Connect pin 2 of the LCD to the Positive rail of the breadboard
- Place 1 x 220 Ohm resistor between pin 3 and 1 of the LCD screen (This controls the Contrast of the screen)
- Connect pins 10, 11 and 12 of the Arduino to pins 6, 5 and 4 of the LCD (Pins 4, 5 and 6 on the LCD are RS, R/W and Enable for the LMB162ABC)
- Connect pins 2, 3, 4 and 5 of the Arduino to pins 14, 13, 12 and 11 of the LCD (These are the Data pins of the LCD)
- Connect pin 16 to Ground
- Connect a 1ohm Resistor from the Positive rail to a terminal strip
- (I used an online calculator to get the value of the resistor using the figures from the LCD datasheet)
- Connect pin 15 of the LCD to the terminal strip with the 1 ohm resistor (Pin 15 and pin 16 of the LCD control the backlight.)
- Place the led between 2 terminal strips
- Place a resistor from the Anode to another Terminal Strip
- Connect pin 9 of the Arduino to the Resistor
- Connect the Cathode of the LED to a negative rail
The pins 1, 2, 3 , 4 and 5 on the membrane that I have, correspond to buttons 2, 1, 4, 3 and Common. I am only going to use 3 of the buttons:
- Connect a lead from the common pin of the membrane to the Ground of the Arduino
- Connect 3 other leads from the membrane to pins 6, 7 and 8 of the Arduino
I designed this menu program to easily edit and execute code where required. When a button is pressed it will either Navigate the Menu or Execute Code.
Execute code
- In this example the executed part will control the LED
- Turning the LED: ON, OFF, fading the LED or blinking the LED
In the Navigate Section
- It figures out where you are in the menu
- Finds possible places you can navigate to
- Then allows you to choose where you can navigate to, using the buttons
Instead of the numbers on the button membrane I stuck masking tape labels to assist with navigation.


_ztBMuBhMHo.jpg?auto=compress%2Cformat&w=48&h=48&fit=fill&bg=ffffff)


Comments
Please log in or sign up to comment.