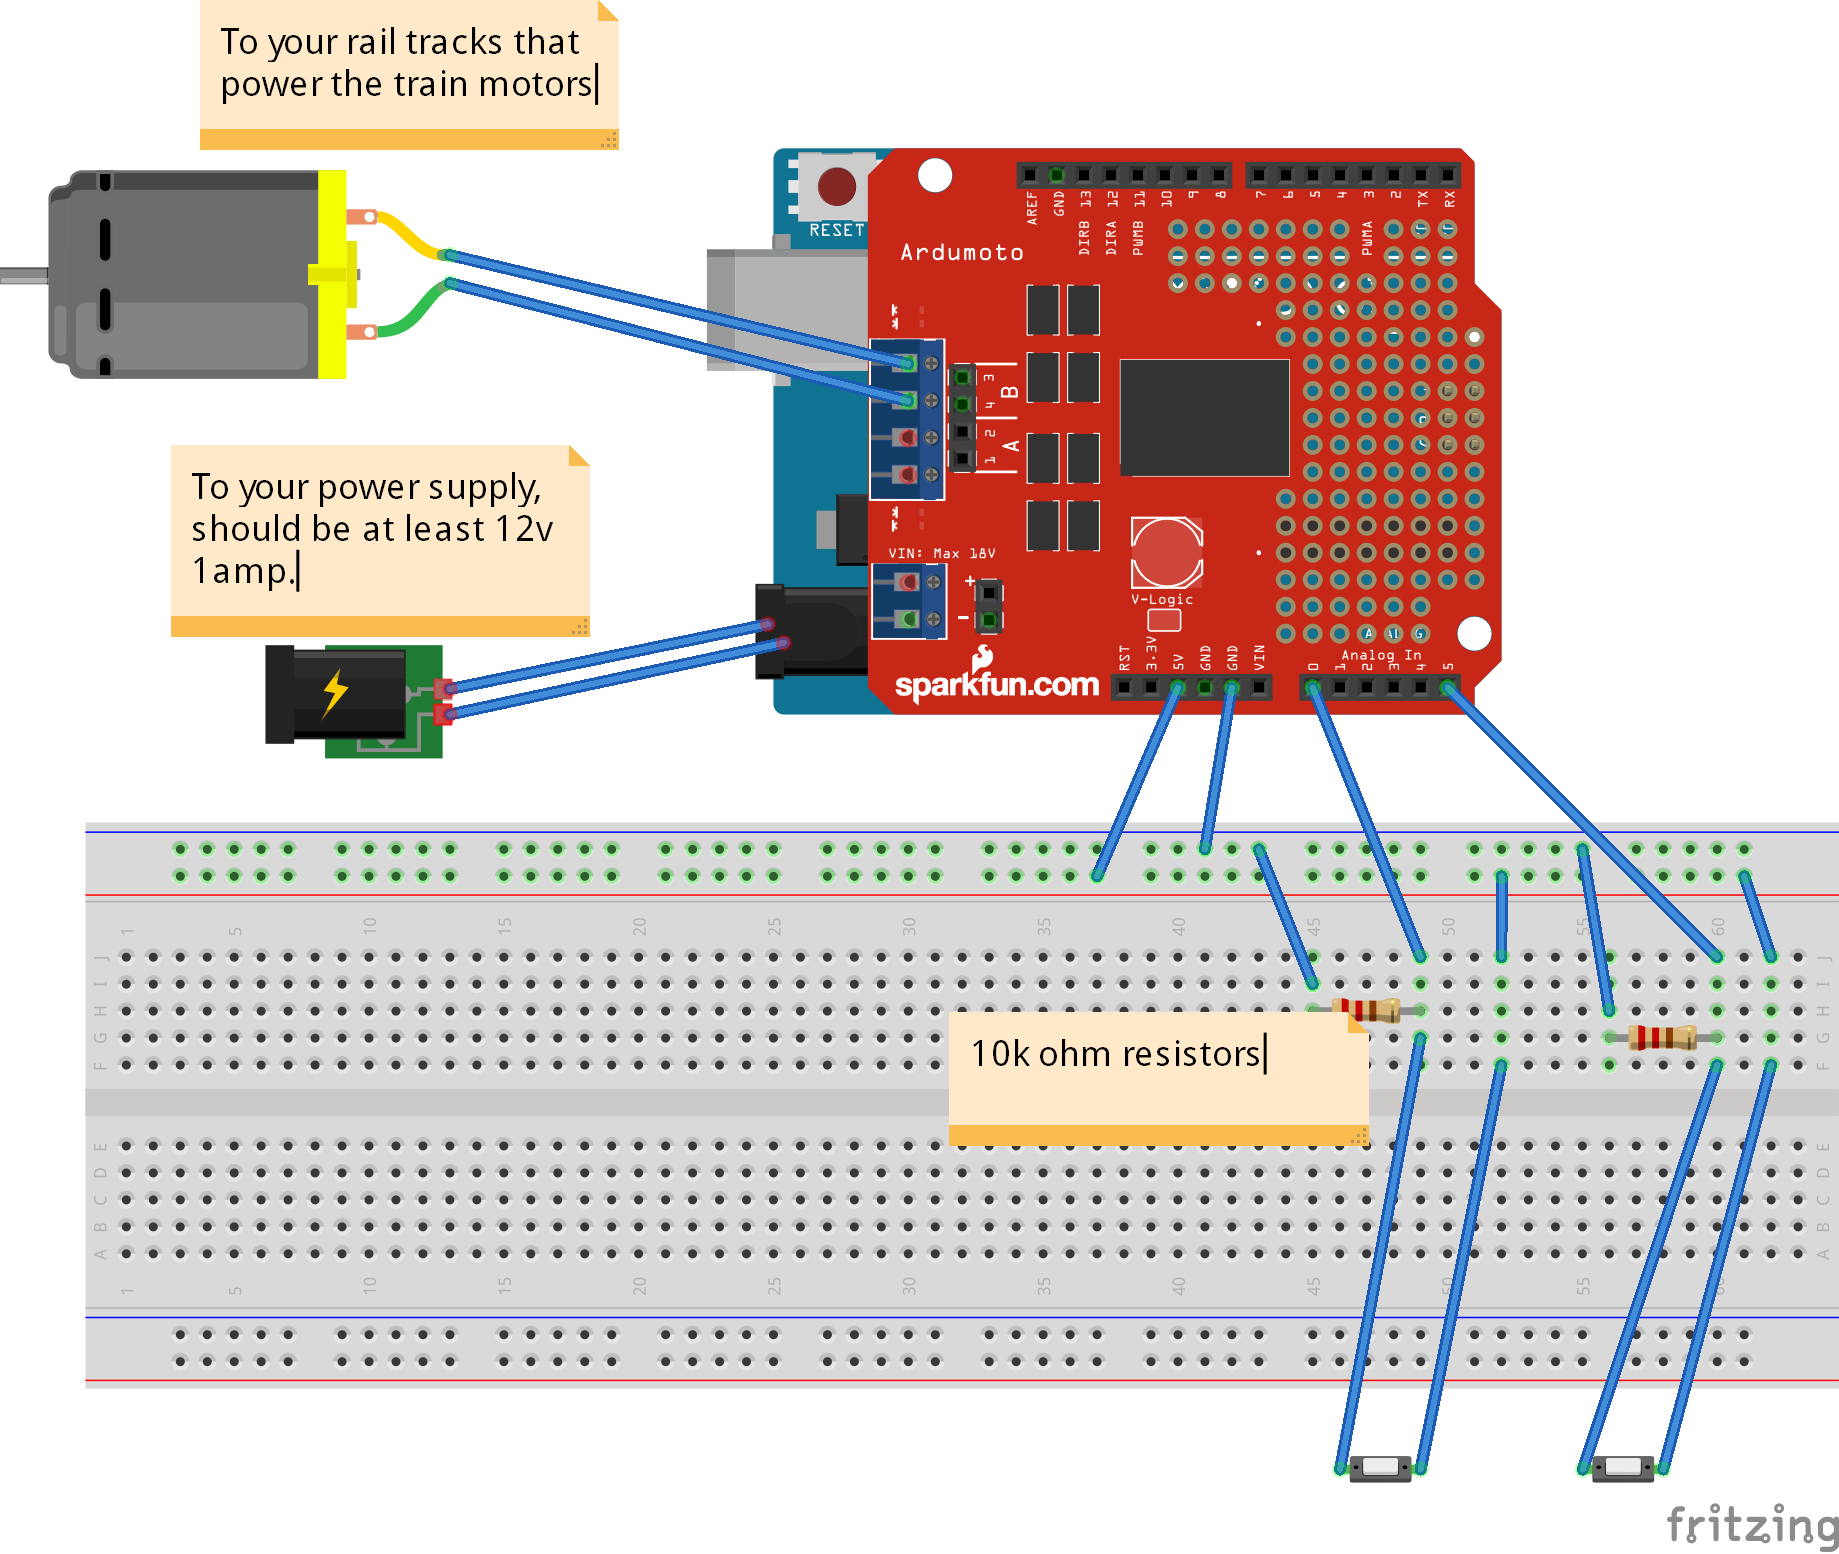
//....
// Include any motor/additional libraries you want here
// I basically just plugged in the below to my Sainsmart L293D shield code
//....
//....

// Button setup
int buttonOnePin = 14;
int lastButtonOneRead = 0;
int buttonOneRead = 0;
int buttonTwoPin = 16;
int lastButtonTwoRead = 0;
int buttonTwoRead = 0;

int maxSpeed = 255; // define the max speed of the train - 255 is the highest value we can put here as it is using PWM frequency...voltage out will change depending on the power supply you're using

bool runFlag = true;

void setup()
{
  Serial.begin(9600);
  Serial.println("Railroad Switch start");

  Serial.print("ButtonOne value: ");
  buttonOneRead = digitalRead(buttonOnePin);
  Serial.println(buttonOneRead);

  Serial.print("ButtonTwo value: ");
  buttonTwoRead = digitalRead(buttonTwoPin);
  Serial.println(buttonTwoRead);

  if (buttonOneRead == 0 && buttonTwoRead == 0) {
    motor(1, FORWARD, maxSpeed);
  }
}

void loop()
{

  if (runFlag) { // might use this later
    Serial.print("ButtonOne value: ");
    buttonOneRead = digitalRead(buttonOnePin);
    Serial.println(buttonOneRead);

    Serial.print("ButtonTwo value: ");
    buttonTwoRead = digitalRead(buttonTwoPin);
    Serial.println(buttonTwoRead);

    if (buttonOneRead != lastButtonOneRead) { // button one changed
      Serial.print("ButtonOne value changed!");
      if (buttonOneRead == 1 && lastButtonOneRead == 0) { // it was pressed...otherwise, we don't care
        Serial.println(" // It was pressed!");
        Serial.println("***Going forwards");
        motor(1, FORWARD, 0);
        motor(1, FORWARD, maxSpeed);
      } else {
        Serial.println(" // it was let go...so I don't care.");
      }
    }

    if (buttonTwoRead != lastButtonTwoRead) { // button two changed
      Serial.print("ButtonTwo value changed!");
      if (buttonTwoRead == 1 && lastButtonTwoRead == 0) { // it was pressed...otherwise, we don't care
        Serial.println(" // It was pressed!");
        Serial.println("***Going backwards");
        motor(1, BACKWARD, 0);
        motor(1, BACKWARD, maxSpeed);
      } else {
        Serial.println(" // it was let go...so I don't care.");
      }
    }
  }

  lastButtonOneRead = buttonOneRead;
  lastButtonTwoRead = buttonTwoRead;
  delay(200);

}
_ztBMuBhMHo.jpg?auto=compress%2Cformat&w=48&h=48&fit=fill&bg=ffffff)


Comments
Please log in or sign up to comment.