I built an Iron Man MK VI helmet (from Iron Man 2) using Pepakura and Body Filler. I automated it back then using an Arduino Nano with two separate battery packs (one for the Nano, one for the Servos (4 SG90’s). The servos were on all the time when in operation and had a manual switch to turn it off. This lead to the servos being powered all the time which drained my servo battery.
The helmet was heavy due to the batteries and the material (Bondo).
I recently got a 3D printer so I decided to print a MK 85 helmet from Avengers: Endgame. I wanted to make the faceplate go up like the previous helmet but I couldn’t find a good hinge system for it online so I decided to remix an existing hinge system for the Mark 6 helmet to fit the 85. Since the design was different, I had to modify the hinges.
Step One: Print the HelmetPrint the free Mark 85 helmet from Thingiverse.
Step Two: Print the HingesPrint the free MK VI hinges from Thingiverse. You will need to print the following stl's:
- FaceMount
- FlatTop
- HingeArm
- HingeBrackets
- SecondHinge
- SecondHingeMount
Print the free custom L Hinge I remixed on Thingiverse.
Step Four:Attach the following as shown:
Hint:
With the faceplate fully closed, flip the helmet upside down so you can see the inside. Attach the facemount that's attached to the servo and find the sweet spot. I found mine as shown in the photo. Test the hinges by moving the faceplate up and down and see if it reaches your desired position.
For the side hinges, attach the mount to the faceplate first. Then find the sweet spot when the helmet is closed.
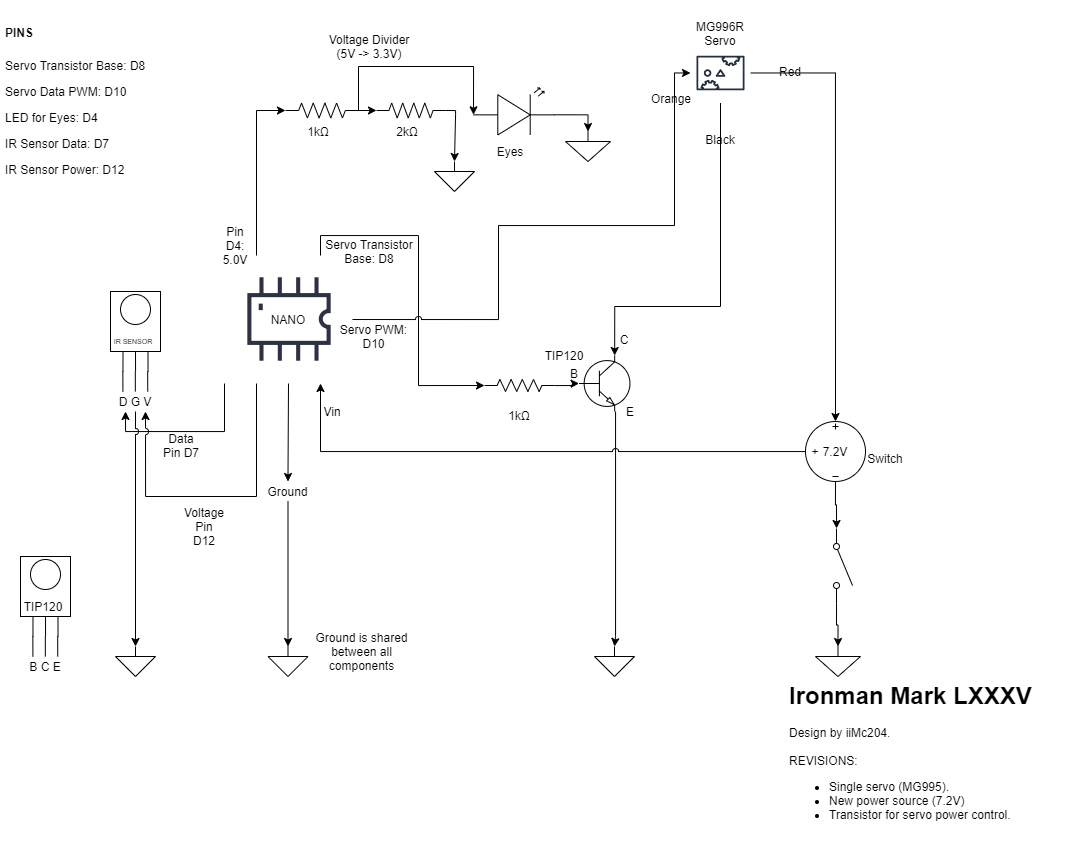
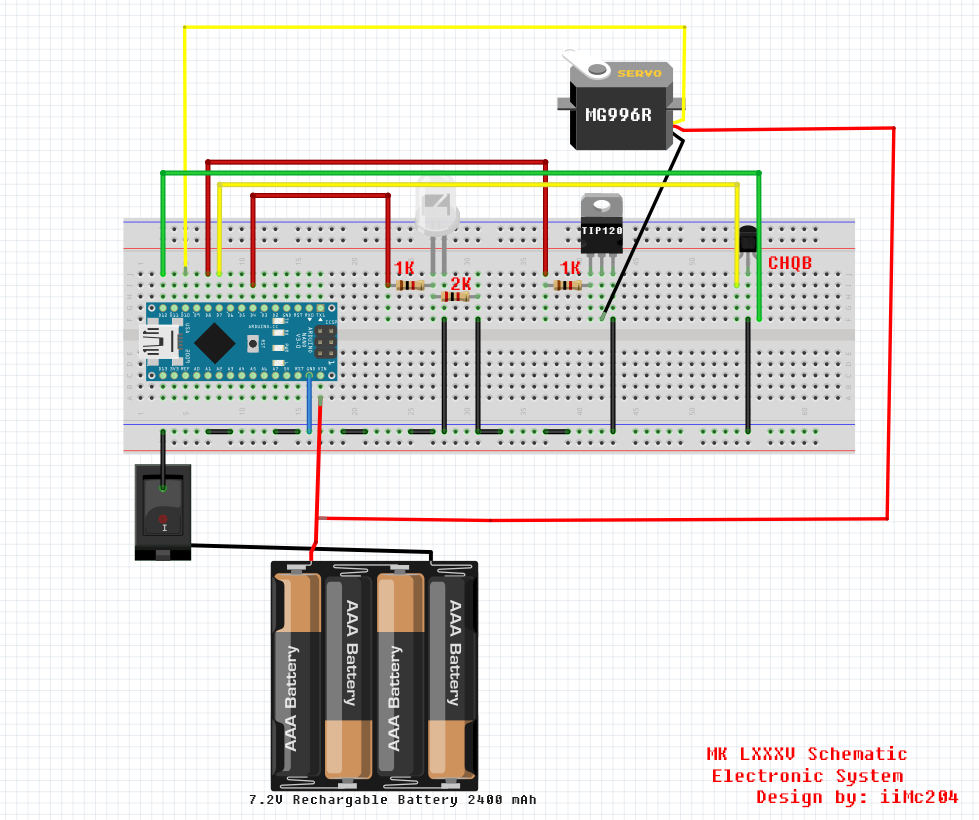
Step Five: WiringWire the electronics according to the attached diagram.
Step Six: Enjoy


Comments
Please log in or sign up to comment.