


Hardware components | ||||||
| × | 1 | ||||
 |
| × | 1 | |||
Software apps and online services | ||||||
| ||||||
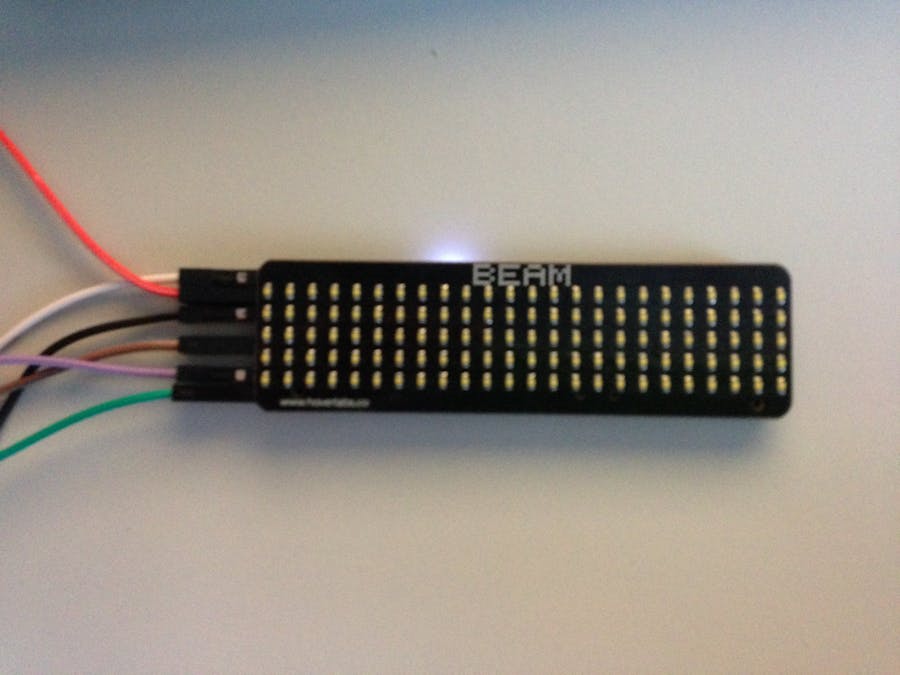
Next to MyWeatherstation for indoor & outdoor use project, I will show the extension of the project with an LED display - the Hoverlabs Beam. This is to show the determined ambient values such as temperature and humidity.
Steps
Step 1The prerequisite is the acquisition of at least 1 beam. Up to a maximum of 4 beams can be switched in one row. The length is then slightly larger than the side of a DIN A4 sheet. You can purchase Beams at Hoverlabs Onlinestore or their partners for approximately $ 25.
I assure you I'm not to profit from the sale of Beams.
Step 2I explain the use of Beam and Particle Photon under the following scheme:
- Beam >> Photon
- HOST V >> 3V3
- 3.3V >> 3V3
- GND >> GND
- SYNC >> not in use
- RESET >> D2
- IRQ >> not in use
- SCL >> D1
- SDA >> D0
Source: https://docs.particle.io/datasheets/photon-datasheet/#pin-out-diagrams
Remark: User, which prefer to use Seeedstudio / Grove - components I suggest to have an eye to this Projekt which describes the scheme: Hoverlabs - Beam - Photon Base Shield. It differs primarily in the power supply: since only 1 PIN for 3V3 is available, HOST V is connected to VIN.
Step 3Create within the Particle WebIDE with the plus sign to the right 4 additional tabs, in which the Libary is inserted.
Within the WebIDE, the Beam Libary is not available as an import option as of 04/2017.
Step 4Control the individual tabs and their include statements as follows:
- mytemp-beam.ino:
#include "application.h",#include "beam.h"
- beam.cpp:
#include "application.h",#include "beam.h",#include "charactermap.h"and#include "frames.h"
- beam.h: no include-Statement
- charactermap.h:
#include "Particle.h"
- frames.h:
#include "Particle.h"
Check your pin definitions for Beam:
#define RSTPIN 2
#define IRQPIN 9
#define BEAMCOUNT 1
and at least iniitialize an instance of Beam:
Beam b = Beam(RSTPIN, IRQPIN, BEAMCOUNT);
Control backside jumper setting: default from new beams = A = first beam in a row. If you bought more: 2 = B, 3 = C, 4 = D.
Step 7Beam can begin scrolling text with just print() and play()
    b.print(String(temperature).substring(0, 5) + " C");
    //b.play();
    b.display();
    delay(3000);
    b.print(String(humidity).substring(0, 5) + " %");
    //b.play();
    b.display();
    delay(3000);
Remark: In my case I use no scrolling; only display the values.
    //Time.format(time, TIME_FORMAT_DEFAULT); // Sat Jan 10 08:22:04 2004 , same as Time.timeStr()
    //b.print(Time.format(time, TIME_FORMAT_DEFAULT));
    Time.zone(+2.00);  // setup a time zone, which is part of the ISO6801 format
    //b.print(Time.format(Time.now(), "%I:%M%p.")); // = 12h = hh:mmPM.
Remark: check here for a good format list.
    b.print(Time.format(Time.now(), "%H:%M h")); // = 24h = hh:mm
    b.display();
    delay(3000);
Flash after your format-needs and ignore this Error from Particle WebIDE:
Finish!
Further help:
- Check your Particle Firmware: works fine with v0.6.0, v0.6.1, v0.6.2-rc.1
- Check the Particle Community:
https://go.particle.io/shared_apps/58eec962f6db2a9176000db6
https://community.particle.io/t/hover-labs-beam/30437
https://community.particle.io/t/hover-labs-beam/30753
https://community.particle.io/t/resolved-beam-code-leaves-me-in-bad-state/22168
https://community.particle.io/t/triggering-text-on-a-beam-remotely/28543
- Interested in Beam and residence in Germany? I am willing to rent my Beams because the time of the procurement and the circumstances of the customs demand some patience and additional costs. Contact me if necessary.
Update 25.07.2017: If you are save with the Beams and looking for an immediate project? Check this out: Die Losungen - every day a new bible verse


Comments
Please log in or sign up to comment.