Hello friends of sleep!
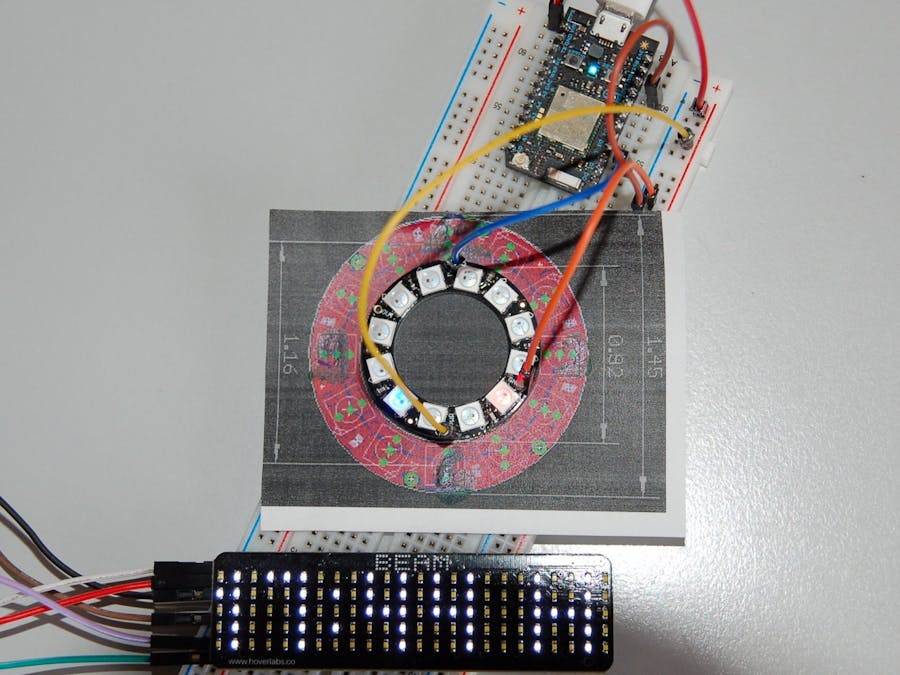
AboutSleeping drunk with drowsy eyes, reading the time on the clock becomes difficult. Glasses not handy or slightly drunk from the last party? There is an Adafruit NeoPixel Ring with 12 LEDs which can be individually controlled. By symbolizing the hour as a red LED and the grouping of the minutes into a 5 minute range as a blue LED, you can estimate with only one NeoPixel Ring how much time you can spend in the bed until the alarm rings (this can be retrofitted with a buzzer).
Unfortunately, the active LEDs can only be seen schematically.
Please follow 2 further projects: the description of my first experiences with the unboxing of a NeoPixel Ring and if necessary there is more information about Hoverlabs Beam.
Remark also the product page from Adafruit here: https://www.adafruit.com/product/1643
PIN Definitions
- VIN to 5V DC
- GND to GND
- Data In to D2
Remember to include the NeoPixel Library into the Sketch by using the Particle IDE like this:
#include <neopixel.h>
// IMPORTANT: Set pixel COUNT, PIN and TYPE
#define PIXEL_COUNT 12
#define PIXEL_PIN D2
#define PIXEL_TYPE WS2812B
int brightness_h = 10;        // 0-256 nonbright to bright
int brightness_m = 10;        // 0-256 nonbright to bright
int delayval = 1000;          // update scene
int min_px;                   // minute-pixel
int h;                        // hour
unsigned color_m;             // minute-color
Adafruit_NeoPixel strip = Adafruit_NeoPixel(PIXEL_COUNT, PIXEL_PIN, PIXEL_TYPE);  // Instance the object
After these prerequisites we take a look into setup:
void setup() {
 Serial.begin(9600);
 Time.zone (+2.00); // setup a timezone > in this case Berlin
 strip.begin();
}
and the loop:
   if (Time.hourFormat12() == 12) {  // neopixel not count from 1-12 like the time-function. we need to change 12 o´clock to pixel 0
   h = 0;
   } else {
   h = Time.hourFormat12(); // https://docs.particle.io/reference/firmware/photon/#hourformat12- - returns integer 1-12
   }
   Serial.println("**********VALIDATION HOUR******************************");
   Serial.print("Device-Function: ");
   Serial.println(Time.hourFormat12());
   Serial.print("Hour: ");
   Serial.println(h);
   int m = Time.minute();
   strip.clear(); // all already switched pixel turned off
We have to solve the problem that the photon already has some functions for the time detection (THX Particle), but the NeoPixel Ring counts at 0 for the first LED and ends at 11 in our case. This means that the determined 12th hour corresponds to the NeoPixel 0, which is checked by a condition.
After we have determined the minute, the NeoPixel Ring is cleaned with already existing colors and each with updated time.
   if (m<5) {
     min_px = 0;                   // 0 = first of in this case 12 pixel
     color_m = (0,0,255);          // blue
   } else if (m >= 5 && m<10) {
     min_px = 1;
     color_m = (0,0,255);          // blue
   } else if (m >= 10 && m<15) {
     min_px = 2;
     color_m = (0,0,255);          // blue
Let's examine the minutes and bring them to a 5 minute range.
Now we check what happens when the hour and minute range are identical and show this using an additional color aid - here yellow. It is then displayed and repeated after a short interval.
   if (h == min_px) {
     Serial.println("***********EXCEPTION CASE: HOUR = Range of Minute-Pixel");
     Serial.print("Hour: ");
     Serial.println(h);
     Serial.print("Minute: ");
     Serial.println(m);
     Serial.print("Minute-Range: ");
     Serial.println(min_px);
     Serial.println("hour and minute-range is equal - you see 1 pixel bright");
     strip.setPixelColor(h,128,128,0); // h: 1 Pixel in Yellow if hour and minute-range is equal
     strip.setBrightness(brightness_h);
     strip.show();
   } else {
     Serial.println("**********NORMAL CASE: HOUR <> Range of Minute-Pixel***");
     Serial.print("Hour: ");
     Serial.println(h);
     Serial.print("Minute: ");
     Serial.println(m);
     Serial.print("Minute-Range: ");
     Serial.println(min_px);
     Serial.println("hour and minute-range is NOT equal - you see 2 pixels bright");
     strip.setPixelColor(h,255,0,0); // h: 1 Pixel in Red
     strip.setBrightness(brightness_h);
     strip.show();
     strip.setPixelColor(min_px, color_m); // min_px: 1 Pixel represents a period from 5 min
     strip.setBrightness(brightness_m);
     strip.show();
The values are output properly on the serial monitor.
The secret to the control lies in the first value, then the following 3 color values in RGB mode. In other words: strip.setPixelColor
(which pixel, which color).
Update: check the Sketch-Update v1.1 on Github for individual colors also for hour and minute.
Future Add-onsI see possibilities for expansion with a buzzer, additional OLED display for a desk variant, and influencing of the variables via Blynk services. The brightness I have defined as 10 - thus not too bright. If you have a red/blue/yellow weakness, the colors themselves can be adapted independently.
Like my description? You will find more under my account.
Follow me to be notified when I publish new projects!
Here is my Paypal link. You can also send me sensors or ideas, which I like to look at sometimes.


Comments
Please log in or sign up to comment.