Through published projects here at hackster.io I became aware of PHPoC and thought that I could polish up and use my rusty PHP knowledge.
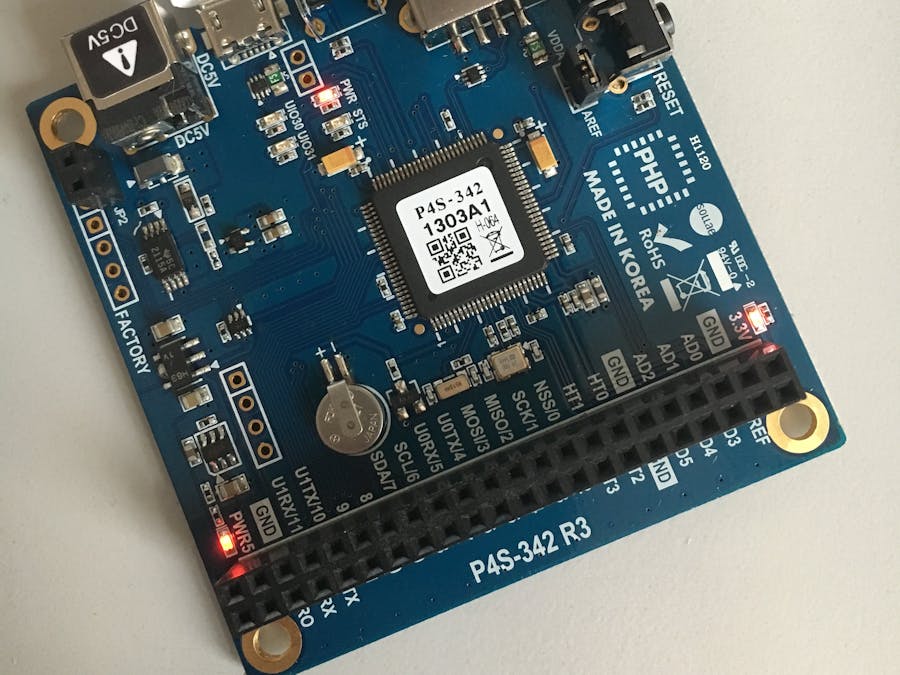
The business area is managed by EZTCP.com, the IoT clientele via phpoc.com: here is a whole range of products available. The portfolio starts with the here presented PHPoC Shield for Arduino (Uno and Mega) with product name P4S-348 as well as the self-sufficient - without Arduino - running PHPoC Blue with designation P4S-342.
The difference to the PHPoC Black is the LAN interface instead of the (included) WiFi dongle.
Further expansion boards join the portfolio (also for SeeedStudio Grove) and cover special cases, such as the control of stepper motors.The latest newsletter from 10/2018 also announces the launch of its own IoT P4M-400 board.
What Do You GetIn addition to the products themselves, so the shield or the board is the WiFi dongle (only adapters using Ralink RT3070/5370 chipsetswork) and a customer card and a "DE-Stack Lever" to do so.This is the current advertising campaign of PHPoC: who has published a project the chance to get a free extension board. Please read the detailed conditions and registration conditions (Instagramm) separately. Borrowed from the economy "the leverage effect" comes probably from the video for the DE stack Lever. With the 3D-printed tool, the boards are quickly and comfortably detached from each other. A nice goodie.
PreparationFor a product to stand out from the crowd, unique selling points have to be named:
- Arduino compatible (the sketches for the control of the sensors are recorded via the Arduino IDE and visualized via PHP-side components such as slide switches analogue to Blynk services in the web browser via their own IP address (initial 192.168.0.1) through the web server) or to operate independently with Blue/Black-Board - depending on the available budget.
- Arduino Library with Examples
- PHP and Scratch possible
- Above all, good documentation, video examples (Jasmine, Amy) and
- Email support with forum
Check out the PHPoC brochure and then start installing your own programming environment (v1.4.0) for Windows, named PHPoCD(eveloper). There is no other installation available for Linux or MacOS.
IntroductionWork through the few points of each manual (Blue-Board) and familiarize yourself with the IDE.
As a first point, you should make sure to install the latest firmware updates.
From version 1.4.0 is remote network support supportet - so it´s only possible for PHPoC Black/Blue and not for PHPoC Shield for Arduino which firmware ends in version 1.3.1. A real disadvantage for the not quite cheap Shield. Use via WiFi is excluded for the Arduino.
Good news: in consultation with the support a firmware update for the remote support, as well as with further features is in development! and will be released soon!
As second point connect the Board via MicroUSB-cable to a COM-Port at your Windows PC. Check the 3 boxes in the Tab 'Network' from 'Advanced'-Settings.
After you can switch from COM-Port x to "Network". Another dialog appears which discover your network to the board.
Power your Board via USB-Powerbank:
In my case I have a connection via http://192.168.178.55/ and got this output screen after I "ADD" a new file in the top level board structure, named it "index.php" and upload my simple PHP-Script with the fourth icon.
Of course, the board has a variety of interfaces and so external sensors can be connected and queried via Arduino Sketch.An optical processing of the data then takes place via PHP with curves and graphs.
A whole range of existing projects can be found here at hackster.io or in the PHPoC forum.
Adjusting Brightness via Web Browser from an LEDUsing the PHPoC Shields for Arduino, the following steps are necessary:a.) Builds the circuit together: plus pole of the LED (the longer leg) is provided with a resistor and connected to the shield with PIN 9. The minus pole is connected to GND.b.) Load via Arduino IDE the example sketch with MicroUSB cable at the COM port of the PC on the Arduino.c.) Load the PHP code onto the shield via PHPoCD.d.) call the IP address specified by the shield and with slash the PHP file name.For me this is http://192.168.178.52/remote_slide_led.php
The situation is different with the use of the black / blue board: here, all programming on sketches is dispensed with within the Arduino IDE and the PINs are addressed here directly using PHPoCD and PHP-Script.
What experiences have you gained with PHPoC?


Comments
Please log in or sign up to comment.