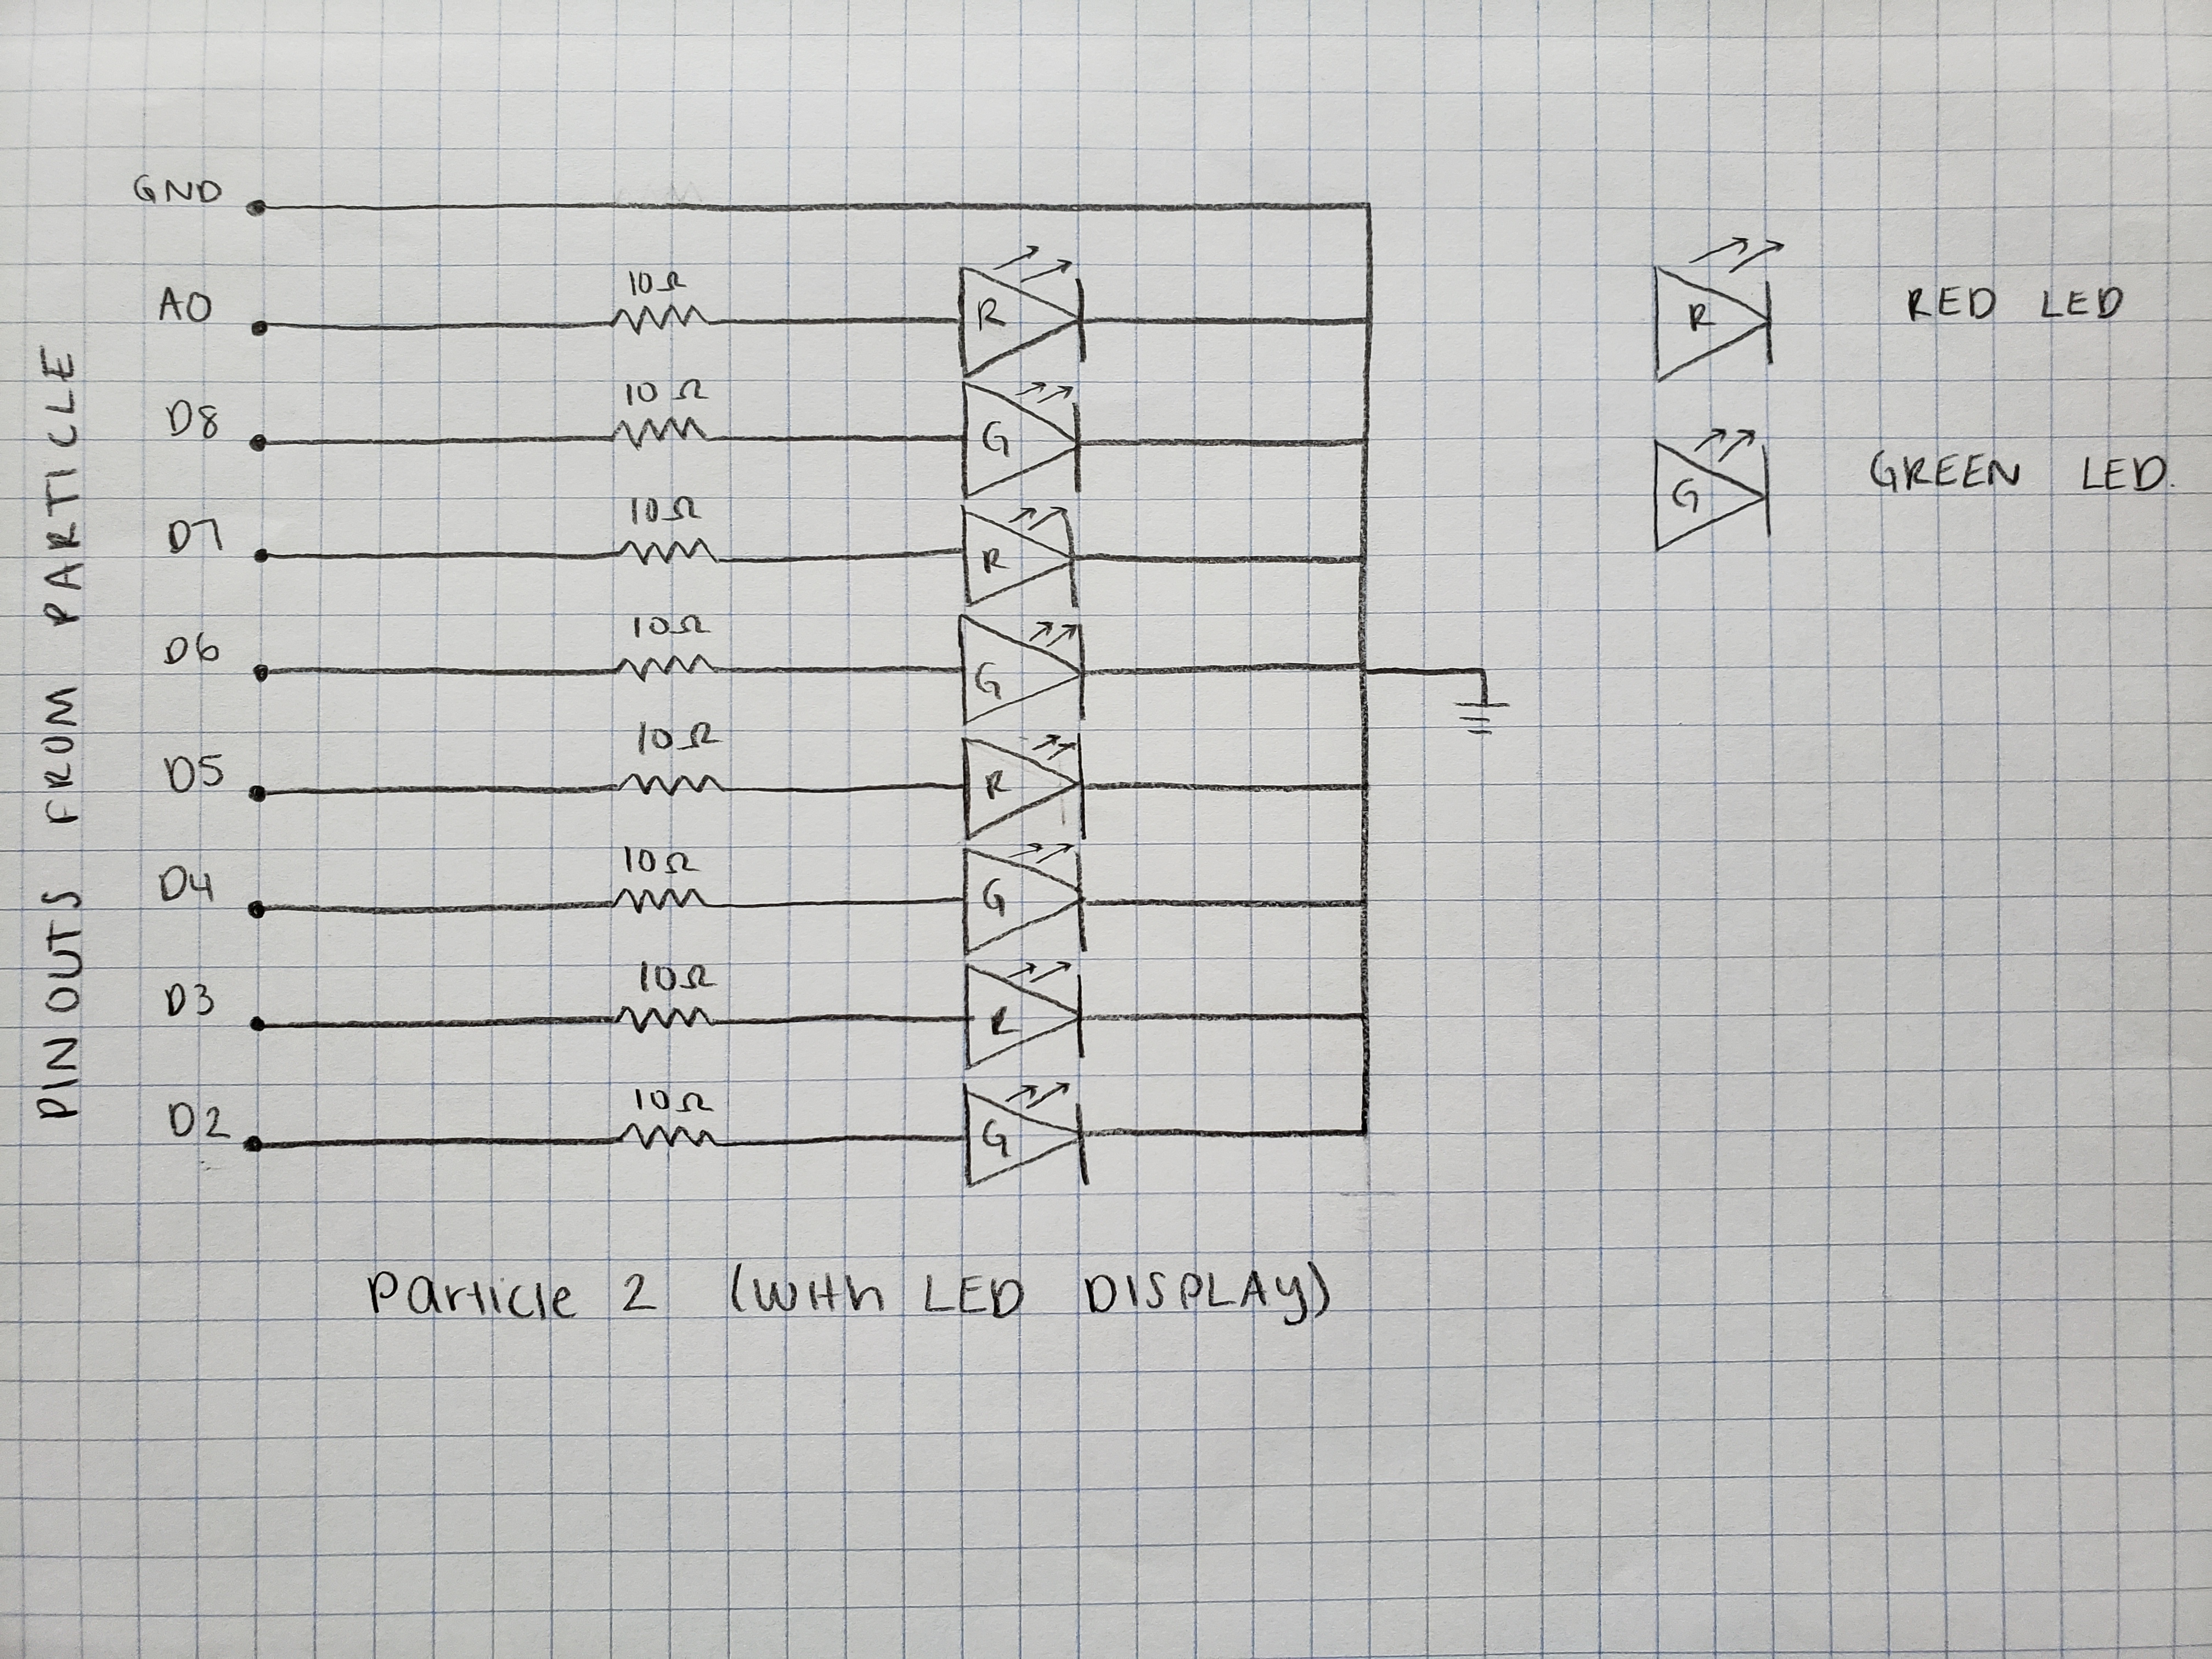
// The LEDs and the digital outputs used on the Particle are defined below.
int led2 = D2;
int led3 = D3;
int led4 = D4;
int led5 = D5;
int led6 = D6;
int led7 = D7;
int led8 = D8;
int led9 = A0;
//The LEDs are defined as outputs and the Particle is told to subscribe to the other Particle.
void setup() {
pinMode(led2, OUTPUT);
pinMode(led3, OUTPUT);
pinMode(led4, OUTPUT);
pinMode(led5, OUTPUT);
pinMode(led6, OUTPUT);
pinMode(led7, OUTPUT);
pinMode(led8, OUTPUT);
pinMode(led9, OUTPUT);
Particle.subscribe("merry_christmas_santa_came", ledBlink);
}
void loop() {
}
/* -----------------------------------------
An 'If' statement was used to tell the Particle to enable the LED display if a present was detected by the other Particle. If there was a present, the other Particle would publish an event called "present," which this Particle would detect and tell the LEDs to come on until an event, "stolen" was published by the first Particle.
If the LEDs were told to turn on, this Particle (with all of the LEDs) would publish an event called "blink," which told the first Particle to turn on an LED, which would signify that this Particle received the "present" message and that the LEDs had turned on.
If the first Particle did not detect a present, an event called "stolen" was published. This Particle would not turn the LEDs on, and would publish an event called "off" to tell the LED on the other Particle to stay off.
------------------------------------------*/
void ledBlink(const char *event, const char *data)
{
if (strcmp(data, "present")==0){
digitalWrite(led2, HIGH);
digitalWrite(led3, HIGH);
digitalWrite(led4, HIGH);
digitalWrite(led5, HIGH);
digitalWrite(led6, HIGH);
digitalWrite(led7, HIGH);
digitalWrite(led8, HIGH);
digitalWrite(led9, HIGH);
Particle.publish("santa_has_come_blinkled49", "blink", PRIVATE);
}
else if (strcmp(data, "stolen")==0) {
digitalWrite(led2, LOW);
digitalWrite(led3, LOW);
digitalWrite(led4, LOW);
digitalWrite(led5, LOW);
digitalWrite(led6, LOW);
digitalWrite(led7, LOW);
digitalWrite(led8, LOW);
digitalWrite(led9, LOW);
Particle.publish("santa_has_come_blinkled49", "off", PRIVATE);
}
delay(4000);
}
/* -----------------------------------------
SOURCES
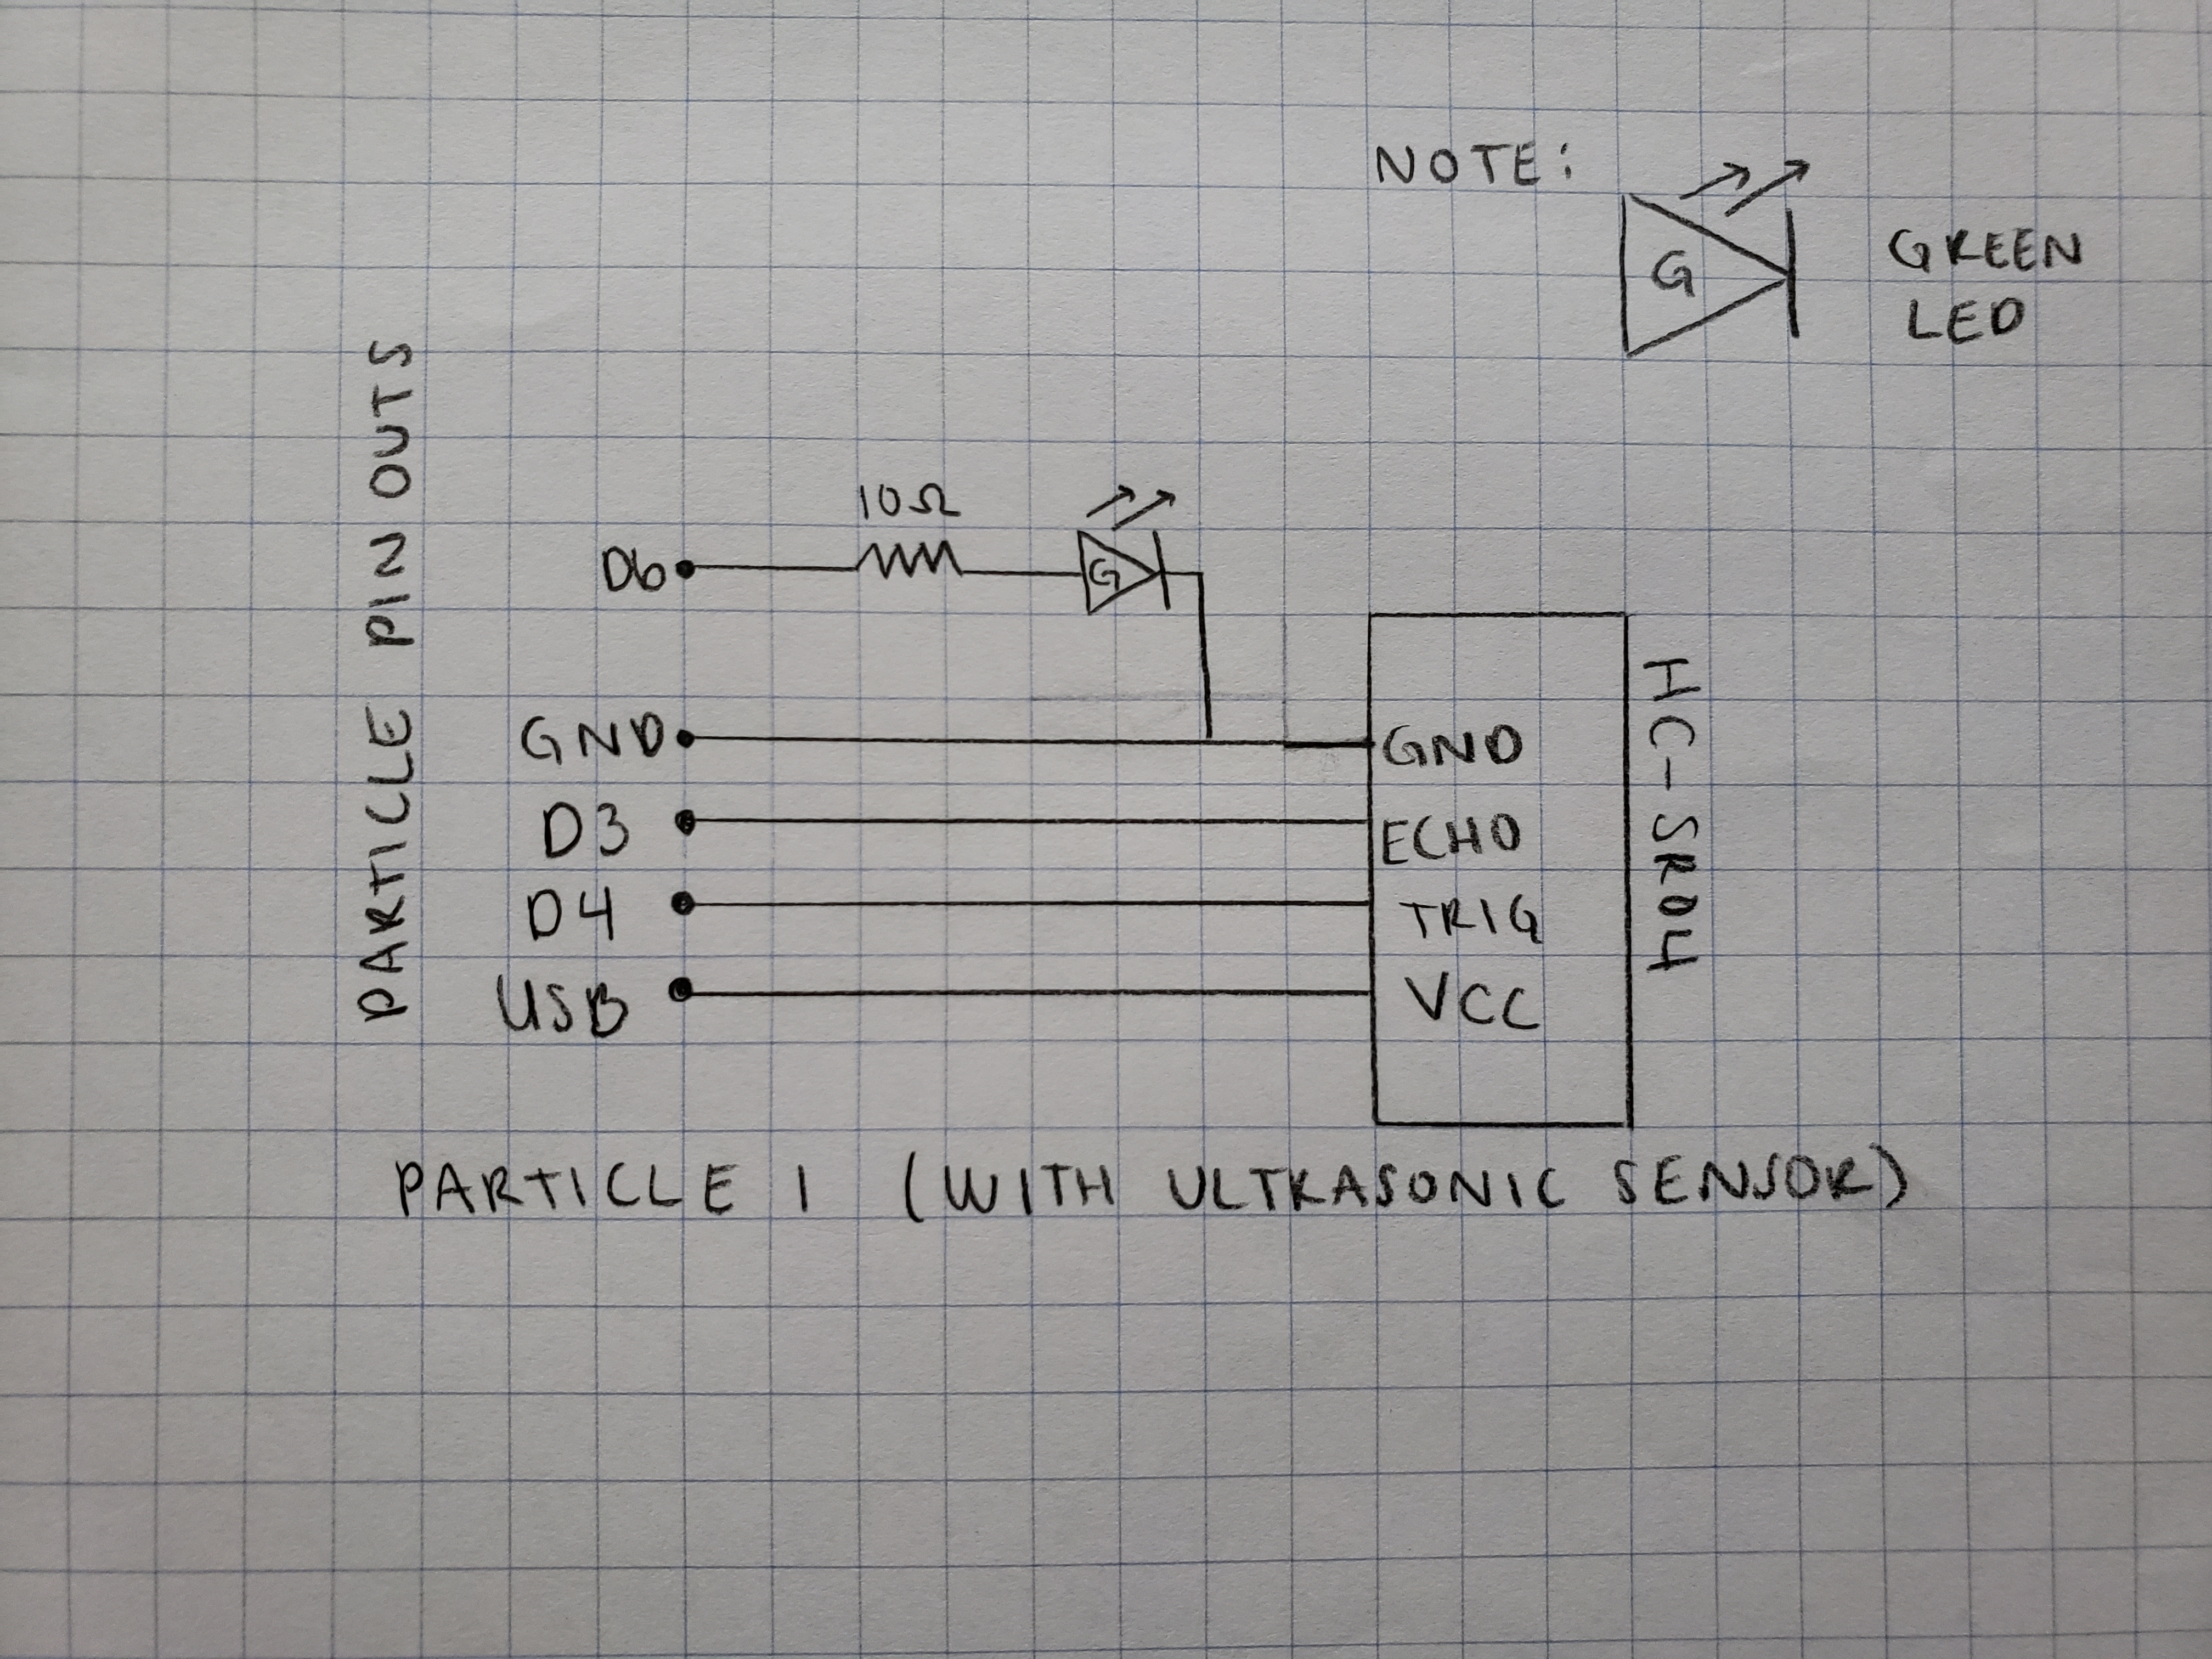
We referenced the code from this website and used the author's useage of an ultrasonic
sensor to understand how to use it in our project.
Hrisko, Joshua. "Wiring and Coding." Internet of Things WiFi and Bluetooth Mesh Network with Particle Argon and Xenon Boards.
Maker Portal. Maker Portal, November 11, 2018. Accessed November 18, 2020.
https://makersportal.com/blog/2018/11/11/internet-of-things-bluetooth-and-wifi-mesh-network-with-particle-argon-and-xenon-boards.
This video was used to figure out how to wire the ultrasonic sensor to the Particle.
"Ultrasonic Sensor HC-SR04 and Arduino Tutorial." Youtube, uploaded by How to Mechatronics, July 26, 2015. Accessed November 15, 2020.
https://youtu.be/ZejQOX69K5M
------------------------------------------*/


_zhWsCcSEcl.jpg?auto=compress%2Cformat&w=48&h=48&fit=fill&bg=ffffff)


Comments
Please log in or sign up to comment.