This is an introductory project for students to learn about IoT. Our site, iotSky provides coursework and cloud infrastructure to experiment with connected devices.
With this experiment, students can control a Philips Hue LED by pushing a button connected to a Arduino Yun. When the button is pressed, a message is published on a topic. The broker in the cloud receives it and forwards it to a subscriber listening on the same topic. That subscriber then checks the status of the Philips Hue LED and then toggles it.
Instructions:- Before you start you should have your arduino (loaded with the micro sd card) connected to your computer and ready to go
- Create a basic project on iotSky. (For this exercise, you do not need any plugins)
- Assuming your Micro SD Card is mounted on /mnt/sda1 create a directory called ex_2.
mkdir /mnt/sda1/arduino/ex_2
- Click the 'Cert' button and 'Private Key' button on the project details page to show their values. These need to be copied onto the Micro SD Card. You can do this like:
scp hue_me_on_cert.pem root@linino.local:/mnt/sda1/arduino/ex_2
scp hue_me_on_private_key.pem root@linino.local:/mnt/sda1/arduino/ex_2
- Copy the root aws cert from here, onto the root arduino directory on the SD card. i.e. it should have a file called /mnt/sda1/arduino/rootaws_cert.pem
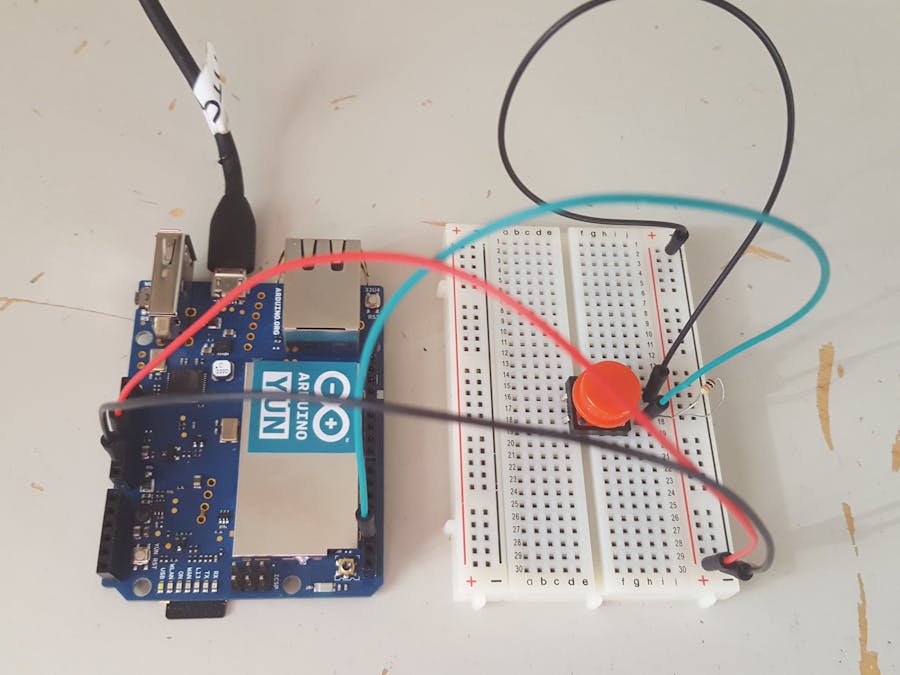
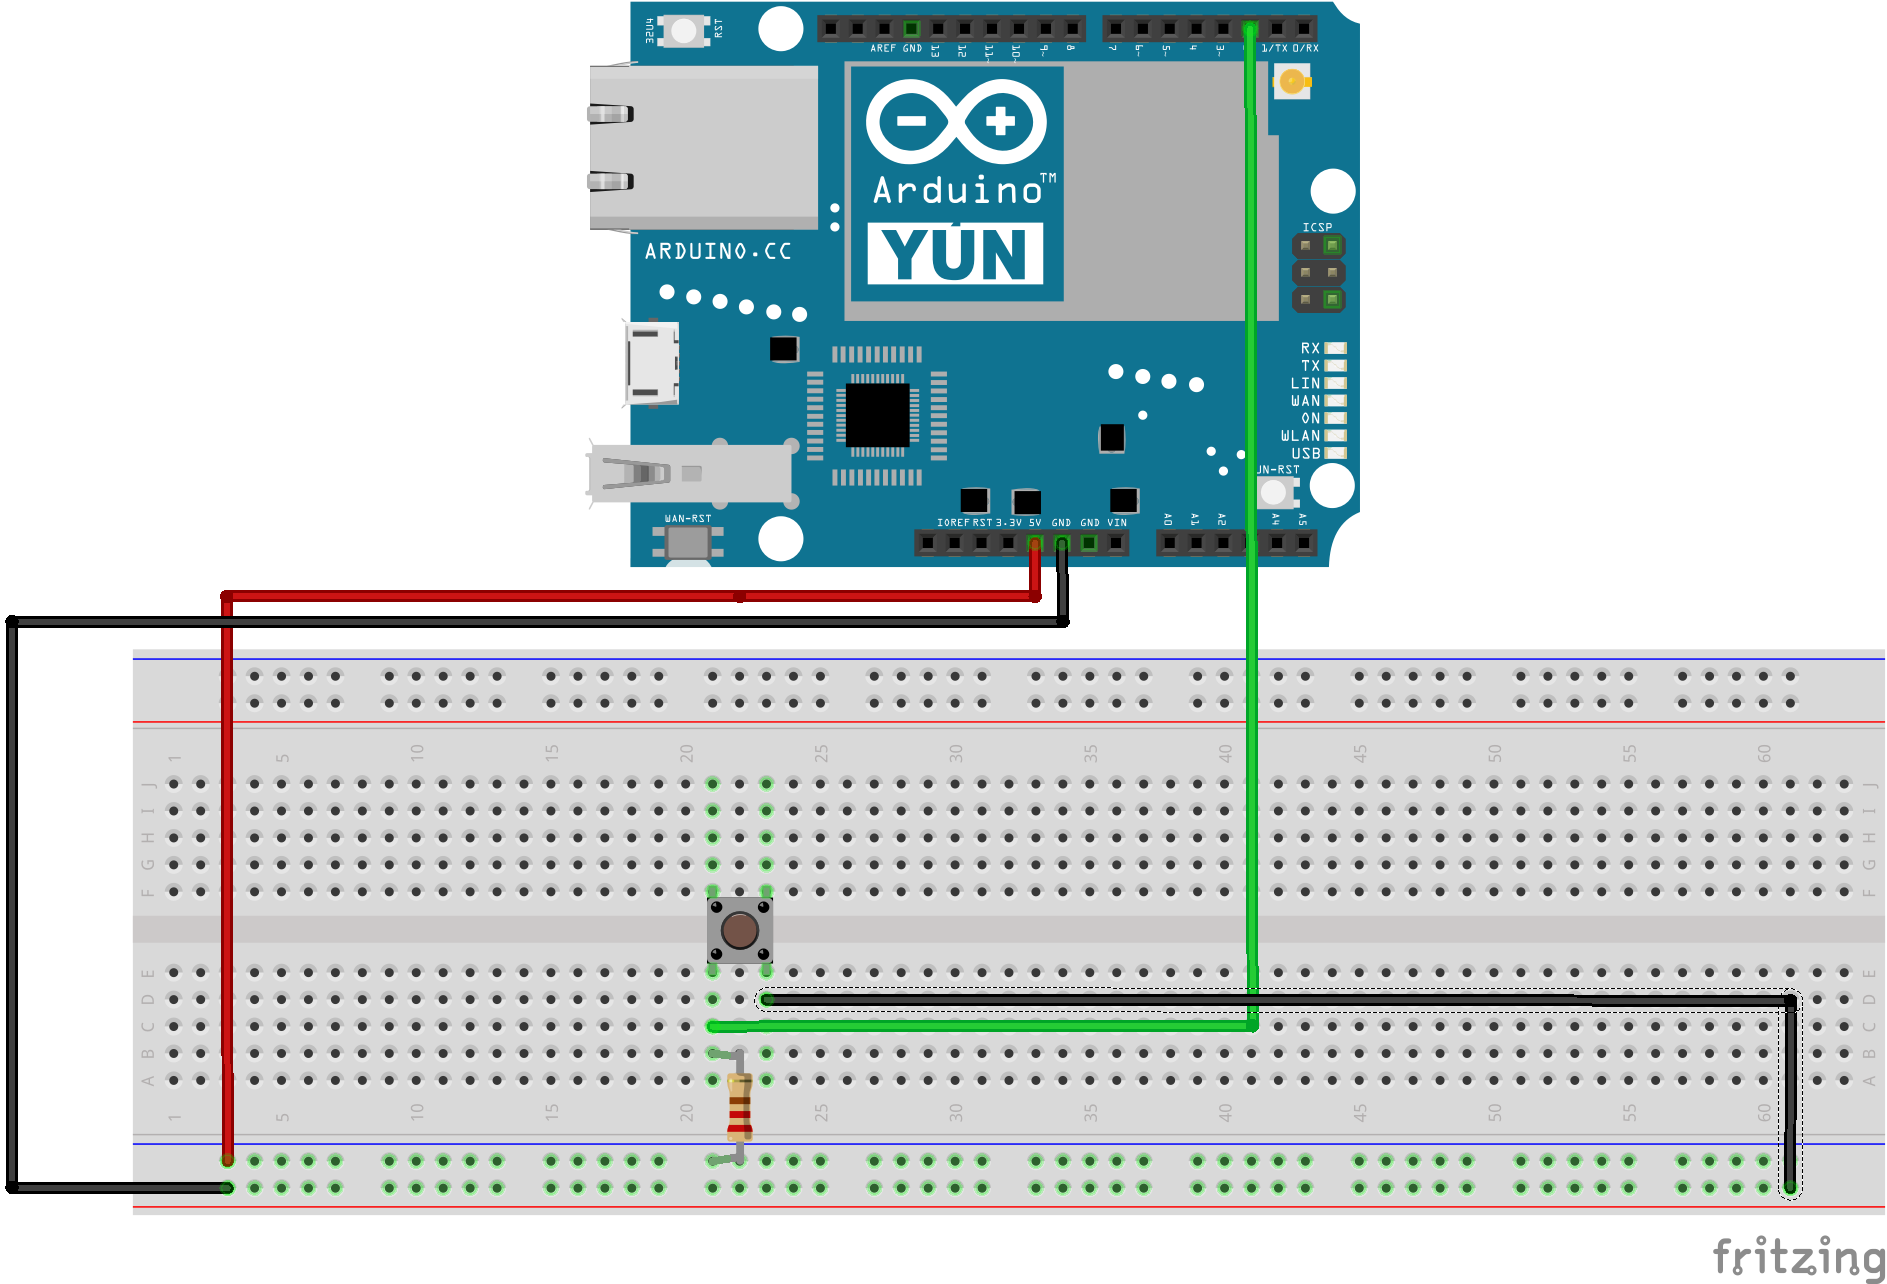
- Assemble the circuit as shown in the Fritzing diagram
- Set up the Philips Hue bridge by using their getting started guide. At the end of this your should have a authorized username
- Open the Arduino IDE and create a new sketch. Copy the sketch_hue_me_on.ino and aws_iot_config.h files from github. Edit the publish topic to match your own
- Download this sketch onto the Arduino Yun board
- Download the sample subscribe program. Edit the authorized username to be the one you got in step 7.
- When you press the pushbutton, you should see the Philips Hue LED turn on. If you press it again, it will turn off
More details on our catalog page for this exercise.


_3u05Tpwasz.png?auto=compress%2Cformat&w=40&h=40&fit=fillmax&bg=fff&dpr=2)
Comments
Please log in or sign up to comment.