#Raspberry Pi Pico is a little different from the existing #Raspberry Pi.
Raspberry Pi pico is target might be a sensor.
There are basic interfaces that can be attached to the MCU: UART, SPI, I2C, GPIO USB, PWM, and there are also things that can control the MCU such as dma, watchdog, timer, etc.
In order to use Pico, the example and SDK code must be present together, so these two are provided together.
Basically, you can check the Raspberry Pi Pico's Get Started documentation.
You can follow what I posted
I worked in C/C++ + Window10 environment
In Korean :
in English :
- https://www.hackster.io/irinakim1225/windows10-environment-building-for-raspberry-pi-pico-c-c-2dc9f3
You can check the basic LED driving through the environment building link..
.
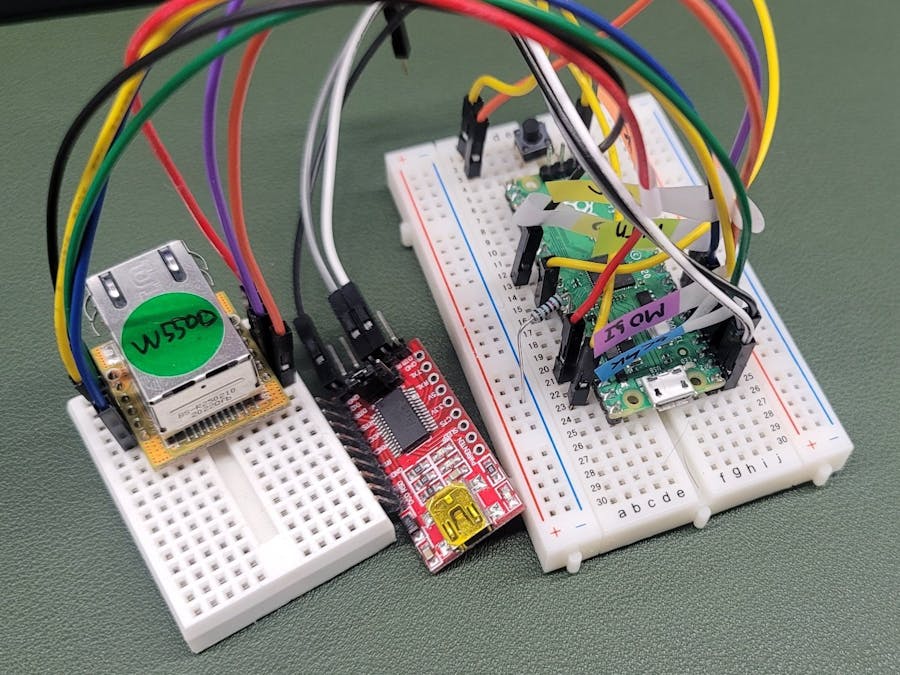
There is an SPI interface, and the Raspberry Pi pico doesn't have a network-related chip such as Ethernet or Wifi, so I wanted to do Ethernet communication programming.
First, in the pico-example example, there are about 4 SPI folders as shown below.
So, I created the W5500_SPI folder and added w5500_spi to CMakeList.txt in the SPI folder.
IoLibrary of WIznet
https://github.com/Wiznet/ioLibrary_Driver
Only files used in W5500 were added in ioLibrary provided by Wiznet.
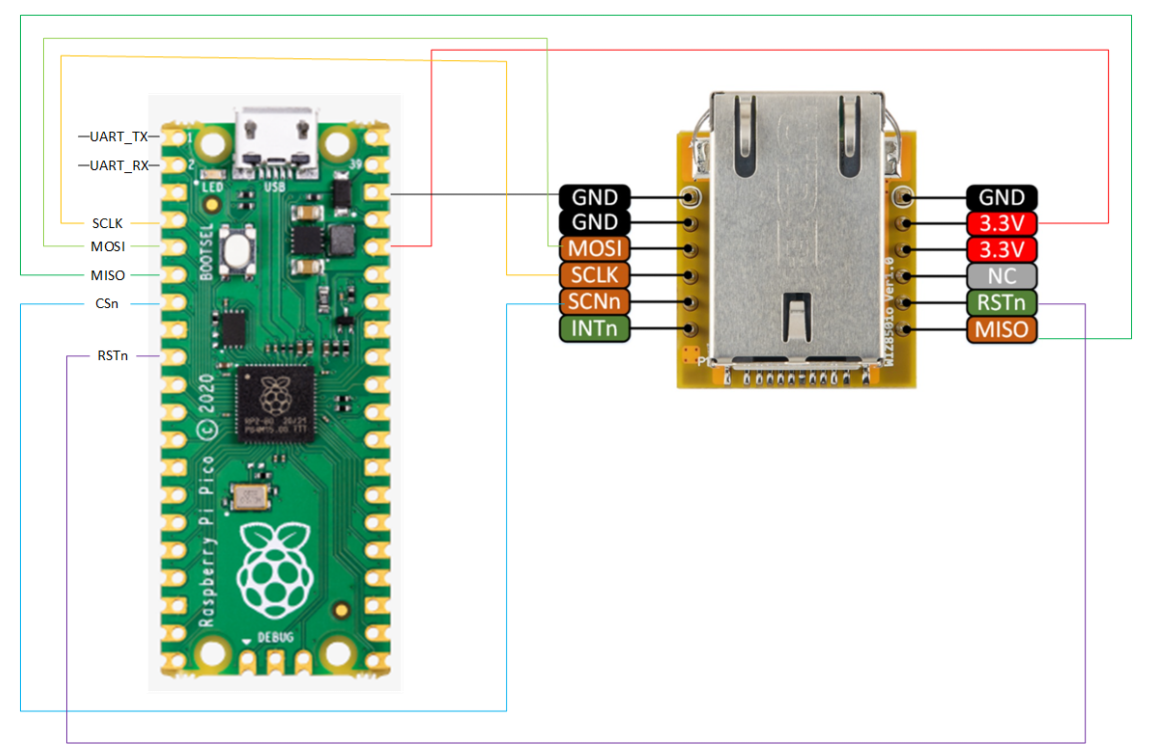
Below is the SPI and Reset pinmap,
Below is the change of Read/Write byte operation.
Below is a video of compilation, firmware upload, and operation demonstration using Cmake.
Currently, I sent a pull request to the Pico-example provided by raspberry, and I am ping pong hard, and I think I will be able to enter the basic example sooner or later.


Comments
Please log in or sign up to comment.