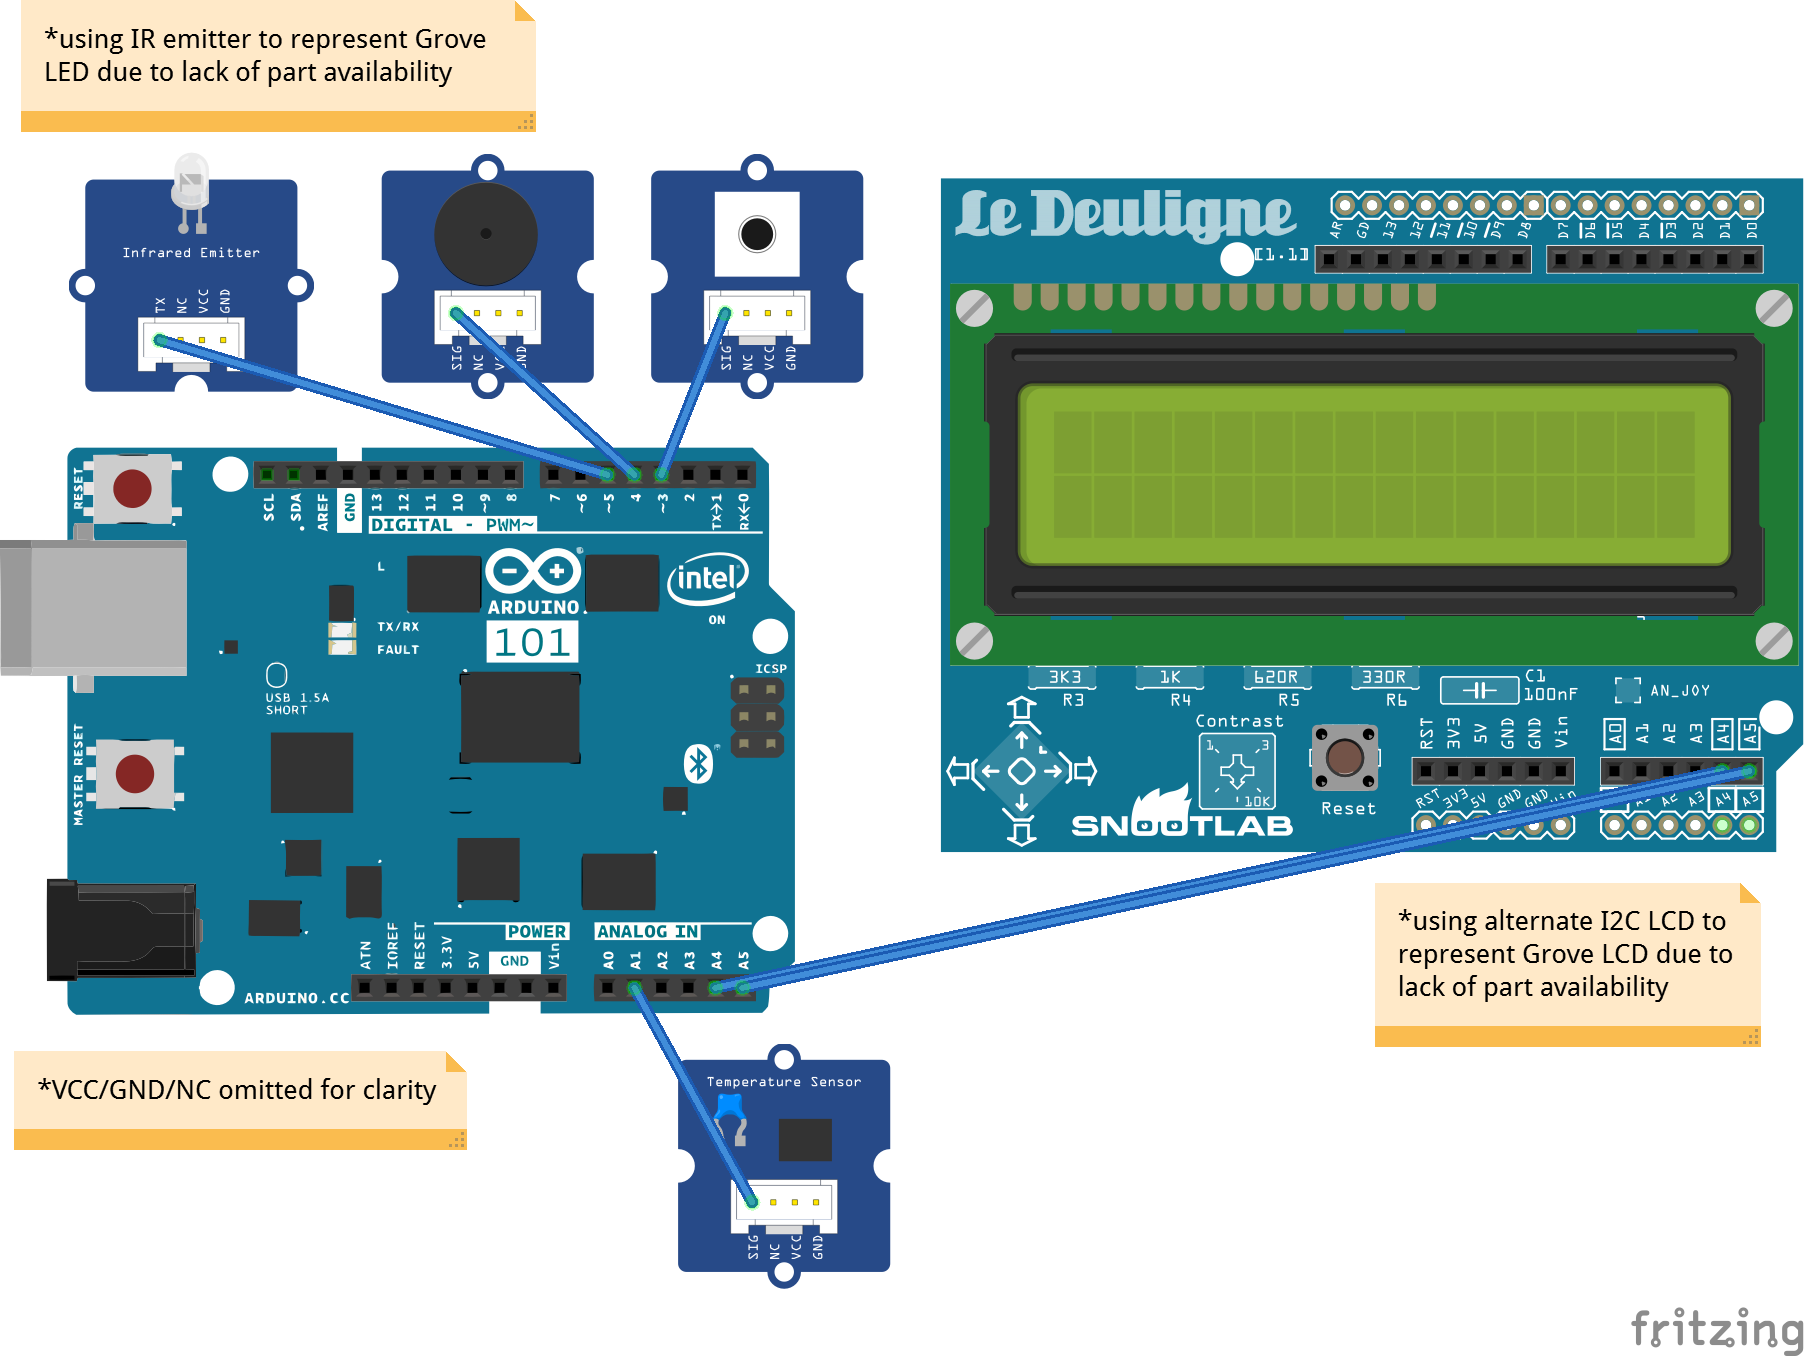
I started out with a related, yet significantly different idea: creating a simple, highly-visible display using a charlieplexed LED matrix. I intended to leverage the Arduino 101's Bluetooth LE to populate the display, e.g. for displaying notifications or as a miniature billboard. Once I received the Grove Starter Kit, however, I quickly pivoted; for starters, the charlieplexed LEDs consumed almost all available pins, meaning none remained for use with Grove sensors and actuators. The Grove kit comes with a nice I2C LCD, giving me 2 rows of 16 5x7 pixel characters vs. just 14x9 pixels total with the LEDs - all while consuming only two pins! With a nice selection of sensors to play with (experimentation is made very easy by the ubiquitous Grove connectors - nothing to solder, or even breadboard!) I started to form an idea around displaying information on the powerful RGB LCD. I've always been a huge fan of Chumby - and while its hardware may no longer be cutting edge, it's still an incredibly powerful way to receive information passively throughout the day - which made me realize that even a simple LCD could be used to provide valuable information. It was this realization that lead me to create groby - an Arduino 101 and Grove-based Personal Information Display!
Getting StartedI'm familiar with Arduino development and the capabilities of Uno and its ilk, but I wanted to get to know the Arduino 101 and what made it different. I started a fresh sketch called HelloCurie and walked through the handy Getting Started guide, including the tutorials and the 101-specific libraries with their related examples. I also explored the Grove kit's button, temperature, buzzer, and LED modules, which all work like their off-the-shelf counterparts, just without the need for soldering or breadboarding. The LCD requires installation of a library which also includes a number of helpful examples.
After some experimentation, I'd touched on most of the areas that would be required for groby: the RGB LCD, button, temperature, buzzer and LED Grove modules, plus the IMU, RTC, and BLE functionality of the 101.
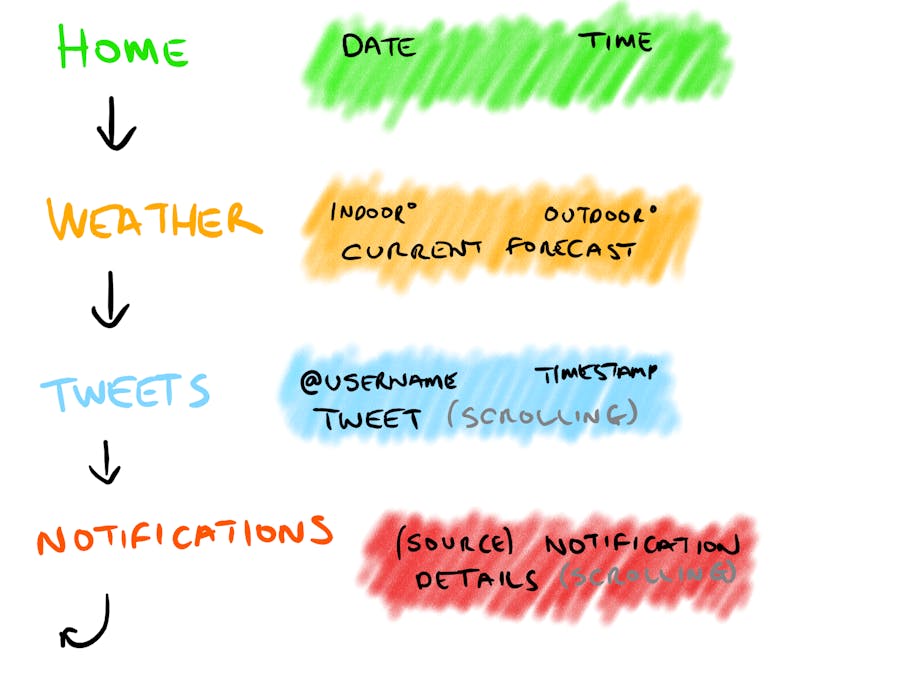
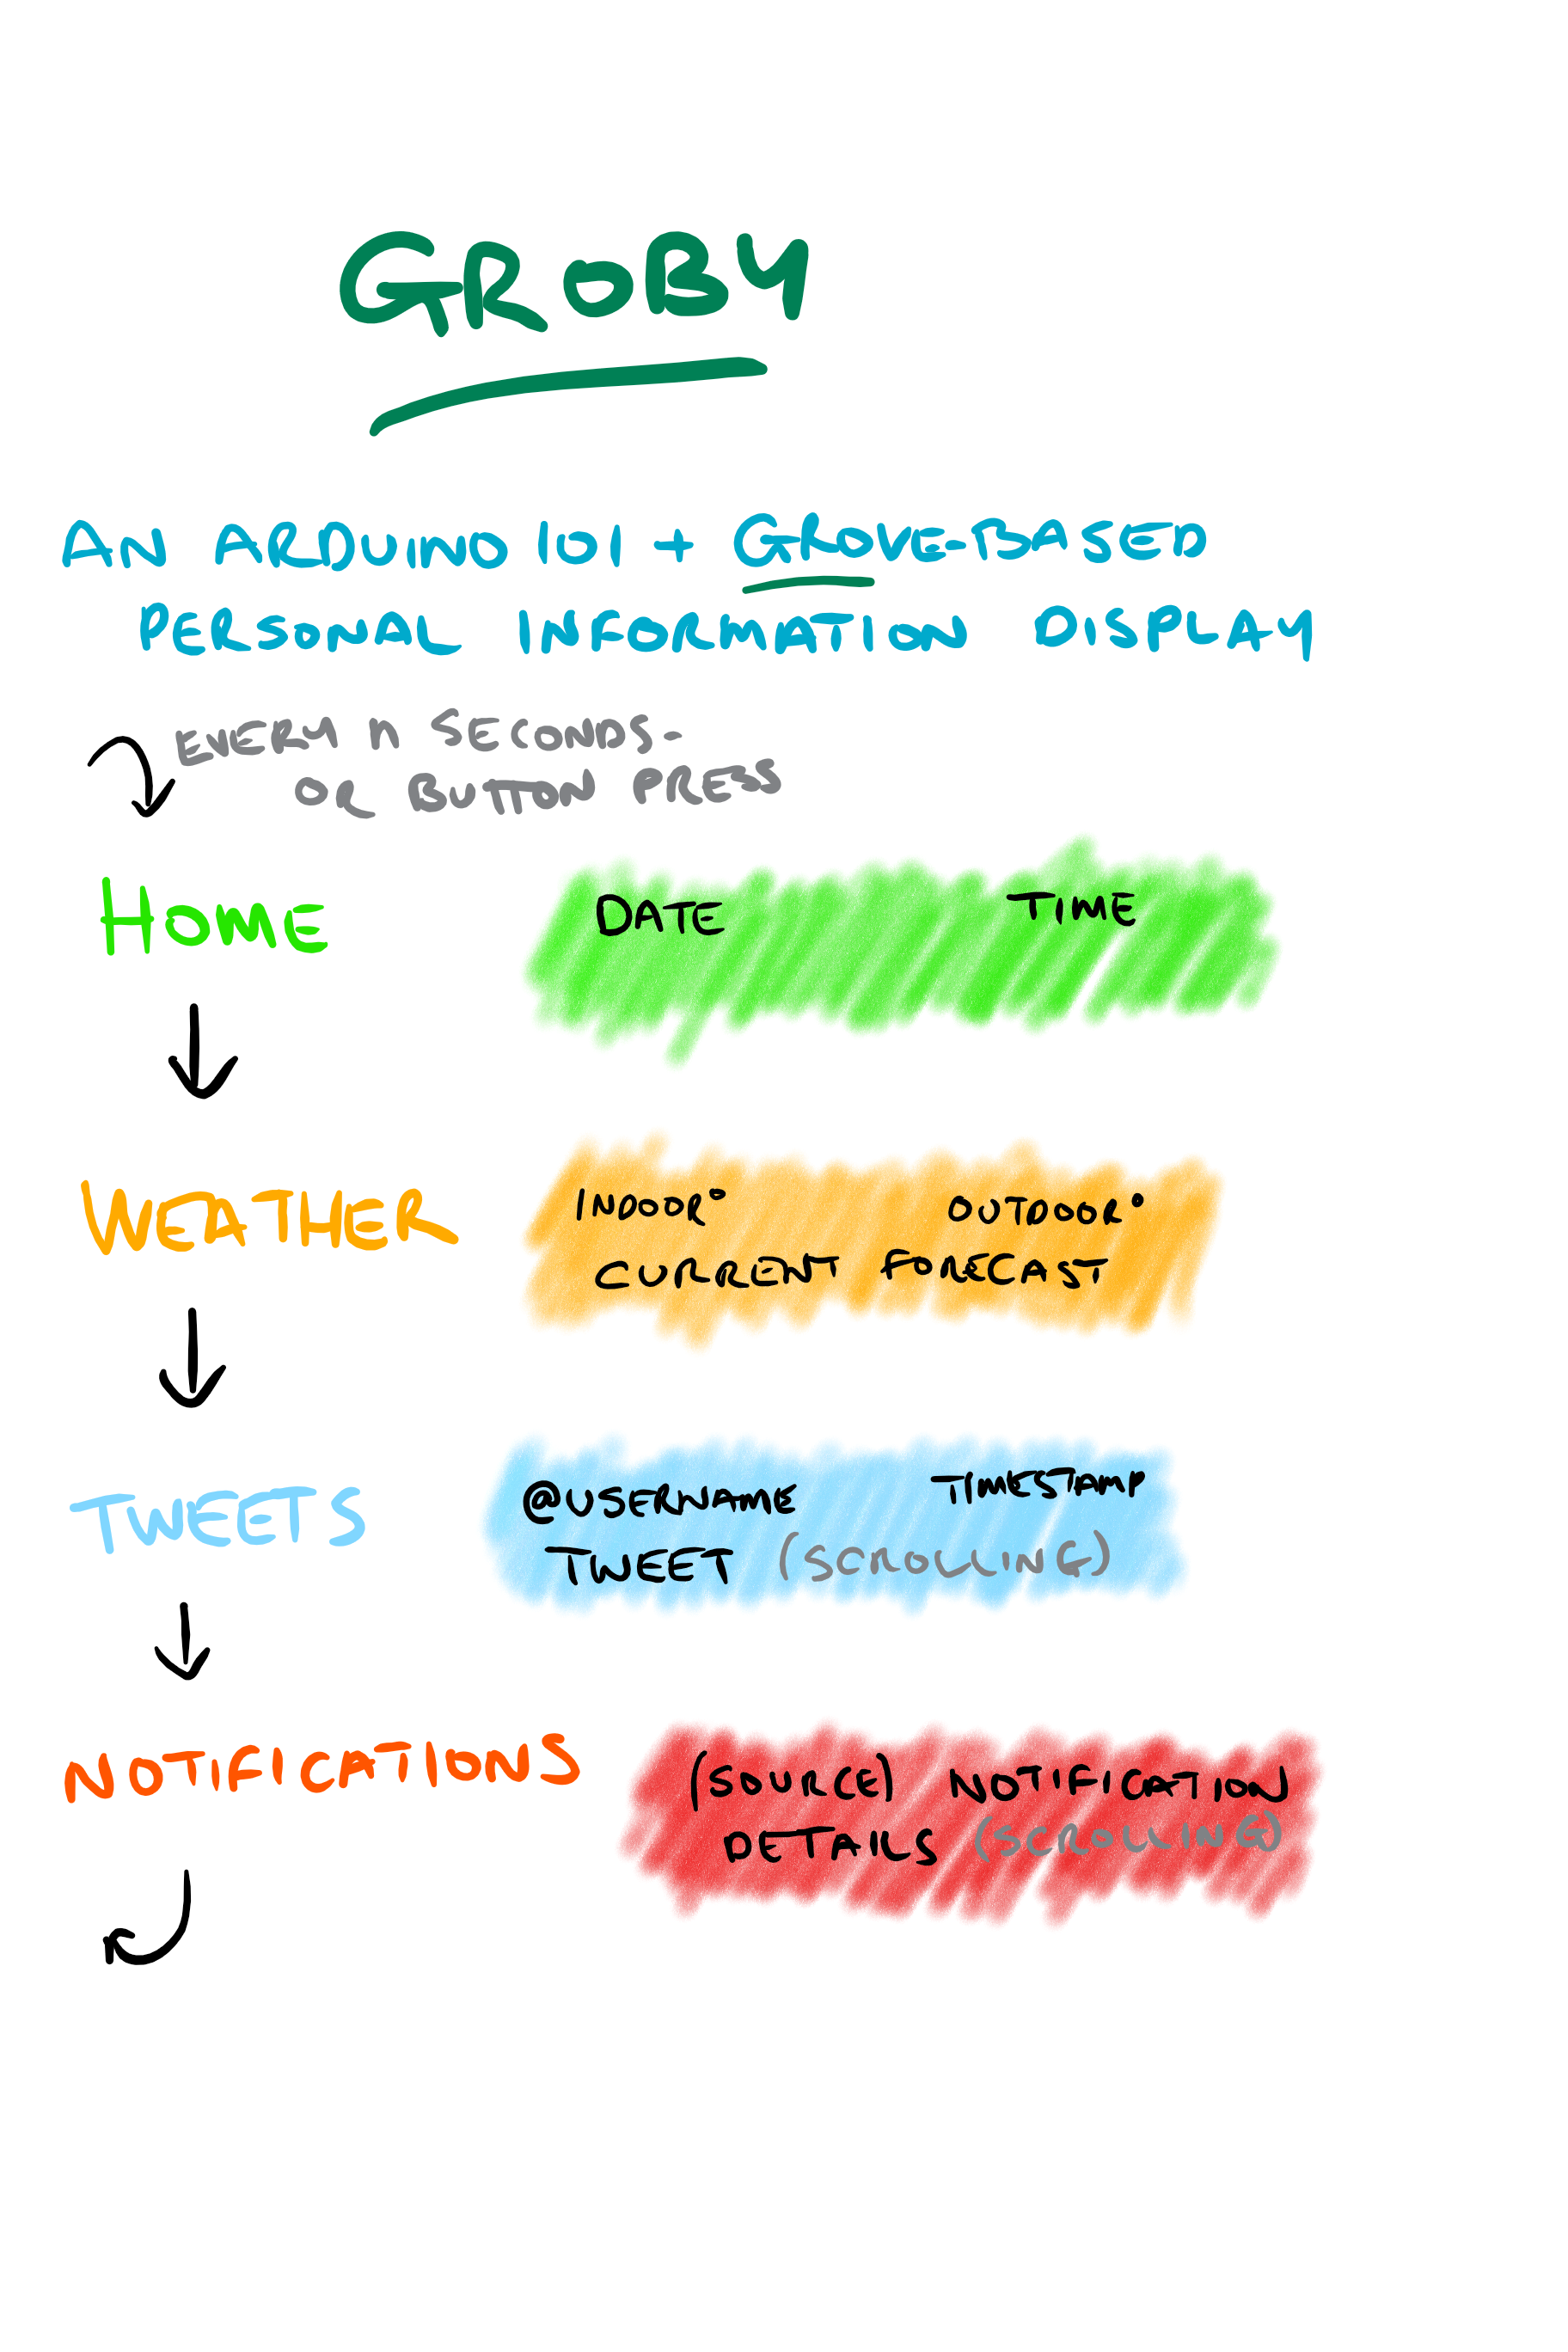
Development ProcessWith a solid understanding of the Arduino 101 and Grove modules under my belt, I forked my original HelloCurie repo as groby and methodically added my desired functionality. I mocked up a series of UI states (Home, Weather, Tweets and Notifications) and implemented the corresponding BLE Characteristics to allow them to be populated from the extremely helpful nRF Connect for Mobile app on my phone, which I discovered as part of the CurieBLE Button LED example. I simplified my input logic significantly by leveraging BLE events/callbacks and a button interrupt instead of checking their values during Arduino's loop() function.
The only issue I encountered during development was with the Grove Temperature Sensor v1.2 - the example code produced absurd values (e.g. 48°C (118°F) room temperature!), and even rewriting it from scratch using an Adafruit guide on thermistors and the Steinhart-Hart equation yielded similarly bizarre results. As a workaround for now, I used the temperature from the 101's IMU!
Results and ConclusionsThe robust documentation and plentiful examples for the Arduino 101 and Grove kit allowed me to build familiarity with their functionality and usage with relative ease. I built a colorful, attractive personal information display that's capable of displaying time/date information, indoor/outdoor temperatures and forecast, and the latest Tweets and notifications from my phone. The familiarity of the Arduino platform and the easy-to-use Grove connector system made experimentation and implementation completely pain-free!
Next Steps/Future EnhancementsWith a solid proof-of-concept in place, I'm looking forward to extending groby's capabilities! The next feature I plan on implementing is notification alert functionality - this would cause the normal UI state cycle to be interrupted upon receipt of notification data in order to display the latest notification immediately, as well as producing an audible tone for additional impact. The alert would then be cleared by tapping/shaking the device (using the on-board IMU), thus returning to normal UI state cycling. The primary impediment to this at present is the lack of an enclosure to keep everything together while shaking; I don't have access to a 3D printer at present, but will soon, and will be able to proceed with this functionality.
Beyond the basic proof-of-concept, I would love to enhance groby further by enabling more data to be displayed on the small screen. I would like to leverage the LCD's built-in scrolling functionality to do this, but I encountered an unexpected limitation of the BLE Characteristics used to transfer data from the phone to the 101: they are limited to 20 bytes! This works great for the 16-character messages that groby currently displays, but in order to allow longer messages, some sort of disassembly and reassembly of data in 20-byte chunks would probably be required, which was more than this initial PoC warranted. I would also like to add custom characters to the LCD to represent notification types, e.g. email, SMS, and other icons. I would really have liked to get the Grove Temperature Sensor to work vs. falling back on the IMU, which is itself obviously not the most accurate measure of indoor temperature. Finally, dedicated Android/iOS apps to enable automated RTC sync and sending of weather, Twitter, and notification data would be fantastic, although the nRF Connect app does an absolutely brilliant job during this prototyping phase!


_baVEVgguW1.jpg?auto=compress%2Cformat&w=48&h=48&fit=fill&bg=ffffff)


Comments