Past week, I went to Bangkok Maker Faire in Thailand. It's great opportunity to explore ideas, projects and been shopping for more stuffs for future projects.
I have got the RoverC, JoyC and newest released M5Atom along with many stuffs from M5stack who hosted an exhibition booth in the faire to show their latest stuffs.
What is M5Atom?The M5Atom is smallest (?) ESP32 development board with a size of only 24 x 24 mm. Don't judge from the size, it packs with tons of features, WIFI, Bluetooth, 5x5 RGB LED Metrix with a push button, IMU sensor (MPU6886), 6 GPIOs.
The main control is ESP-PICO. So it is using the same library with M5Stickc.
Assemble itemsAssemble M5StickC with RoverC and JoyC is the easiest part. You can just plug and play using the example from M5Stack
RoverC: https://github.com/m5stack/M5StickC/blob/master/examples/Hat/RoverC/RoverC.ino
JoyC: https://github.com/m5stack/M5-ProductExampleCodes/tree/master/Hat/JoyC
Once you load codes to both M5StickC on RoverC and JoyC. You can enjoy driving the RoverC using JoyC within no time. But it's too easy for us, hard core Maker :)
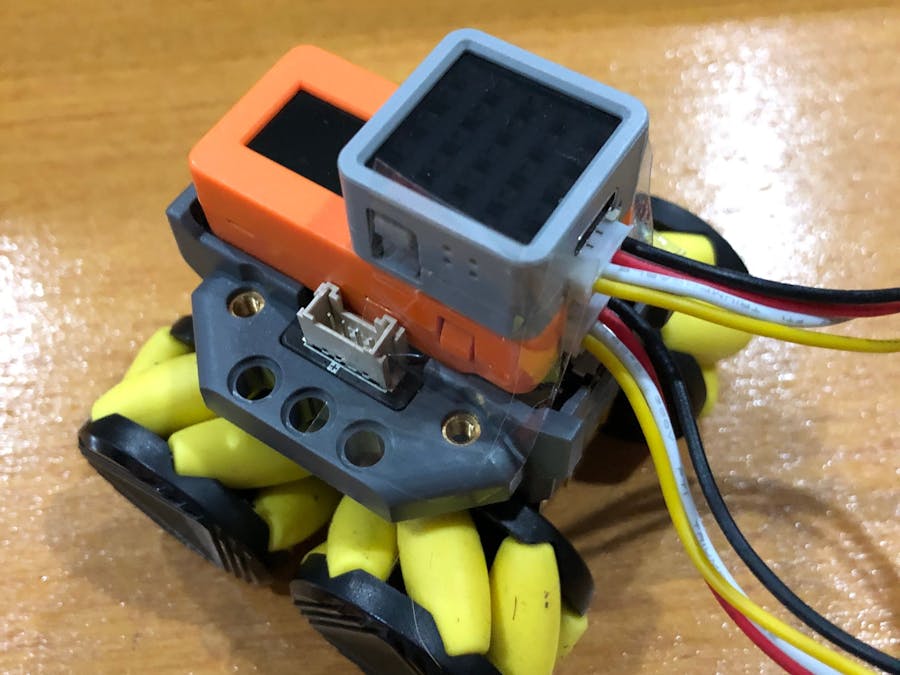
So I try to assemble the newest item from M5Stack, the M5Atom to display direction of the RoverC using its LED display.
The M5Atom comes with UART connector that we can use it to connect with M5StickC on RoverC (G26 <-> G32 and G32 <-> G33)
So, now we using Serial port to communicate between these 2 devices. In this case, I use G32 <-> G33 connection.
Serial2.begin(115200, SERIAL_8N1, 32, 33); // GroveThen, I just simply tracking the movement of RoverC (udodata[3], udodata[4], udodata[5]) and send value to M5Atom
if (udodata[4] > 100 && udodata[4] > udodata[3] && udodata[4] > udodata[5]) {
   Serial.printf("FWD");
   Serial2.write(0x02);
} else if ((int) udodata[4] < 100 && udodata[4] < udodata[3] && udodata[4] < udodata[5]) {
   Serial.printf("BKD");
   Serial2.write(0x03);
} else if ((int) udodata[3] > 100 && udodata[3] > udodata[4] && udodata[3] > udodata[5]) {
   Serial.printf("LEFT");
   Serial2.write(0x04);
} else if ((int) udodata[3] < 100 && udodata[3] < udodata[4] && udodata[3] < udodata[5]) {
   Serial.printf("RIGHT");
   Serial2.write(0x05);
}
Once, M5Atom gets the value, it display LED according to matching configurations. I draw it pixel by pixel in the LED configurations.
Final ProductsNow we have got eveything in place. I just taped the M5Atom on top of M5Stick and take it for a drive. EnJoy !!
Full Code: https://github.com/iyawat/Line-RoverC
This is just one simple example that you can play with M5Atom. I just scratch the surface of what it can do. I will later continue playing with this amazing things. :)


Comments
Please log in or sign up to comment.