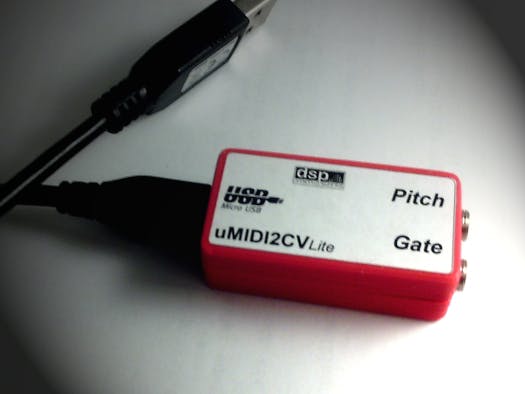
How do you make a USB MIDI to CV interface for playing analog synthesizers from your DAW?
This one is simple and does not require any expensive Teensy’s or STM32.
Being HID compliant it works on computers, tablets and smartphones without any special driver.
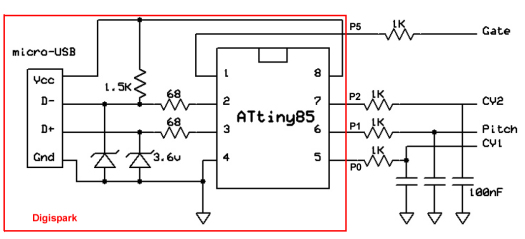
It runs on the ATtiny85 using V-USB.
The ATtiny is programmed with the Micronucleus bootloader and is firmware upgradeable in circuit.
(* CV1 and CV2 are optional, see below)
If you don’t want to build the circuit above, a cheap chinese Trinket does the job.
It can be built into an analog synth like the Korg Monotron to give it USB MIDI.
If using a Digispark board there is a protection diode on the USB 5 volt feed that can cause a voltage drop and make the CV out of tune.
If you are having problems that the pitch is out of tune, bypass this diode with a small jumper.
You also need the DigiMIDI library found here:
https://github.com/heartscrytech/DigisparkMIDI
To be able to receive MIDI from the host, the file DigiMIDI.h requires some modification.
Add this to the function usbFunctionWriteOut:
void usbFunctionWriteOut(uchar * data, uchar len) {
  uint8_t note=data[2]; //Get note for key on/off
  if (note<36) note=36; //If note is lower than C2 set it to C2
  note=note-36; //Subtract 36 to get into CV range
  if (note>60) note=60; //If note is higher than C7 set it to C7
  if (data[1] == 0x90) { //If note on
    digitalWrite(5, HIGH); //Set Gate HIGH
    OCR1A = note<<2; //Multiply note by 4 to set the voltage (1v/octave)
  }
  if (data[1] == 0x80) { //If note off
  digitalWrite(5, LOW); //Set Gate LOW
  OCR1A = note<<2; //Multiply note by 4 to set the voltage (1v/octave)
  }
}
And this is the MIDI2CV.INO sketch:
// (*) All in the spirit of open-source and open-hardware
// Janost 2019 Sweden
// DIY USB MIDI to CV
// http://blog.dspsynth.eu/cheap-diy-usb-midi-to-cv-interface/
// Copyright 2019 DSP Synthesizers Sweden.
//
// Author: Jan Ostman
//
// This program is free software: you can redistribute it and/or modify
// it under the terms of the GNU General Public License as published by
// the Free Software Foundation, either version 3 of the License, or
// (at your option) any later version.
// This program is distributed in the hope that it will be useful,
// but WITHOUT ANY WARRANTY; without even the implied warranty of
// MERCHANTABILITY or FITNESS FOR A PARTICULAR PURPOSE. See the
// GNU General Public License for more details.

#include <DigiMIDI.h>
DigiMIDIDevice midi;
void setup() {
  pinMode(1,OUTPUT); //Pitch is output
  pinMode(5, OUTPUT); //Gate is output
  //Setup Timer1 to do PWM DAC for Pitch
  TCCR1 = _BV(PWM1A) | _BV(COM1A1) | _BV(CS10);
  GTCCR = 0;
  OCR1C = 239; //Set CV PWM range to 240
  OCR1A = 0; //Set initial Pitch to C2
  digitalWrite(5,LOW); //Set initial Gate to LOW;
}
void loop() {
  midi.update(); //Check if any MIDI data is received
}
8-bits is actually a too low resolution for the pitch but a trick makes it work.
The CV range is set to 0-239 instead of 255 and that makes each seminote exactly 4 steps.
Thats it, very simple and cheap.
If you have no clue about programming and soldering skills only you can buy a preprogrammed Digispark board.
The DIY preprogrammed MIDI2CV Digispark is available here
(*) The optional CV1 and CV2 outputs adds 2 more CV outputs and requires adding some code to the sketch above.


Comments
Please log in or sign up to comment.