Step 1: Log in to your Bolt Cloud by clicking the link below:
https://cloud.boltiot.com/login?next=%2F
Step 2: After logging your page should look like this and make sure your device is online. click on the device info button where small I is written. Note down the device ID.
Step 3: Then go to the API section. If you have not generated your API key before, select the enable radio button and click on generate new API key button.
Step 4: Then click on API documentation tab and go through GPIO commands.
Step 5: Now go to the IFTTT login page by clicking the link: https://ifttt.com/
Step 6: Create an account in IFTTT by clicking the sign up button on the top right corner.
Step 7: Once you have created the account now click on NEW APPLETS option.
Step 8: Click on +THIS option and select Google Assistant, and click on "say a simple phrase" option and fill in the details and press 'create trigger.'
Step 9: Now it's time for THAT option and search for Webhooks.
Step 9. In the URL section, enter the below and replace it with your respective credentials.
https://cloud.boltiot.com/remote/API_KEY/digitalWrite?pin=PIN_NUMBER&state=HIGH/LOW&deviceName=DEVICE_ID
CREDENTIALS TO BE REPLACED:
- API KEY - It will be available in the Bolt dashboard.
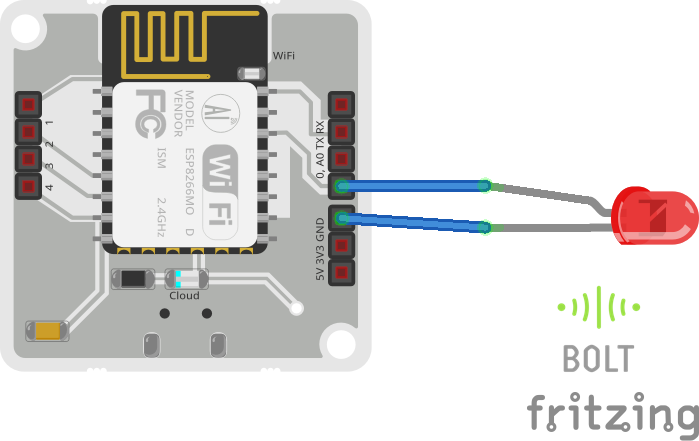
- PIN NUMBER - Enter the pin number in which you have connected your resistor.
- HIGH/LOW - If you want your google assistant to turn on the lights make the state to be high. Similarly, for switching the lights off make the state to be low.
- DEVICE ID - You can get it from your Bolt dashboard.
Step 10. Select the "get" method and then select the content type to application and make sure your applet is turned on.
Step 11. For turning off the lights, follow the steps given for "turning on the lights." The only thing you have to do is to set the state = LOW in the URL section available in the "make the web request" window.
Now we are ready with our project. It's time to get your hands on to the Google Assistant by saying the phrases you have saved.


Comments
Please log in or sign up to comment.