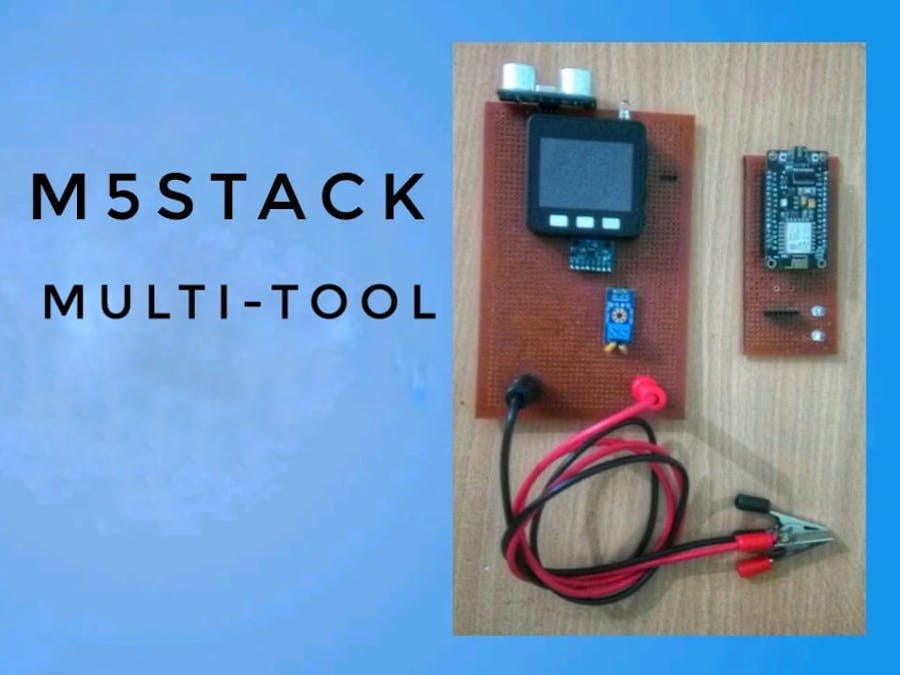
Why I made this:
Nodemcu:
After you know the IP of the Nodemcu paste it here in the M5STACK code
DOCUMENTATION:
Read more- So while a new desk I need tape to measure and spirit level and I need to go to the switchboard for the fan and lights.
- as I am so lazy and tired of this and that's why I made this.
- Here are the instructions, how to use it
- Click A for distance measurement
- Click B for level
1 / 2
- Click C for voltage measurement
- Click A(long) for controls of Find my phone/ switch on the light
- Now click on A for FMP
- Click on B for LIT
- Click B(long) for controls of Room light controls
- Click A for L1 ON
- Click B for L2 ON
- Hold A(long) for L1 OFF
- Hold B(long) for L2 OFF
- M5Stack will work as a remote.
- so here we are working as a client for the server.
- so if I do these operations given then it will write /ON1 or /ON2 after IP so that server can do the procedure as assigned
if (M5.BtnA.wasReleased()) {
      http.begin("http://192.168.4.1/ON2");
        int httpCode = http.GET();
        M5.Lcd.fillScreen(BLUE);
        M5.Lcd.setTextColor(WHITE);
        M5.Lcd.setTextSize(3);
        M5.Lcd.setCursor(65, 10);
        M5.Lcd.print("10BACK");
        http.end();
    }
    else if (M5.BtnC.wasReleased()) {
      http.begin("http://192.168.4.1/ON1");
        int httpCode = http.GET();
        M5.Lcd.fillScreen(BLUE);
        M5.Lcd.setTextColor(WHITE);
        M5.Lcd.setTextSize(3);
        M5.Lcd.setCursor(65, 10);
        M5.Lcd.print("10FOR");
        http.end();
}- Connections:
- I connected and led to Nodemcu on GPIO4(D2) and GPIO5(D1).
- type the IP of Nodemcu on the web in the laptop which is connected to the same wifi and if it displays this then all ok
if (M5.BtnA.wasReleased()) {
        http.begin("http://192.168.1.6/1ON");//put nodemcu ip here
        int httpCode = http.GET();
        http.end();
    }
    else if (M5.BtnB.wasReleased()) {
        http.begin("http://192.168.1.6/2ON");//put nodemcu ip here
        int httpCode = http.GET();
        http.end();    }else if (M5.BtnA.wasReleasefor(700)) {
        http.begin("http://192.168.1.6/1OFF");//put nodemcu ip here
        int httpCode = http.GET();
        http.end();
    }else if (M5.BtnB.wasReleasefor(700)) {
        http.begin("http://192.168.1.6/2OFF");//put nodemcu ip here
        int httpCode = http.GET();
        http.end();
}- it's very important to do so if not then it won't work
- GO TO IFTTT AND CLICK ON CREATE
- CLICK ON THIS
- GO FOR WEBHOOKS
- CLICK ON IT
- WRITE THE EVENT NAME AND CLICK ON CREATE TRIGGER
- CLICK ON THAT
- SEARCH FOR CALL CLICK ON VoIP CALLS
- CLICK ON CALL MY DEVICE
- WRITE WHAT YOU WANT IT TO SAY AND CLICK ON CREATE ACTION
- GO TO HOME AND SEARCH WEBHOOKS IN EXPLORE AND CLICK ON IT
- NOW CLICK ON DOCUMENTATION
- NOW WRITE EVENT NAME IN EVANT INBOX
- THEN COPY THE URL AND PASTE IT HERE
while (WiFi.status() != WL_CONNECTED) {
       delay(500);
       }
       WiFiClient client;
       const int httpPort = 80;
       if (!client.connect(host, httpPort)) {
        M5.Lcd.println("Weak Network");
       return;
       }
       String url = "/trigger/find_my/with/key/cnp2whSuq1Zn_4GB0kMLlx"; //PASTE THE URL HERE
       client.print(String("GET ") + url + " HTTP/1.1\r\n" + "Host: " + host + "\r\n" + "Connection: close\r\n\r\n");
       delay(1000);
       client.stop();
       for (int i = 0; i <= 11; i++) {
         m5.Lcd.print(". ");
         delay(1000);
}- THEN YOU NEED TO INSTALL IFTTT APP IN YOUR PHONE
- SET UP AND PASTE URL IN WEB TO TEST ITS WORKING OR NOT
- The voltage circuit consists of a voltage divider circuit of two resistors in which R1 is 30K and R2 is 7.5K.
- Interfacing a voltage sensor with Arduino or any other microcontroller is pretty straight forward. Connect the VCC and GND of the voltage source whose voltage to be measured to the screw terminals of the voltage sensor. Connect the S and – (GND) pins of voltage sensor to Analog pin and GND of Arduino respectively.
- Input and output voltage can be calculated using:
val = analogRead(vr);
vo = (val * 5.0) / 1024.0;
vi = (vo / (r2/(r1+r2)))-3;


Comments
Please log in or sign up to comment.