


Hardware components | ||||||
 |
| × | 1 | |||
 |
| × | 1 | |||
 |
| × | 1 | |||
 |
| × | 1 | |||
Software apps and online services | ||||||
 |
| |||||
Hand tools and fabrication machines | ||||||
 |
| |||||
Why I made this:
Nodemcu:
How to use it:
Read more- while watching my fav series I when I need to =vol or forward it 10sec I need to go to the laptop(connected to tv) from the sofa to do these adjustments.
- as I am so lazy and tired of this and that's why I made this.
- M5Stack will work as a remote.
- so here we are working as a client for the server.
- so if I do these operations given then it will write /A or /B after IP so that server can do the procedure as assigned
if (M5.BtnA.wasReleased()) {
      http.begin("http://192.168.4.1/A");
        int httpCode = http.GET();
        M5.Lcd.fillScreen(BLUE);
        M5.Lcd.setTextColor(WHITE);
        M5.Lcd.setTextSize(3);
        M5.Lcd.setCursor(65, 10);
        M5.Lcd.print("10BACK");
        http.end();
    }
    else if (M5.BtnC.wasReleased()) {
      http.begin("http://192.168.4.1/B");
        int httpCode = http.GET();
        M5.Lcd.fillScreen(BLUE);
        M5.Lcd.setTextColor(WHITE);
        M5.Lcd.setTextSize(3);
        M5.Lcd.setCursor(65, 10);
        M5.Lcd.print("10FOR");
        http.end();
    }
    else if (M5.BtnB.wasReleased()) {
      http.begin("http://192.168.4.1/C");
        int httpCode = http.GET();
        M5.Lcd.fillScreen(RED);
        M5.Lcd.setTextColor(WHITE);
        M5.Lcd.setTextSize(3);
        M5.Lcd.setCursor(65, 10);
        M5.Lcd.print("PL/PS");
        http.end();
    } else if (M5.BtnA.wasReleasefor(700)) {
      http.begin("http://192.168.4.1/D");
        int httpCode = http.GET();
        M5.Lcd.fillScreen(BLUE);
        M5.Lcd.setTextColor(WHITE);
        M5.Lcd.setTextSize(3);
        M5.Lcd.setCursor(65, 10);
        M5.Lcd.print("+5VOL");
        http.end();
    }
    else if (M5.BtnC.wasReleasefor(700)) {
      http.begin("http://192.168.4.1/E");
        int httpCode = http.GET();
        M5.Lcd.fillScreen(BLUE);
        M5.Lcd.setTextColor(WHITE);
        M5.Lcd.setTextSize(3);
        M5.Lcd.setCursor(65, 10);
        M5.Lcd.print("-5VOL");
http.end();- so for sample I pressed the A button then it will write /A after IP then Nodemcu will write A in Serial.
void A(){
  Serial.println("A");
  digitalWrite(4,1);
  delay(500);
  digitalWrite(4,0);
}- and it also blinks an led connected on D2(GPIO4) of Nodemcu.
- Then python will read it and do procedures as assigned.
if da==b'A':
pyautogui.press('j')- 'j' to back 10sec and like this play/pause and vol up/down works.
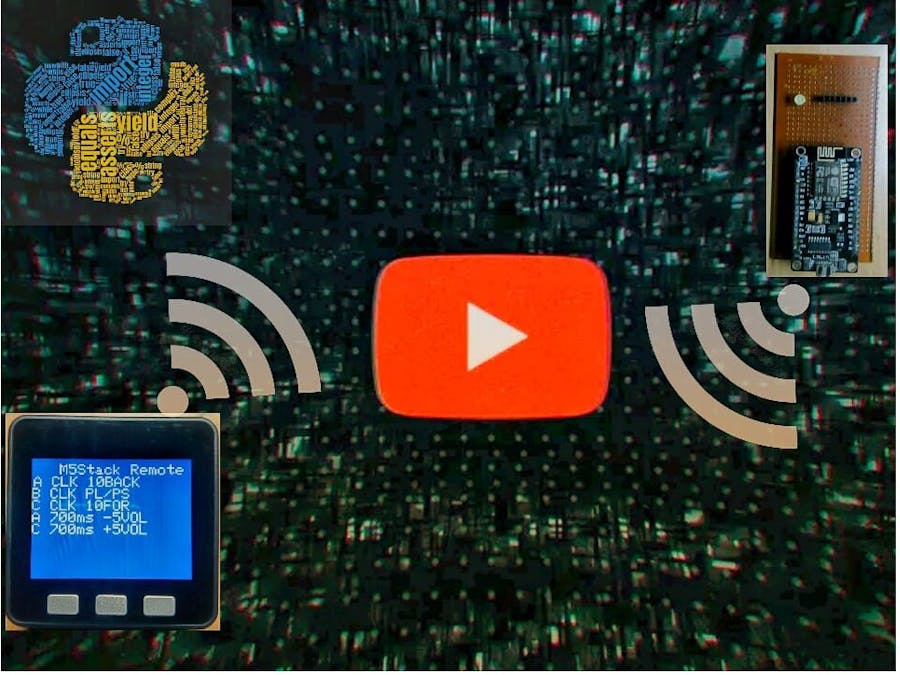
- Here is the menu for how to control vids with it.
- Click A to back 10sec or -10sec.
- Click B to play/pause.
- Click C to forward 10sec or +10sec.
- Press C for 700ms to +5Vol.
- Press A for 700ms to -5Vol.
- I connected an led to Nodemcu on GPIO4(D2) that will indicate that it connected with the client and working.
- if you have time then you can make it like this.
- connect Nodemcu to Pc and open Arduino then select board and port and upload if you haven't uploaded the code then
- in my case port is COM5 that's why I put COM5 here put your port of Nodemcu to make it work.
m5 = serial.Serial('COM5', 115200, timeout=.1)- then run the python program but don't close Arduino then it won't work.
IF YOU HAVE ANY PROBLEM WITH IT THEN COMMENT TELL ME IN COMMENTS BELOW.


Comments
Please log in or sign up to comment.