I was going camping, and wanted a way to charge my camera that would not require me to plug it in. Using components I had on hand and purchasing only two items, I was able to make a battery bank that rivals some commercial solar powered banks on the market. Especially if you like outdoor activities, this project is fantastic. I have had a lot of fun with it, and I think you will too :D.
Before I begin, if you like this content, follow and leave a comment. Also check out my instagram @jaynkylabs.
Enough talk. Lets get started!
Here is the general format.
- Gathering parts (scrapping)
- Assembly
1. Scrapping a male USB.
This is rather straightforward. Simply find a broken or discarded USB cable. Cut off the male USB end and removing the insulator. You will only need the power wires (red and black) not the data wires.
3. A 5V solar panel.
You can cheat and buy one. But thats boring. Solar powered lawn lights tend to get corroded easily. This is good news for you. A free 5V solar panel! Once you get your hands on one (ask around, someone ought to have one). Rip it apart and cut the wires to the solar panel, and you are done. Congrats!
2. Laptop batteries (If you already have 18650 Li-ion batteries you can skip this step).
It seems as if almost everyone has an old broken laptop that they are holding onto for no reason. Its time for you to capitalize on it :). Once you get a laptop you can scrap, remove the battery bank on back. Almost all laptops have similar means of removing the battery pack. Like this one.
Once you remove the battery bank flip it over to the sticker part. It should look something like this.
Get a screwdriver or small hard object and remove the sticker. When you are done you should see plastic slats, and the battery gold underneath.
Next, pry off the plastic slats over the batteries and remove those sweet sweet Li-ion batteries. You can just smell the power. Yum! :P
That should be it! Congratulations on collecting all the parts. If you were able to obtain all of them through scrapping kudos to you! If you are having problems finding the parts or scrapping them, leave a comment. I might be able to help you.
AssemblyParts Assemble! Time to roll up your sleeves and forge your awesome battery bank. Here is the plan.
1. Modify the solar panel
2. Build the battery pack
3. Plug everything in
Got it? Great lets go!
1. Modify the solar panel
Now that you have a solar panel, you need to adapt it so that we can use it. Get that male USB that you scrapped and solder to the solar panel. Red wire to red wire and black wire to black wire. Either use heat shrink tubing or electrical tape to insulate the connection.
To improve the connection I like to wrap both wires and connection points in electrical tape. Set it aside for later use
2. Build the battery bank
Before you insert the batteries in the DIY batter bank you purchased (extra points if you DIY this too), snap the cover on it. The manufactures do not want you to take it off, so you will have to pry it open. You are doing this so that it will be easier to change the batteries in the future. Once the cover is pried off, insert the scrapped laptop batteries.
When completed place the cover back on and secure with electrical tape.
You now have a high density power bank. Depending on the type of laptop batteries you scrapped, this bank can recharge your phone multiple times. As a standalone this a big accomplishment. With little effort and low cost, you were able to make a battery bank that is arguably better than a much more expensive counterpart online. Good job! On to the final act.
3. Plugging everything in!
This is the part you have been waiting for! The grand finale. Its mostly self explanatory but I will walk you through just in case.
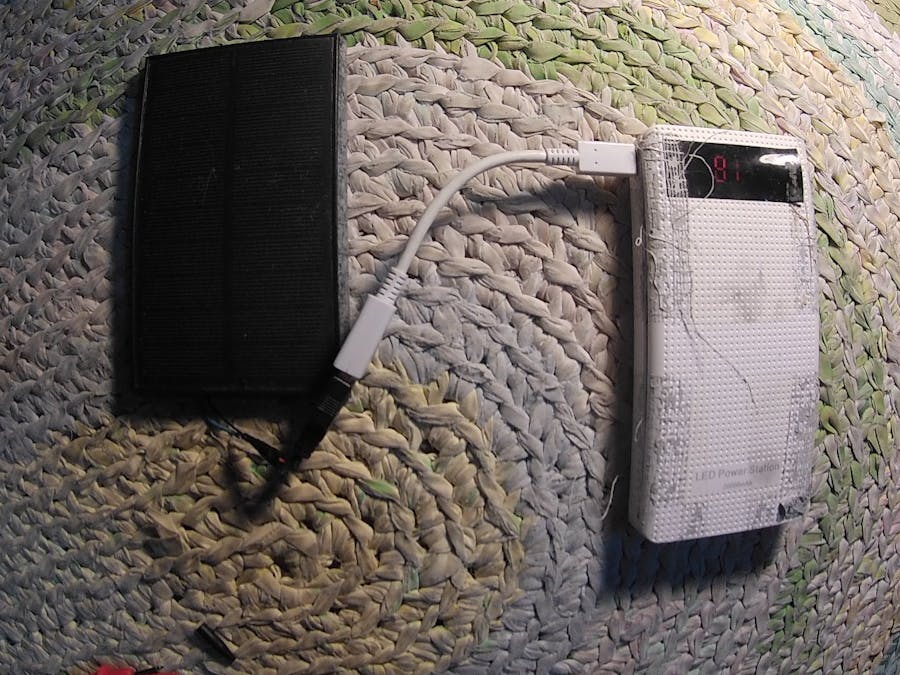
Plug the male USB that you soldered onto the solar panel into the USB to USB C adapter and the USB C adapter into the battery bank. It should look something like this:
Thanks for sticking around. Leave a comment. I would love to see what you have done with this project. Like and follow for more great content. Also check out my instagram where I post Jaynky inspirational content. @jaynkylabs.


Comments
Please log in or sign up to comment.