I have been working to developing a depth sensing aid in the form of a belt that can help provide navigational assistance to the visually impaired. The belt is built upon a large workout belt that can be wrapped around the user. In the middle is a 4 by 3 matrix of vibration motors that help to convey a user's surroundings. Depending upon the location and intensity of a motor's vibration, the belt can convey the location of an obstacle and its distance from the user. This will augment other navigational aids or help to normalize iterations when the user may have trouble noticing certain objects or gestures.
Physical ConstructionSmall holes were cut to accommodate the vibration motors,and wires were sewn into the fabric of the belt to get them all to terminate in the same location on the side. Fabric squares were used to organize and cover wires on the belt.
The wires for the motors and ground are then connected to the Arduino Mega in pwm pins 2-13 and GND in accordance with motor location. The Arduino was secured with foam board tape, I later added electrical tape to help secure it more and hold connections. In a more final product the Arduino could be sewn onto the belt or secured with Velcro.
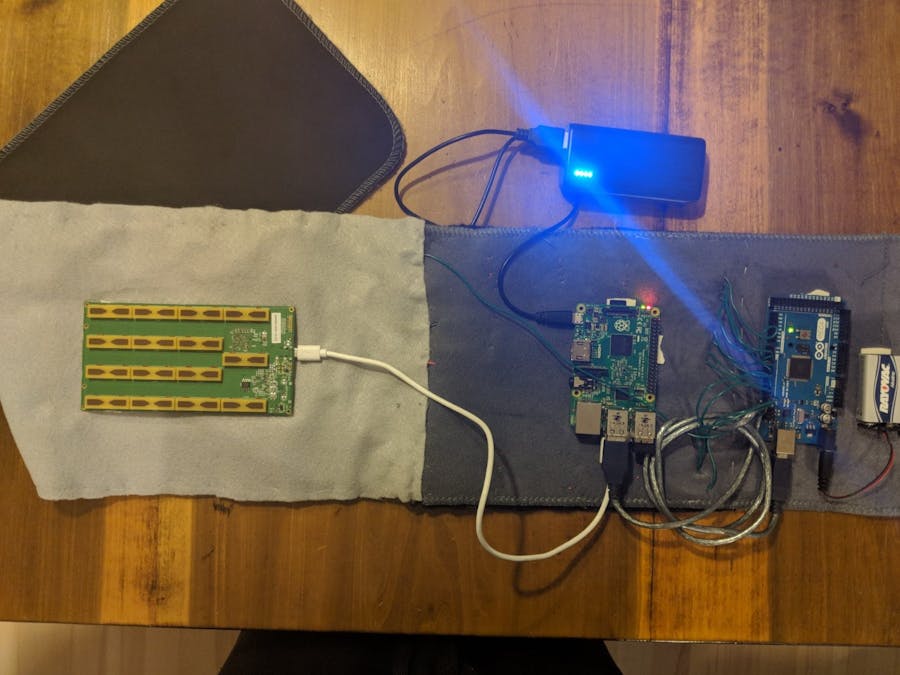
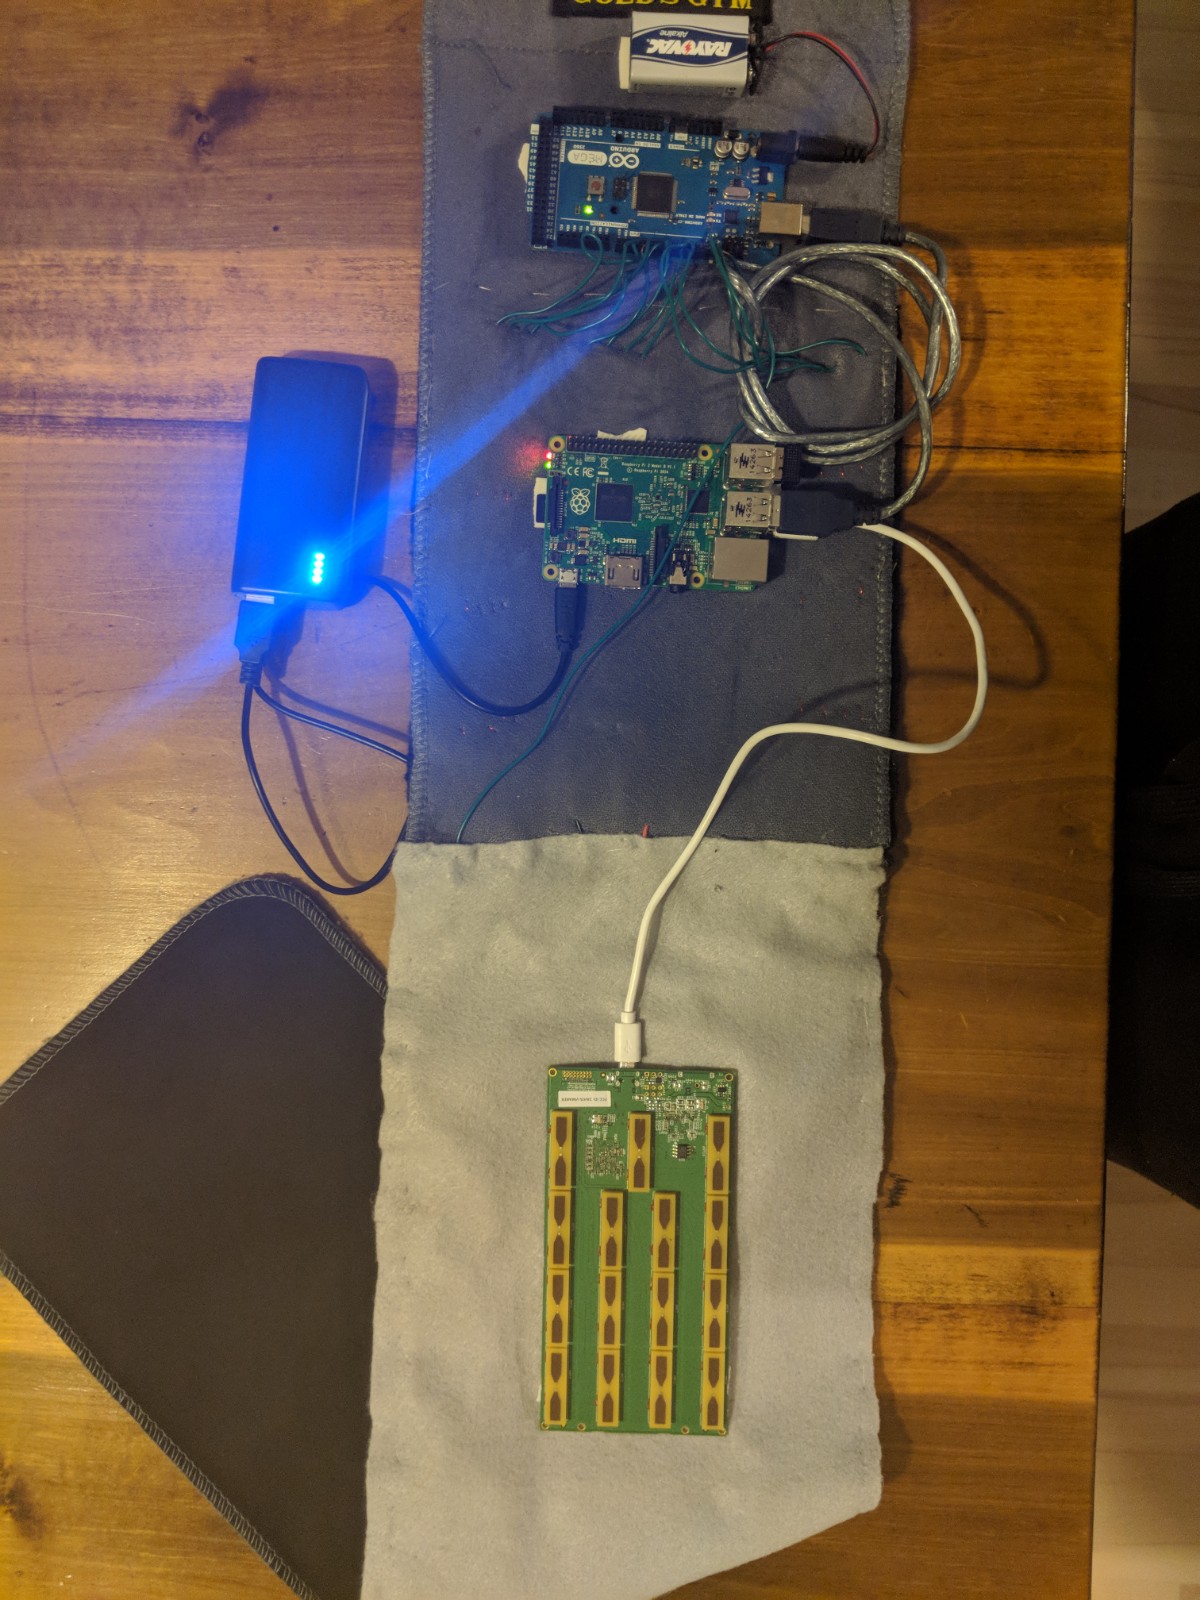
The Raspberry Pi can then be connected to the Arduino with a USB-A to USB-B cable and the Walabot Sensor with the provided micro-USB Cable. The pi and Walabot were secured with foam board tape, and the pi later had electrical tape added to the sides and over connections to better secure them.
Batteries can then be connected to power the arduino and pi. I used a portable phone charger to power the pi and 9 volt for the arduino. The portable charger may be able to power the arduino alone through the USB cable, but I felt it was weak. The 9 volt is connected with foam board tape, and the portable charger is intended to be put in the wearer's pocket, though it can be attached to the belt if desired.
Here's an example of the belt being worn
The code is still developing, there's a decent amount of debugging that stills need to be done, but I wanted to submit what I had now to showcase the capabilities of Walabot. I thought it would be a shame if such a potential application that can do a decent amount of good for others was not demonstrated.
The software has three components, the Android Application, Raspberry Pi, and Arduino. The android application is very simple at the moment, it currently is only intended to send the command to the raspberry pi (via bluetooth) to begin tracking objects with Walabot and start vibration motors on the belt. In the future it could provide directions or other information on obstacles in the environment in an auditory form to supplemental haptic feedback provided by the belt. Once the app tells the pi to begin, the pi ceases bluetooth communication with the app, and creates a serial connection with the arduino. The python software gets targets from the Walabot, and determines the motor on the belt their location correlates to. A value between 0 and 255 is assigned to each grid space for the vibration motors, the higher the value the closer the object and higher intensity of vibration of that motor. These values are concatenated to a string and sent to the arduino. The arduino then writes an analog value to each motor in accordance with the determined values by the pi. The arduino code and app apk can just be downloaded from the code section and loaded onto the appropriate device, while the python software will take some setup.
If you already have a basic pi setup you can continue, otherwise follow the instructions here to setup the pi os: https://www.raspberrypi.org/help/noobs-setup/2/
You can then go ahead and upload the python code to the pi. Ensure you have installed all necessary python packages. Some values in the python code will need to be input by you. These include the arduino serial port, bluetooth settings, desired range settings for the Walabot, and according grid divisions based upon Walabot parameters/orientation on the belt.
The python code will then need to be setup to autorun after the pi is powered on. This link does a good job of explaining how to do that : https://www.raspberrypi-spy.co.uk/2015/02/how-to-autorun-a-python-script-on-raspberry-pi-boot/
Getting everything setup will take some troubleshooting on your part as I am still working to iron out some kinks and debug as they arise.
Demo VideoHere's a quick video where I give another explanation of the belt and how show how it should function. Sorry about the vertical video, I forgot to rotate before I uploaded it to YouTube and did not see the rotate video option in the video editor options once uploaded. Hopefully the video helps you to better understand what the belt is intended to do and how it could help the visually impaired.


_copy_P5AWOdT4dX.png?auto=compress%2Cformat&w=48&h=48&fit=fill&bg=ffffff)

_wzec989qrF.jpg?auto=compress%2Cformat&w=48&h=48&fit=fill&bg=ffffff)


Comments
Please log in or sign up to comment.