So you've got yourself a brand new C.H.I.P. computer and you want to take over the world? Well, every evil genius has to start somewhere and, for you, that somewhere is making an LED blink using the GPIO interface on your fancy new SBC.
Examining the CHIP GPIO docs we learn that the 8 digital GPIO (General Purpose Input/Output) pins can be manipulated using a Linux sysfs interface, meaning that to read from a particular pin, you read from a special file, and to write to it instead, you write to a special file. The hard part is knowing which files to work with. Luckily for you, I've written a simple set of BASH functions that translate from the easily-forgettable file names associated with each pin into something more memorable.
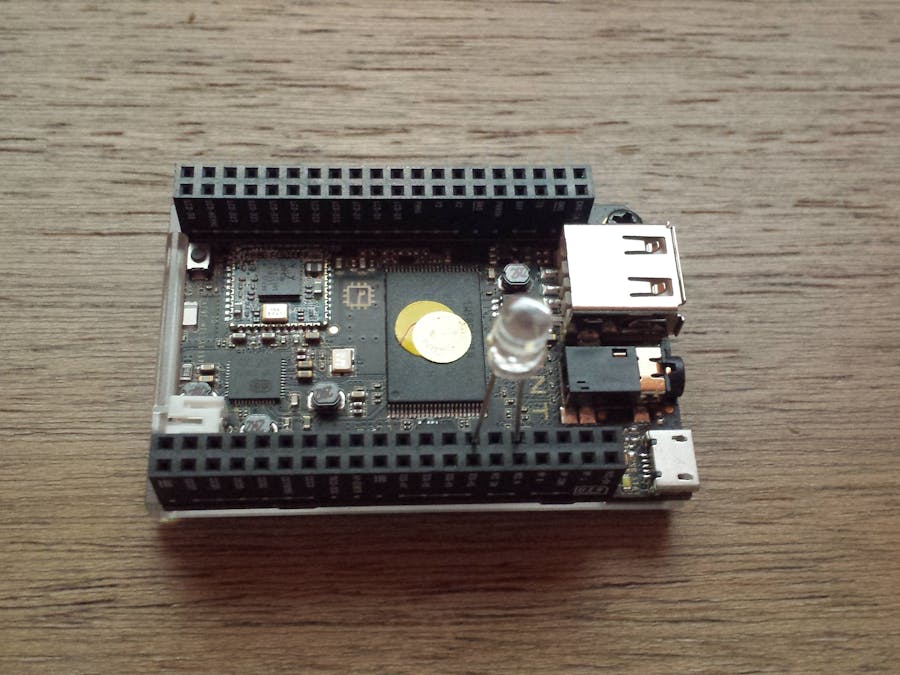
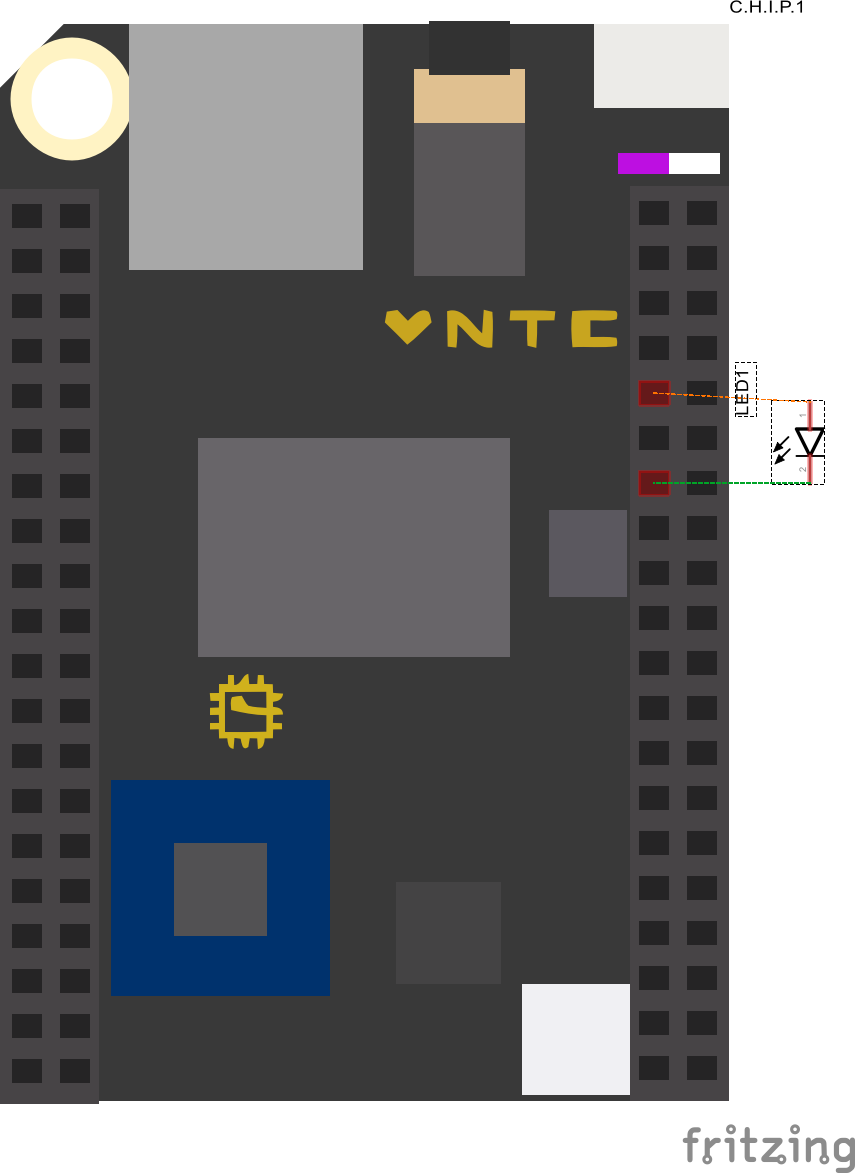
Let's start by hooking your LED up to your CHIP. You're probably tempted to power the LED from one of your GPIO pins, but upon reading the CHIP forums you'll learn that these pins don't provide a heck of a lot of power, resulting in a dim LED. Not to worry, if you'll turn your LED around and place the anode (the longer pin, which expects positive voltage) into the 3.3V pin on right side of the board (when viewed with the USB to the top) and the cathode (the shorter lead, which expects negative power) into the pin 2 below it, cleverly labeled "XIO-P0". Should you use a resister? Probably, but we're dealing with so little power here and only working with one, easily-replaceable LED, let's not worry about it.
The hardware's hooked up, so what about the software? Let's start by cloning the BASH functions and sourcing them so that they're usable.
$ git clone git@gist.github.com:b2fcec3817ea5d85288f.git chip-bash
$ source chip-bash/gpio.sh
This will add a few functions to our environment, let's use one of them to enable GPIO pin 0. Notice that you will be asked for your password, because we're having to use the sudo command inside these function to perform the actions by an administrative user. If you're running the default software that came on your chip, chances are the password is 'chip'.
$ gpio_enable 0
[sudo] password for chip:
Ok, behind the scenes this turned on pin 0, so let's set that pin to be read for output.
$ gpio_mode 0 out
Now, it's possible that your LED just lit up, but it might not have. In order to turn it on, we want to write "0" to pin "0". We'll do that with the gpio_write function.
$ gpio_write 0 0
This may be counter-intuitive, but because we're powering the LED from the 3.3V and using the GPIO pin as ground, the LED will light up when our GPIO pin in off and turn off when the pin is on. I'll give you a minute to process that one.
Ok, so now we can turn the pin on or off at will, but I promised blinking! To do that, we'll write a little loop in BASH to alternate between 0 and 1. We'll wait a second on each state using the sleep command. A loop in BASH looks like the following.
$ for ((i=0; i<100; i++)) ; do gpio_write 0 $((i%2)) ; sleep 1 ; done
If you're done any BASH programming, or written code in any C-like programming language, that syntax will probably look familiar. We're looping 100 times for 0 to 99. At each value we're writing i%2 to our pin, which simply means we're alternating between 0 and 1. After setting the pin to a new value, we're sleeping for 1 second. Voila! Your LED should now blink for 100 seconds. Your enemies ought to be shuddering in fear.
Like any good evil genius, you should really clean up after your work. Let's disable pin 0 now that we're done with it. That can be achieved with the following command.
$ gpio_disable 0
There you have it. You've taken your first step to work domination by making a simple LED blink using your new CHIP computer. Please remember me when you've successfully taken over the world.
There you have it. You've taken your first step to world domination by making a simple LED blink using your new CHIP computer. Please remember me, your faithful servant, once you've taken your rightful place as overlord.


Comments
Please log in or sign up to comment.