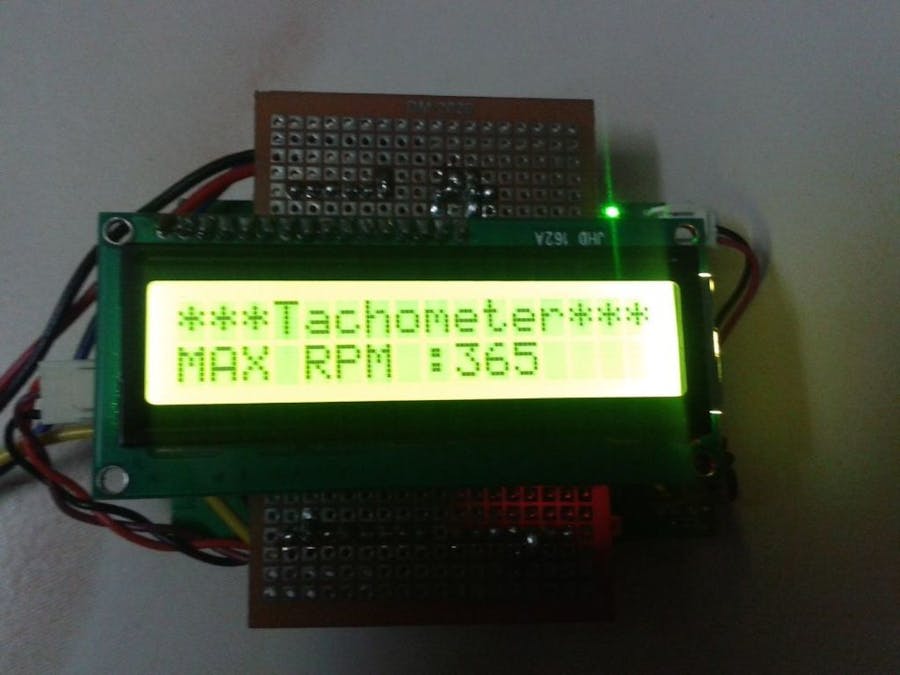
We use tachometer in our industry. So Like to make some tachometer to check it in home with available resource.
Step 1: Materails Required1) Linkit one Board with Battery.
2) Infra red LED and Photo Diode - 1no.
3) 16X2 Serial LCD display.
4) 270 ohms Resister - 1No.
5) 33K Resister - 1No.
6) 1K Trim pot.
7) PCB puch button 1 No
8) Double Side Tape.
9) Wires, Soldering Iron lead and Paste
10) old Sketch pen.
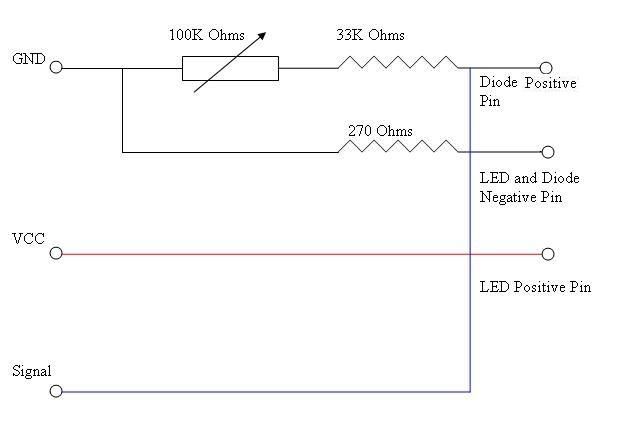
Step 2: Sensor Circuit1) see sensor Circuit Diagram in diagram tag.
2) Cut a small piece of PCB and Soldered the Components as Per diagram.
3) Cut the Sketch Pen body for two smalls tubes.
4) use it to separate the IR LED and Photo Diode.
5) Fix it using Hot Glue Gun.
6) Another Small Circuit For Digital Input using a Push Button and 220 Ohms Resister.
7) Solder a Female PCB connector in the Sensor board.
8) Solder a Male PCB connector in the Switch Board.
9) Solder four wires VCC, GND, Sensor Signal, Push Button Wire in the Sensor PCB.
10) Join the Male connector to Sensor Board Female Connector.
Step 3: Make a Shield1) Plug in male connector to the Link it one (to required pins only, For my future use i solder all pins).
2) Join Plain PCB Over it.
3) Solder the pins.
4) Solder the sensor pin wires as follows
a ) Black - GND
b) Red - VCC 5V
c) Blue - A0 Analog input
d) Yellow - 12 Digital Input
5) Solder the Serial LCD Display
a) Black - GND
b) Brown - VCC 5V
c) Red - 1 Tx of the Serial1.
6) Connect the Battery.
All done in circuit part
Step 4: Make it PortableUsing double Side Sticker Paste the Battery below the Linkit one board. Paste LCD above the PCB over Linkit one Board. Now u have indicator and a sensor probe.
Step 5: Programming1) Upload the above program to Link it one.
2) Check the sensor reading when different type of object cross.
3) Use 10K trim pot to change the sensitivity.
4) Test with reflecting sticker for tachometer. I check with double side tape with out remove the top paper.
5) It shows more reflection then all other.
6) With that reading Change the if condition value in the Program if required.
7) I use Serial LCd display brought from Robokits india online website. They supply documents for code.
Download Code from coding tab
Step 6: TestingTesting video Shows how it shows the reading. Switch on the Link it one board using the battery switch. Press the Push button over the sensor board. Move the Sticker before the Sensor. It shows current RPM. For every 5 crossing it calculate the RPM and shows. When the push button is release it shows the Maximum RPM.
Step 7: Real Time CheckI check it with my Ceiling fan. Switch off the fan. Paste a piece of double side tape over on the Fan (in industry u use reflection sticker for tachometer). After turn on the fan. Hold the sensor board straight to that sticker and Push the button. U able to see the RPM. After release the push button we able to see Maximum RPM of fan. Use it with any rotating motors.


Comments
Please log in or sign up to comment.