


Hardware components | ||||||
_ztBMuBhMHo.jpg?auto=compress%2Cformat&w=48&h=48&fit=fill&bg=ffffff) |
| × | 1 | |||
 |
| × | 1 | |||
 |
| × | 2 | |||
 |
| × | 1 | |||
 |
| × | 5 | |||
 |
| × | 1 | |||
Hand tools and fabrication machines | ||||||
 |
| |||||
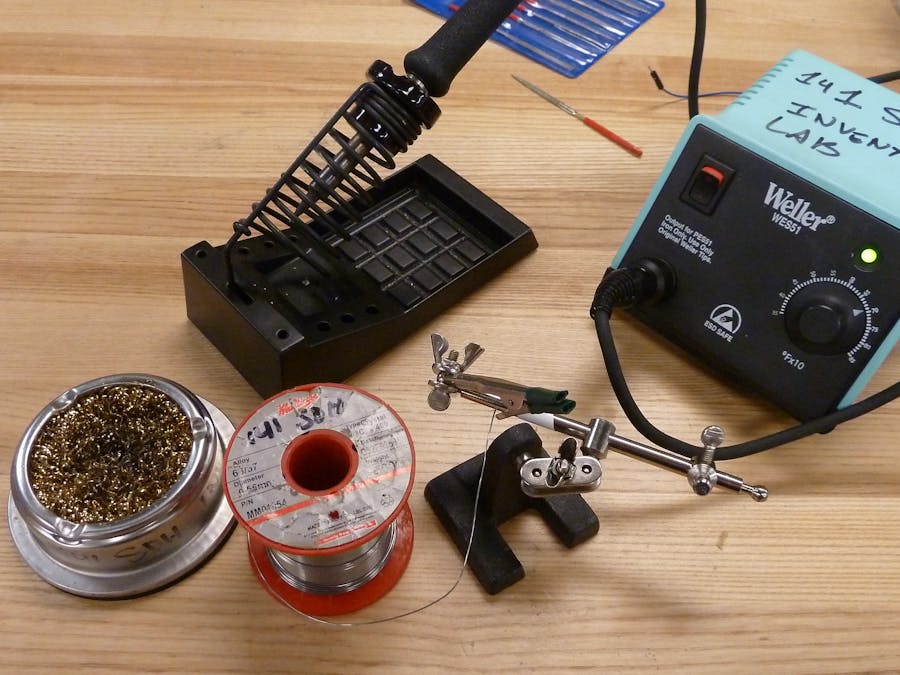
Intro to Soldering
This week's assignment was to create solder 4 short pieces of wire. Adafruit's soldering tutorial has detailed instructions and was very helpful. Instead of wasting new wire, I used pieces of scrap wire I had laying around, which happened to be stranded wire.
First I used a wire strippers to strip the ends of the wires. The wire stripper has different holes for several common wire thickness, my wire was 28 gauge. Then I twisted the ends together and used a soldering iron to melt the solder onto the connected wire.
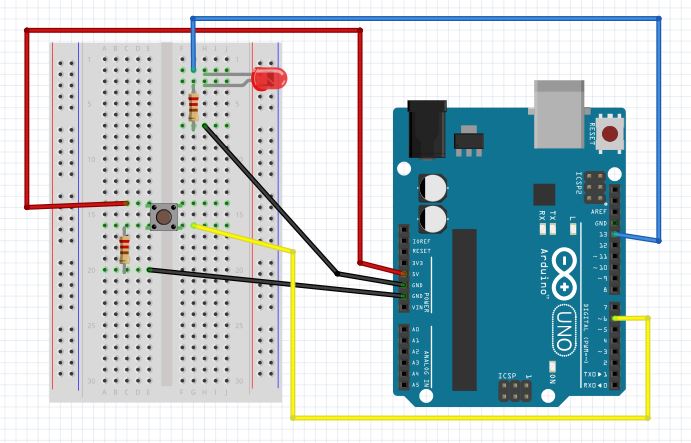
Debouncing
I connected an Arduino Uno to a pushbutton switch to change the state of an LED during the button transition. The LED is connected to pin 13, which also controls the on-board LED. The switch is connected to pin 6.
Due to physical and mechanical issues, a single press of the button may be read as multiple transitions. The Arduino debouncing tutorial explains it well. To solve this issue, we can use the delay() function to debounce the button. However, while the delay() function is being run, the Arduino won't read any button transitions.
Another method to debounce is to use the millis() function to measure the amount of time between button transitions.
I also did a video of debouncing using millis() in dark so the change in LED state is more visible.
After debouncing using millis(), the LED is much more responsive to button transitions. If the LED is currently on, pushing the button will turn it off. Similarly, if the LED is currently off, pushing the button will turn it on.


_3u05Tpwasz.png?auto=compress%2Cformat&w=40&h=40&fit=fillmax&bg=fff&dpr=2)
Comments
Please log in or sign up to comment.