


Hardware components | ||||||
| × | 1 | ||||
| × | 1 | ||||
 |
| × | 1 | |||
 |
| × | 1 | |||
_wzec989qrF.jpg?auto=compress%2Cformat&w=48&h=48&fit=fill&bg=ffffff) |
| × | 1 | |||
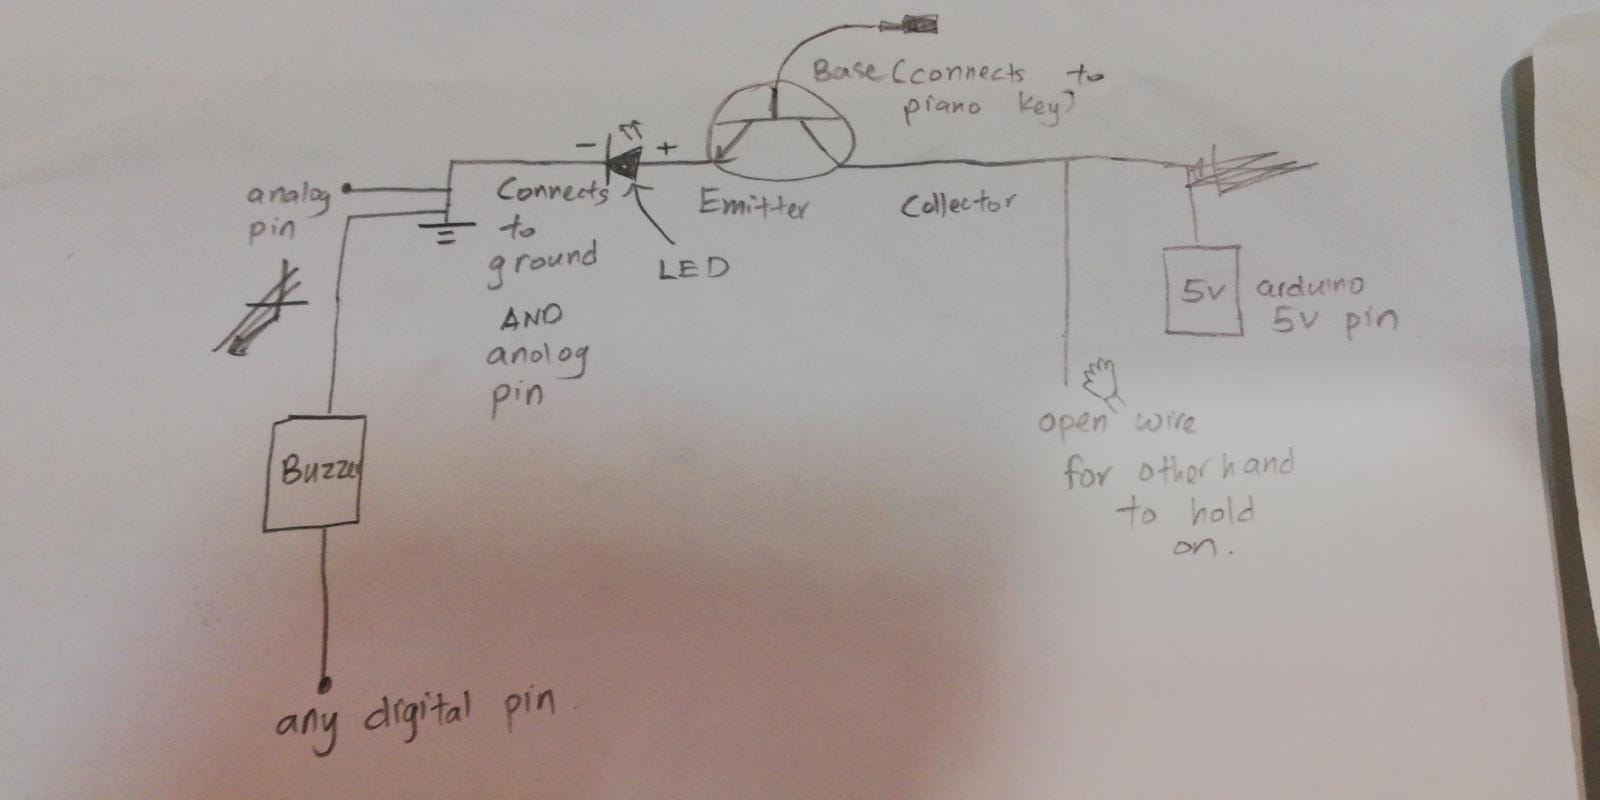
The concept of the touch sensing piano is simple. Voltage is fed through the collector of the NPN transistor. An open wire is also added at the collector for the hand the hold. As for the base of the transistor, it is connected to the paper piano. The emitter is connected to the LED which leads to ground, and an analog pin reads the voltage at the emitter as well. If a person touches the hand wire along with the piano key, the person connects the base and the collector together, hence providing an alternate path for the current to flow from the collector to the emitter, basically the hands are a form of a switch to turn on/off the signs. The analog pin detects the change in voltage, which then provides the audio output based on the pin of the piano key.
VIDEO OF PIANO:
https://drive.google.com/file/d/1_wpoYDR0XaQcjk
for more info on transistors and their working principles - https://learn.sparkfun.com/tutorials/transistors/all
https://www.youtube.com/watch?v=sRVvUkK0U80
-things to note of:
the keys tend to conduct electricity on the same paper, hence, it is advisable to cut and stick key keys on a plastic sheet.
circuit diagram ( for ONE PIANO KEY).
As for the buzzer, it is connected to a digital pin for its live wire so that it will only output audio when there is a change in voltage which is picked up by the analog pin, and ground obviously to ground.
It is highly recommended to create a three rails to simplify the circuit for all keys. These rails consists of a live rail for the 5v from the arduino, a ground rail as well as a rail for the hand wire.


Comments
Please log in or sign up to comment.